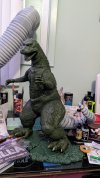
Godzilla & Gundam! (complete)

Marktastrophe

Well-Known Member
Joined
Nov 19, 2021
Messages
371
Complete album is in post #43

PXL_20220125_203521334.jpg
Let me know if there is any interest in the unboxing, or the process of the Godzilla kit.
The RX-79[G] is the new reengineered kit. SO SO SO much nicer than the original ~2001 mold.

PXL_20220125_203446868.jpg
 
Last edited:
Pretty interesting, I will definitely checkin in from time to time. Is that Godzilla vinyl or an ordinary plastic kit?
 
It's an ordinary plastic kit, made in China, and it is rough. (By Bandai, Tamiya, Hasegawa, etc standards). Likely because they didn't do anything to the decades old mold ¯\_( ͡° ͜ʖ ͡°)_/¯

I've definitely run into an early road block, lol. I'm struggling to visualize colors for this, and reference material is largely black and white, lol.
 
Maybe check some "fanart" or other illustrations.
Thanks. I've found some older promo stuff, and a couple of photos of the few hundred dollar Showa Godzilla Anniversary figure from Bandai. Not sure how closely I want to stick to them.
 
The seams on Godzilla are pretty gross. I have very little experience fixing seams, so this will be good Tamiya basic putty practice.
I've also been thinking about LEDs, I don't want to overdo it with those though. Thinking just red for the Kings eyes atm.

Here goes a stick in the eye.
 
I'm working on initial build still, between other life tasks, lol.
This Godzilla kit came out of the box mostly not on Sprues, and all scraped up :/
And the seam lines aren't bad, but fitment is bad. So many gaps.
Finally getting some use out of this Tamiya basic putty that's been sitting on my workbench for a few years.

@CrazyCritter I see you are from Michigan... you wouldn't happen to shop at The Model Cave, would you?
 
The seams on Godzilla are pretty gross. I have very little experience fixing seams, so this will be good Tamiya basic putty practice...
Another way to deal with seams is to use the extrusion or "squeeze" technique. This is useful on parts like Godzilla's legs, left and right fuselage halves, pieces where you've got a long seam.

You hold the parts together and flow liquid styrene cement into the seam, letting capillary action draw the cement in. Then apply pressure along the seam, till a bead of melted plastic is extruded along the seam. When the glue and plastic have cured, you can scrape that bead away, leaving a minimal seam that requires very little cleanup.

I like that method, where I can use it, because the join is homogeneous, unlike joins where I have to apply putty or other fillers.

A similar method is to use stretched sprue to fill any seams. I'll use the kit sprue, so again, it's the same material as the parts. Stretch some sprue, then lay the pieces into the seam, and run liquid styrene cement along the seam. Again, when the glue has cured, it's a solid join of kit plastic.

That's not to say that putty doesn't have its place, either. But it's good to have multiple arrows in your quiver.

Hope that helps!

Best regards,
Brad
Those are all great tips! I've used the glue method before... but the only plastic cement I have on hand evaporates too quickly for this technique this time :/
Do you have any liquid styrene cement brand recommendations?
I'm using Plastruct Plastic Weld... The bottle has been opened and used seldomly since spring 2016 though.
 
It looks like my kit has problems in a lot of the same area's as Critter's... but turned up to eleven in a few spots.
PXL_20220207_150858732.jpg
I'll probably end up using up the end of an old roll of Kneadatite blue/yellow I have laying around to fill these really large gaps, and I'll attempt to match texture to the kit.
 

Attachments

  • PXL_20220207_150842225.jpg
    PXL_20220207_150842225.jpg
    272.7 KB · Views: 5
First thing to get out of the way... yes my workbench needs a cleaning... but this kit is large enough to just put my bench in that state even after I clear everything else off of it.
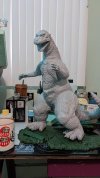
After priming, my seams are not anything to write home about, but they are much better than the gaps and everything from the initial fit.

I also found a seam/gap I completely missed after I primed it... but if you can't tell where it is, then why should I!? lol.

PXL_20220217_164124790.jpg

I'm a bit at a loss on how I want to paint this, but we're going to go for it!
Probably do some pre-shading in black, base in a green of some wort, and then see about highlights and washes going off how it looks once based.

I'm definitely open to suggestions or pointers on painting this Kaiju.
 
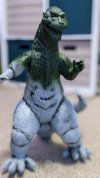
It sure seems like I've done a lot to get this to look mostly like it did on the box :D

PXL_20220219_015346614.PORTRAIT.jpg
Took a break to let paint cure all the way. Will paint the tail when I can handle the top half without worry.PXL_20220219_022833672.jpg
And we'll call that a base coat after the tail is covered. Then it'll be on to basing the spine ridge, and deciding what kind of highlights I want on those pieces.
 
screw that .
Any time the temp here drops below 50 , I consider moving closer to the equator :D
 

Latest posts

Back
Top