MystRacing
Active Member
- Joined
- Nov 7, 2023
- Messages
- 62
Roden 1914 Pattern RR Armored Car
After deciding I wanted to get in on the Mark 1 group build, I went to researching WW1 tanks and other armor etc. Being as the group build is planned to begin in January, I painted up some crew figures, and then decided to do a quick build to get back into the plastic model world. When I was looking at the various tanks and available kits I came across the Rolls Royce armored car and decided I'd like to build one. I watched a video comparing the Takom and Roden version and opted for the Roden because it had the engine and interior.
When I started this, I wasn't planning on posting anything about it, but after looking around there isn't a lot of information, I could find beyond a few reviews that made some generalizations and didn't actually build it. So, at any rate here we go.
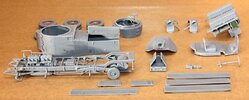
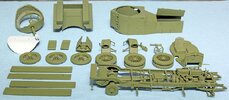
For starters this is the kit I have, Roden makes a couple versions with the most obvious difference being the spoked wheels on the 1914 pattern vs solid wheels on the 1920 pattern. They also have different fenders, lights, and turret for the other main differences. The 1914 Pattern kit is actually the 1920 Pattern kit with one extra sprue containing the parts that are different from the 1920 Pattern, and of course the spoked wheels. The 1920 pattern tires and wheels are not included so you can't really build the 1920 Pattern with this kit unless you make or source wheels elsewhere.
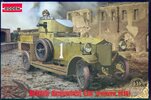
All of the reviews I saw both videos and pictures show the plastic as molded in a dark green. To my surprise when I opened the box everything in my kit was molded in medium gray plastic with the exception of one sprue.
SO, being as I wasn't planning on doing this thread I sat down and went to work. I started on the engine as that is the first step, and when gluing the 4th or 5th piece, I reached across the bench and managed to knock my bottle of Tamiya extra thin cement over and soaked the instruction book. I said something like "Gosh that's not great", Then cleaned up the bench and set the instructions outside to dry. Almost threw them away, fortunately I gathered myself back up before that.
After a few deep breaths I opened Fusion 360 and drew a glue bottle holder and printed it on my 3D printer. Picture below.
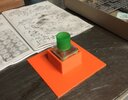
I have accidentally tested the glue holder already and it works great.
So, I finished assembling the engine, there are about 42 parts for the engine, very nicely detailed IMO.
The next part in the instruction manual was the wheels. I was nervous about building these as I have had some major issues with PE in the part. The spokes are made from PE as you would expect. After removing from the tree, all 12 of the PE sections with gaps have to be bent to shape.
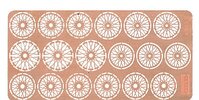
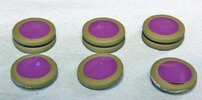
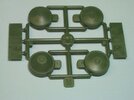
Roden sent along these 4 round what I guess I'll refer to as forms. You take the PE spoke section that corresponds with each plastic piece and basically just mash the brass down on the plastic and it creates the needed shape. If you press rite on the outer ring it also bends the outer section so it will lay flat in the wheel.
A couple of these don't seem to put much of a bend in the brass but it turns out just right. You also have to be careful which brass pieces you do on which forms. The instructions tell you, just a warning though, the number on the brass tree doesn't match the number molded on the form.
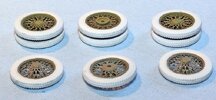
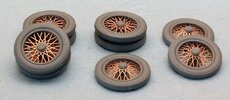
Much to my surprise these went together really easy. You don't even need any CA if you don't want to use it. The inside of the brass pieces are captured on both sides by the plastic inner hub, and the outer portion is captured between the wheel and a plastic inner ring, or rings for the duels. I'm extremely impressed with Roden's design on the wheels. There are a lot of parts a total of 60 for the 6 wheel assemblies.
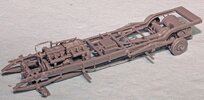
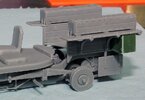
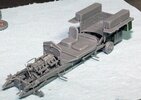
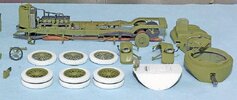
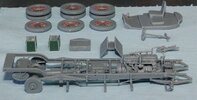
Next I went to work on the chassis. The rails are separate and there are a lot of little detail pieces for the brakes etc. I have somewhere around 6 hours of work in this so far not counting the 2 hours I spent on the wheels. I have had two issues with fitment. The drive shaft from the engine to the transmission, and the one from the rear axle housing to the transmission were too long. Both had to be trimmed about 1mm to make things fit. That could be an issue with my building of course but I don't think it was. Other than that everything fit great. Here's where I am rite now on the build.
Generally, here are some thoughts I have on this kit.
First the plastic seems about as soft as any plastic kit I've ever built. Doesn't seem to be a problem but even assembled it's a little surprising how flexible it is. It does not seem to be causing any problems. On some of the really thin parts it seems to help keep them from snapping in two.
Second thought is there are a lot of parts. The chassis with engine is probably around 100 parts. If that is good or bad is certainly subjective. The detail is great, but if the hood is installed over the engine and the doors behind the turret are closed it's a waste of time. Oddly after all the effort making a nicely detailed engine the hood isn't designed to be mounted open. It'll have to be custom modified to be open. Just a side note; I watched a youtube video of building the Meng version of this vehicle and the Meng chassis only has about 20 parts with no engine.
So far I'm happy with this kit. I'm trying to figure out when to paint what. I think I want to do It basically in 3 separate parts. The chassis, the body, and the wheels. Kits with interiors and engines are always a challenge to paint.
After deciding I wanted to get in on the Mark 1 group build, I went to researching WW1 tanks and other armor etc. Being as the group build is planned to begin in January, I painted up some crew figures, and then decided to do a quick build to get back into the plastic model world. When I was looking at the various tanks and available kits I came across the Rolls Royce armored car and decided I'd like to build one. I watched a video comparing the Takom and Roden version and opted for the Roden because it had the engine and interior.
When I started this, I wasn't planning on posting anything about it, but after looking around there isn't a lot of information, I could find beyond a few reviews that made some generalizations and didn't actually build it. So, at any rate here we go.
For starters this is the kit I have, Roden makes a couple versions with the most obvious difference being the spoked wheels on the 1914 pattern vs solid wheels on the 1920 pattern. They also have different fenders, lights, and turret for the other main differences. The 1914 Pattern kit is actually the 1920 Pattern kit with one extra sprue containing the parts that are different from the 1920 Pattern, and of course the spoked wheels. The 1920 pattern tires and wheels are not included so you can't really build the 1920 Pattern with this kit unless you make or source wheels elsewhere.

All of the reviews I saw both videos and pictures show the plastic as molded in a dark green. To my surprise when I opened the box everything in my kit was molded in medium gray plastic with the exception of one sprue.
SO, being as I wasn't planning on doing this thread I sat down and went to work. I started on the engine as that is the first step, and when gluing the 4th or 5th piece, I reached across the bench and managed to knock my bottle of Tamiya extra thin cement over and soaked the instruction book. I said something like "Gosh that's not great", Then cleaned up the bench and set the instructions outside to dry. Almost threw them away, fortunately I gathered myself back up before that.
After a few deep breaths I opened Fusion 360 and drew a glue bottle holder and printed it on my 3D printer. Picture below.

I have accidentally tested the glue holder already and it works great.
So, I finished assembling the engine, there are about 42 parts for the engine, very nicely detailed IMO.
The next part in the instruction manual was the wheels. I was nervous about building these as I have had some major issues with PE in the part. The spokes are made from PE as you would expect. After removing from the tree, all 12 of the PE sections with gaps have to be bent to shape.

Roden sent along these 4 round what I guess I'll refer to as forms. You take the PE spoke section that corresponds with each plastic piece and basically just mash the brass down on the plastic and it creates the needed shape. If you press rite on the outer ring it also bends the outer section so it will lay flat in the wheel.
A couple of these don't seem to put much of a bend in the brass but it turns out just right. You also have to be careful which brass pieces you do on which forms. The instructions tell you, just a warning though, the number on the brass tree doesn't match the number molded on the form.

Much to my surprise these went together really easy. You don't even need any CA if you don't want to use it. The inside of the brass pieces are captured on both sides by the plastic inner hub, and the outer portion is captured between the wheel and a plastic inner ring, or rings for the duels. I'm extremely impressed with Roden's design on the wheels. There are a lot of parts a total of 60 for the 6 wheel assemblies.

Next I went to work on the chassis. The rails are separate and there are a lot of little detail pieces for the brakes etc. I have somewhere around 6 hours of work in this so far not counting the 2 hours I spent on the wheels. I have had two issues with fitment. The drive shaft from the engine to the transmission, and the one from the rear axle housing to the transmission were too long. Both had to be trimmed about 1mm to make things fit. That could be an issue with my building of course but I don't think it was. Other than that everything fit great. Here's where I am rite now on the build.

Generally, here are some thoughts I have on this kit.
First the plastic seems about as soft as any plastic kit I've ever built. Doesn't seem to be a problem but even assembled it's a little surprising how flexible it is. It does not seem to be causing any problems. On some of the really thin parts it seems to help keep them from snapping in two.
Second thought is there are a lot of parts. The chassis with engine is probably around 100 parts. If that is good or bad is certainly subjective. The detail is great, but if the hood is installed over the engine and the doors behind the turret are closed it's a waste of time. Oddly after all the effort making a nicely detailed engine the hood isn't designed to be mounted open. It'll have to be custom modified to be open. Just a side note; I watched a youtube video of building the Meng version of this vehicle and the Meng chassis only has about 20 parts with no engine.
So far I'm happy with this kit. I'm trying to figure out when to paint what. I think I want to do It basically in 3 separate parts. The chassis, the body, and the wheels. Kits with interiors and engines are always a challenge to paint.
Last edited:

