You are using an out of date browser. It may not display this or other websites correctly.
You should upgrade or use an alternative browser.
You should upgrade or use an alternative browser.
Old male armour
- Thread starter Pantherman
- Start date
GaryG64
Well-Known Member
- Joined
- Sep 8, 2022
- Messages
- 2,278
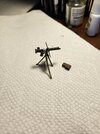
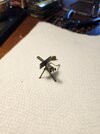
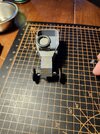
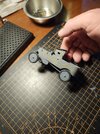
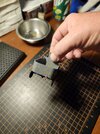
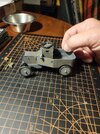
Looks fantastic, Mike!Finished the Vickers that goes in the back of the armored car. It was a bit tedious but went together good. I will need to trim the ammo belt when I install the gun.
View attachment 119322
View attachment 119323
Great detail!
- Joined
- Mar 6, 2023
- Messages
- 1,706
I found that pink insulation board works best for carving and shaping. Just a thought.Just trying some ideas.
This foam is too slick for anything to adhear to it. So, I think I will use the styro side and add shell craters. I've already did a test and it looks just OK. I'll have to keep playing around with the crater idea, if I decide to use them.
So many possibilities with the tank.
View attachment 119236
View attachment 119237
View attachment 119238
View attachment 119239
View attachment 119240
View attachment 119241
MystRacing
Active Member
- Joined
- Nov 7, 2023
- Messages
- 56
Agree with Tim, though pink or blue depending on where you live.
You can also use plaster cloth over about anything. The plaster cloth is just gauze with plaster on it. You get it wet and then spread it over the surface like paper mache. I usually do 2 layers, does not need to dry in between layers. Once that's down any type of paints or anything else can pretty much be used on top. It's a great base for any landscape surfacing. Do a search for plaster cloth it's a typical craft store item.
You can also use plaster cloth over about anything. The plaster cloth is just gauze with plaster on it. You get it wet and then spread it over the surface like paper mache. I usually do 2 layers, does not need to dry in between layers. Once that's down any type of paints or anything else can pretty much be used on top. It's a great base for any landscape surfacing. Do a search for plaster cloth it's a typical craft store item.
I like that. You do good work. On a lighter side? Who's that idiot dumbass watching the guys go up and over into enemy fire sitting there with his foot on a box eating a damn hot dog?This really puts how narrow some of the trench might have been in perspective. As soon as I get the benches and possibly some make-shift boxes it will really show how narrow they were.
I still have the dilemma of making the diorama with the materials I have.
View attachment 118980
View attachment 118981
View attachment 118982
View attachment 118983
GaryG64
Well-Known Member
- Joined
- Sep 8, 2022
- Messages
- 2,278
That's a fantastic idea, thanks!Agree with Tim, though pink or blue depending on where you live.
You can also use plaster cloth over about anything. The plaster cloth is just gauze with plaster on it. You get it wet and then spread it over the surface like paper mache. I usually do 2 layers, does not need to dry in between layers. Once that's down any type of paints or anything else can pretty much be used on top. It's a great base for any landscape surfacing. Do a search for plaster cloth it's a typical craft store item.
GaryG64
Well-Known Member
- Joined
- Sep 8, 2022
- Messages
- 2,278
Thanks.I like that. You do good work. On a lighter side? Who's that idiot dumbass watching the guys go up and over into enemy fire sitting there with his foot on a box eating a damn hot dog?
Yeah, that guy thinks he's at the ball game with his hotdog.
- Joined
- Mar 6, 2023
- Messages
- 1,706
Nice. Great job MikePaint is finished. Just need a wash and some light weathering followed by mounting the Vickers and it will be done. Still not sure why the Dark Earth paint shows with so much yellow in the pictures.
View attachment 120331
View attachment 120332
View attachment 120333
View attachment 120334
GaryG64
Well-Known Member
- Joined
- Sep 8, 2022
- Messages
- 2,278
Looks really nice!Paint is finished. Just need a wash and some light weathering followed by mounting the Vickers and it will be done. Still not sure why the Dark Earth paint shows with so much yellow in the pictures.
View attachment 120331
View attachment 120332
View attachment 120333
View attachment 120334
MystRacing
Active Member
- Joined
- Nov 7, 2023
- Messages
- 56
Mike,
What paint did you use for the metallic looking portion of the machine gun and the rusty looking piece beneath it? I think you did a particularly nice job on the machine gun.
As far as the yellow appearance of the paint on the Model T. It's probably a combination of the room lighting and the algorithm used to process the digital image. Most digital cameras and in particular cell phone cameras are programmed to oversaturate colors and make everything brighter and more contrasted than it really is. The manufacturers have been doing this since they started selling digital cameras because people think it looks better on a typical snapshot type photo. Not true on an indoor macro photo typically.
If you don't have natural or the harsh white LED or fluorescent light, there is always a yellowish cast in a room. When the camera boosts the saturation it really brings out the yellows. Professional photographers used to take pictures of a white card (probably still do), in a high end digital camera you can use that picture to calibrate the camera by telling the camera, that is what white looks like in this particular setting. The camera would then adjust all of the colors based on the adjustment needed to make the white card actually white instead of yellowish or reddish or whatever the sensor picked up. Then the photo looks much more like the real scene. Needless 2 cents worth but now you know.
Last edited:
Bear43
Well-Known Member
- Joined
- May 19, 2023
- Messages
- 632
The rear of the gun was painted with Vallejo Metallic Gunmetal and the part below it, which is the elevation and traversing adjuster, was painted with Vallejo English Uniform. The gunmetal was more silver in appearance than I expected but I thought it worked okay.
Thanks for that info on camera colors and lighting. That makes a lot of sense. I am betting I can adjust the color saturation settings. I'll play around now that I have some idea as to what is going on.
Thanks for that info on camera colors and lighting. That makes a lot of sense. I am betting I can adjust the color saturation settings. I'll play around now that I have some idea as to what is going on.
- Joined
- Mar 6, 2023
- Messages
- 1,706
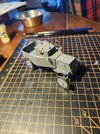
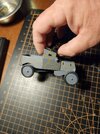
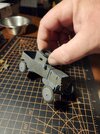
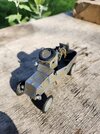
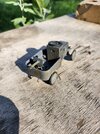
Looks like it would fit right in next to the Mk I. Nice workThe armored car is finished. It looks much better taking the picture in natural light. Just have to finish painting my Mk I and I'll be done with my portion of this thread...lol
View attachment 120347
View attachment 120349
@Bear43 I would love to have painted those especially the little gun.Looks like it would fit right in next to the Mk I. Nice work
durangod
Well-Known Member
- Joined
- Aug 27, 2024
- Messages
- 454
OUCH! Casualty of war. LOL
I was drilling the gun barrels out with a .30mm bit. It slipped off. In looking at the bit, it appears it went in the full length.
View attachment 113559
Ouch, well i guess you could add some real blood to your diorama or that which you are building lol. Sucks when stuff like that happens.

