Zoukei-mura 1/32 Fw 190 A-4

Rob

Well-Known Member
Joined
Apr 29, 2024
Messages
216
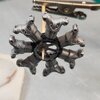
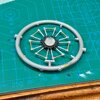
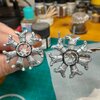
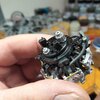
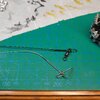
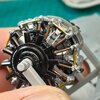
I think this one's going to be fun. I love building and by the time I get to weathering, I'm burnt out. I want to start something new and start building. This is the BMW 801 engine starting with the front and rear cylinder blocks. I built the Border models FW but this one I think is a couple steps up in quality. On this model, I think it will turn out much nicer if I paint stuff and detail it up before I glue it on. And yes I know three quarters of my work will get hidden but I just like building a whole lot better than all the nitpicky fiddly stuff you got to do at the very end of a build. I'm used to building radio control airplane kits back in the'90s. They didn't have no ready built planes back then. You had to build it yourself and then you learned a whole lot. Anyways. Primed in Tamia surface primer Gray and sprayed with flat aluminum. I brushed on lp3 thinned with Mr color leveling thinner 400 which, by the way, is absolutely fantastic stuff. I think I will paint the baffle plates on top of each cylinder a gloss aluminum to give it some sort of contrast. The next thing I have to figure out is the pushrod back piece. The top bar is supposed to be brass colored and Tamia has no brass paint so I think I will paint it first in Chrome silver and then with that dries on top of it I'll spray transparent yellow. I think that should do it, maybe
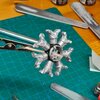
20241228_183035.jpg

20241228_182944.jpg

20241228_182849.jpg
 
Not strange, IMHO: it will look better if it looks actually used. Paint a model just with the colours the manufacturer tells you to, and it looks like a toy. Add some shadows, stains, dirt, etc. and it will look a lot more real.
 
I'm out back doing a little bit of airbrushing and enjoying this excellent weather. I'll take $125° Phoenix Heat in the summer any day of the week because I know I'm going to have weather like this at the end of December. Please don't move here you will not like it at all. There's no water, no electricity and tarantulas the size of Volkswagens and they don't like snowbirds. So I'm going to head in and do some detail work with a brush and maybe start gluing this engine together a little bit

20241228_183035.jpg

20241229_125623.jpg

20241229_125658.jpg
 
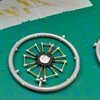
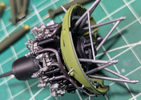
Did a little bit of brush work on the push rods for the valves. I think it looks okay but just okay. I couldn't make my mind up on the push rods going up cuz the instructions had them brass and if you look on a real engine they look kind of brownish and so I just kind of winged it. The top Rod is transparent yellow over chrome and then the bottom push rods are copper over chrome

20241229_145910.jpg

20241229_145905.jpg
 
The 'brass' worked out better than I thought it would with the yellow. I hate working with yellow!
 
The 'brass' worked out better than I thought it would with the yellow. I hate working with yellow!
I have to get some lacquer paint retarder. I have acrylic retarder and I have that leveling thinner but I don't think it has enough retarder in it for my brush work. Starts drying too quick
 
I work with a brush. Haven't worked with lacquer. And Tamiya, AK and Vallejo Model Color acrylics are all a pain.
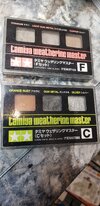
I now rely a lot on my Tamiya weathering master for the bits I want to give a metallic luster. Not large areas mind you, but have had good success. The titanium is my secret sauce!

17355226062831262002696398200973.jpg
 
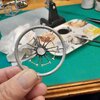
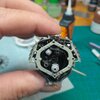
I repainted over the copper push rods going up and down. I decided on red Brown. Also made a pinwash with semi-gloss black lp5 and I'm in the process of using that on the cooling fins. The one I'm holding is done the other one isn't

20241230_105913.jpg

20241230_105706.jpg
 
Zoukei Mura and their pistons...LOL. The Bf109 had pistons and connecting rods, but the J2M3 is a radial and like your FW it too had the (bottom of) pistons and the connecting rods. I'm not a huge fan of building these detailed radials, but they are beautiful. Hope you can have a way to show it off and not have to seal it up with bodywork.

1735585284870.png

I'll be following your work, keep us updated please.
 
Last edited:
While marveling at the intricacies of the engines, and the beauty of the builds, I can't help but wonder if older folks have an added bit of enjoyment, having grown up in the age of the internal combustion everything!
I could almost crawl in under the hood of my '72 meteor, and every part was identifiable, in form and purpose, until black boxes gradually took over... and I found I just didn't care so much anymore...
 
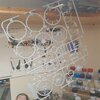
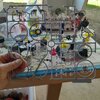
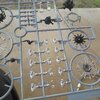
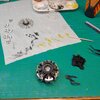
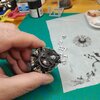
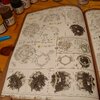
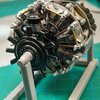
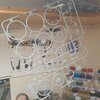
I hear you. I'm wondering why they didn't include a crankshaft? You could do some really cool stuff with dioramas at the factory. Working on the rear of the engine. The fit is impeccable. Sometimes you find yourself getting rid of a coat of paint to make it fit better. Another thing going for it is the instructions. I swear I'm going to be a Master Mechanic when I get done building this. Lots of detail and explanations of why and what. That is all preliminary pictures before I detail it especially the exhaust pipes and all the little doodads that run everything. I also went searching at the hardware store for wire I could use for detailing and I did buy some but didn't really like it and then I remembered my fishing tackle box these braided leaders I think are going to work perfect for all the spark plug wiring.

20241230_131851.jpg

20241230_133342.jpg

20241230_133359.jpg

20241230_135627.jpg

20241230_140449.jpg

20241230_140809.jpg

20241230_141002.jpg
 
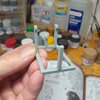
That one picture is an engine stand they give you to build. Kind of neat. I might just keep the engine out next to the plane but I don't know that's way down the road
 
Holy moly!
Looks like the innards of a Swiss watch!
Are those pipes all leading to an exhaust manifold of some kind? And the others (to the left of the cylinder) to some central fuel pump/line?
You must be seeing this thing in your dreams at this point!
Thanks for sharing pics, we get a big dose of vicarious enjoyment of your work even if it is eventually hidden.
 
Sorry barley Bop. I kind of don't understand what you're saying. That's a 14 cylinder radial work of art. Just trying to figure out the exhaust system must have been mind-boggling. An engineer I'm not. And I don't know about electrifying it I did one cylinder. I'm getting too shaky for this close in work. What do y'all think should I continue or stop before I screw it up?

20241230_194457.jpg

20241230_193542.jpg
 
Ha! sometimes I don't understand what I'm saying either!
Suffice to say that I think it is an amazingly executed, minutely detailed piece of model building!
Cheers!
 
Are those pipes all leading to an exhaust manifold of some kind?
Probably not. Aircraft engines like these usually all just have one exhaust per cylinder, to avoid the backpressure problems manifolds can cause. Straight-through exhausts are better for exhaust flow and therefore, for engine power. Depending on the exhaust design, they even contribute a small amount of thrust to the plane.

Looking up some pictures online, the Fw 190 appears to have four exhaust pipes on either side of the front fuselage and four underneath. I'm wondering where the other two cylinders' pipes go to …
Four on each side of the engine and four on the bottom but two of them are doubled up on the bottom exhaust
 

Latest posts

Back
Top