You are using an out of date browser. It may not display this or other websites correctly.
You should upgrade or use an alternative browser.
You should upgrade or use an alternative browser.
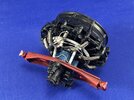
Zoukei-mura 1/32 Fw 190 A-4
- Thread starter Rob
- Start date
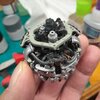
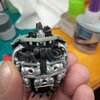
I don't know. I'm at the part where I can do more detailing on it. You know cylinder wiring and all the plumbing on the rear, but I really don't know how to do that stuff. I mean I thought I'd try braided fishing leaders but it should be a little bit more flexible. And I haven't really dived into it like for instance is hollow rubber tubing that will slip right on the spark plug and the little nub coming out of the wiring harness? I just don't know enough about detailing and the items out there. Personally? I think it looks hokey as hell. It doesn't look real it looks like some 8-year-old trying to build his first model car with testers glue. I love building I just haven't got into the research part of what the heck is really out there to scale your model up. Plus the older I get the shakier I get. There should be something out there made for this that will just slip right on the nipple and looks cool... so, @Rob , have you decided if you're done with this bit of detailing?
The age-old, and now I'm finding out, old-age quandary of when enough might be too much!
urumomo
Well-Known Member
- Joined
- Mar 18, 2013
- Messages
- 7,058
There's all kinds of tubing available in the aftermarket ,
Usually in the Automobile Details sections with online shops .
I stocked up years back buying from Hobby Link Japan , who might still be a good source .
Searching " scale rubber tubing " ,
https://www.tedsmodelingmarketplace...Oop3iM4w8oBKxrtH-t65k1_dW961gy3zGUsj_JKSfqMMh
https://www.megahobby.com/products/...gozM60g6OZLWQu4jSoK7KSbfULLt4qnHPFItFN563SSi4
etc
Thanks for the info. And earlier I said about the BMW 801 exhaust. I was wrong. Two pipes on the bottom are not doubled up only one. And there's five pipes on the bottomThere's all kinds of tubing available in the aftermarket ,
Usually in the Automobile Details sections with online shops .
I stocked up years back buying from Hobby Link Japan , who might still be a good source .
Searching " scale rubber tubing " ,
https://www.tedsmodelingmarketplace...Oop3iM4w8oBKxrtH-t65k1_dW961gy3zGUsj_JKSfqMMh
https://www.megahobby.com/products/...gozM60g6OZLWQu4jSoK7KSbfULLt4qnHPFItFN563SSi4
etc
Jakko
Well-Known Member
- Joined
- Oct 9, 2024
- Messages
- 365
One way is to drill out the spark plug and the distributor (or whatever it is these engines have), then glue copper wire into the holes. For example, here's a 1:35 scale R-975 from a MiniArt M3 medium tank that I built a few years ago:You know cylinder wiring and all the plumbing on the rear, but I really don't know how to do that stuff.
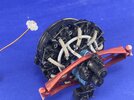
The grey plastic item on the upper left is the distributor, and you can see where I drilled holes in its circumference, as well as holes in the intake pipes (this is correct, BTW). I then glued thin copper wire into the holes in the distributor and inserted the other ends into the intake pipes:
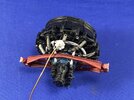
(The copper wire is black because it's lacquered that way.) Next step was to put the distributor into place, bend the thicker copper wire in its centre into place and paint the spark plug leads:
urumomo
Well-Known Member
- Joined
- Mar 18, 2013
- Messages
- 7,058
If you're ever looking for these types of paper ready things ,
https://rzm.com/collections/germany-fighters-bombers
https://rzm.com/
https://rzm.com/collections/germany-fighters-bombers
https://rzm.com/
Jakko
Well-Known Member
- Joined
- Oct 9, 2024
- Messages
- 365
Looking again at the photos I linked to, I see now where I was misled:Thanks for the info. And earlier I said about the BMW 801 exhaust. I was wrong. Two pipes on the bottom are not doubled up only one. And there's five pipes on the bottom

This is not a photo of the underside, but of the left-hand side, rotated 90 degrees counterclockwise …
The actual underside is like this:

BarleyBop
Well-Known Member
- Joined
- Sep 4, 2022
- Messages
- 344
Yes, I almost always check the auto and train accessories when I'm at a hobby shop.There's all kinds of tubing available in the aftermarket ,
Usually in the Automobile Details sections with online shops .
I stocked up years back buying from Hobby Link Japan , who might still be a good source .
Searching " scale rubber tubing " ,
https://www.tedsmodelingmarketplace...Oop3iM4w8oBKxrtH-t65k1_dW961gy3zGUsj_JKSfqMMh
https://www.megahobby.com/products/...gozM60g6OZLWQu4jSoK7KSbfULLt4qnHPFItFN563SSi4
etc
I don't know enough about the stuff to know what its called, but I often know it when I see it!
Wow. They even got the little compression fittings. Too too cool. Thanks man. When I first started on the engine I thought about drilling holes through the one half before you glue it together. That way you could just put five or so inches of wire through that put a little crimp in the end and then glue the other half on. But from that website shoot I'm going to buy some stuff that'll look real. I just don't want to get in the habit of buying $100 model kit and spending 50 bucks to Glitz it up. Maybe once in a while. But I don't need the wife on my ass over a model



BarleyBop
Well-Known Member
- Joined
- Sep 4, 2022
- Messages
- 344
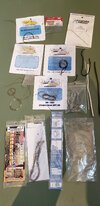
I'm guessing this is really old school, but lead wire can be just the thing in some circumstances, easily shaped, doesn't fight when you try to place it, you can adjust the bend after gluing both ends.
But it is delicate, and you may be wary of handling it.
From my 'wire and hose' drawer, everything from aftermarket wallet squeezers to twist ties and discarded guitar strings!
But it is delicate, and you may be wary of handling it.
From my 'wire and hose' drawer, everything from aftermarket wallet squeezers to twist ties and discarded guitar strings!

Edbert
Well-Known Member
- Joined
- May 16, 2024
- Messages
- 635
That braided wire, are the ignition leads to the spark plug?What do y'all think should I continue or stop before I screw it up?
I'm not really knowledgeable about radials but I thought in WWII they were one per cylinder and centered, under that little fitting from the valve covers.
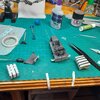
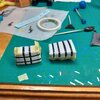
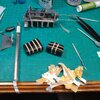
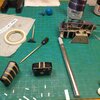
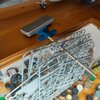
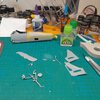
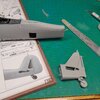
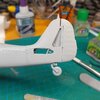
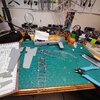
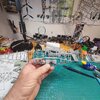
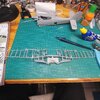
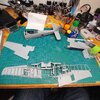
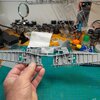
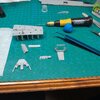
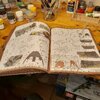
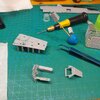
Oh yeah. Two plugs per cylinder. And I'm working towards that little collection like that of all odds and ends for wiring. I ordered some wiring and what I really wanted was on back order but we'll see. Started on the cockpit. I don't know if I want to paint every little thing when it's just all going to be hidden. Don't get me wrong. I love building. The more pieces the better. I just don't know if I want to waste time painting something that I'll Never See. Shoot. I remember building the revelle B-29 all that work and paint that went into the inside and you don't see none of it through the little window for the Gunner. Anyways. Here's some more pictures. Right now I'm just cleaning things up getting ready for primer


Similar threads
- Replies
- 10
- Views
- 344

