BEEP BEEP, not the Roadrunner

BarleyBop

Well-Known Member
Joined
Sep 4, 2022
Messages
325
Direct to you from the fall of 2023 (pre Italo-mania):
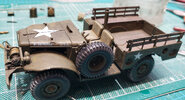
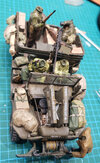
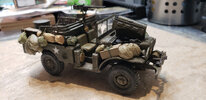
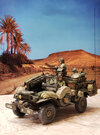
The BEEP, otherwise known as 3/4 Ton 4x4 Weapons Carrier - WC52
(originally I listed it as WC51, this one has the extended area to accommodate the winch)

They had the distinction of landing in West Africa as part of Operation Torch, making the long drive through the Atlas Mountains, probably taking part in the the first American exchanges with German and Italian armor, then on to victory in Tunis, only to get shipped to Sicily and start all over again!

Many build photos this time, so bear with me as I post! I'm excited to share these as there were a few notable breakthroughs, along with the usual head-scratchers and goof-ups!
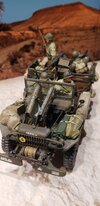
20241230_232809.jpg

Looking at the photos now, I realize that the silvering is particularly bad... but I think I've learned how to address the problem later. The build photos though... too late for them unfortunately.

Stay tuned!
 
Last edited:
Direct to you from the fall of 2023 (pre Italo-mania):
The BEEP, otherwise known as 3/4 Ton 4x4 Weapons Carrier - WC51

They had the distinction of landing in West Africa as part of Operation Torch, making the long drive through the Atlas Mountains, probably taking part in the the first American exchanges with German and Italian armor, then on to victory in Tunis, only to get shipped to Sicily and start all over again!

Many build photos this time, so bear with me as I post! I'm excited to share these as there were a few notable breakthroughs, along with the usual head-scratchers and goof-ups!

View attachment 132979

Looking at the photos now, I realize that the silvering is particularly bad... but I think I've learned how to address the problem later. The build photos though... too late for them unfortunately.

Stay tuned!
Nice. Pantherman
 
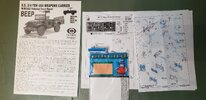
The kit: SKYBOW, in a plastic bag! not even a box... and some shiny bits from Eduard.

17356774497724063436672570851137.jpg

01_20221017_170014.jpg

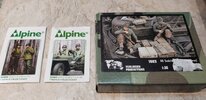
figures courtesy of: Verlinden and Alpine (after the rough characters I'm used to building, they were a dream!)

17356784342261575249650728336415.jpg
 
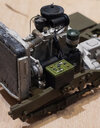
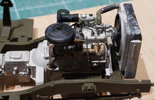
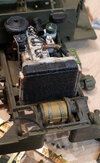
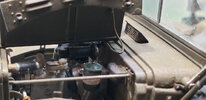
The usual fussing with engine parts, which usually involves tracking down photos, usually restorations, for a better idea of colours, wires and hoses.

02_20220927_221434.jpg

03_20220927_221555.jpg

04_20221017_172655.jpg

for me, it has become more an exercise to become familiar with the engine, after all, it is the heart of the vehicle. Factual and technical accuracy is less important to me than the overall effect. Put enough in so that it seems plausible... I feel that the viewer's imagination will fill in the details!
I liked that the PE actually had radiator updates for both sides.
I get a rush out of just adding a butterfly nut to the air filter!
I once found a squirrel treasure mega muffin jammed onto the air filter of my '72 meteor! Don't know if he just wanted to reheat it, but I drove off before he could eat it!
 
The usual fussing with engine parts, which usually involves tracking down photos, usually restorations, for a better idea of colours, wires and hoses.

View attachment 133030

View attachment 133031

View attachment 133032

for me, it has become more an exercise to become familiar with the engine, after all, it is the heart of the vehicle. Factual and technical accuracy is less important to me than the overall effect. Put enough in so that it seems plausible... I feel that the viewer's imagination will fill in the details!
I liked that the PE actually had radiator updates for both sides.
I get a rush out of just adding a butterfly nut to the air filter!
I once found a squirrel treasure mega muffin jammed onto the air filter of my '72 meteor! Don't know if he just wanted to reheat it, but I drove off before he could eat it!
Loving the details in your work. Nice. Pantherman
 
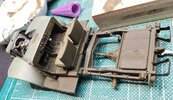
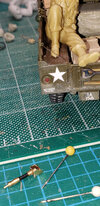
The frame gave me some grief. I posted elsewhere about it, but I noticed it had developed a torsional twist which meant that the tires would probably not all touch the ground.
In the end, I used my little Dewalt clamps to secure the frame, weighted to untwist the frame when I dipped it into hot water. It helped enough, though I could have used hotter water I suppose, just not brave enough to push it!

10_20221101_155536.jpg
it is distressing to discover something like this at this stage, but thankfully still early enough to try and fix it
 
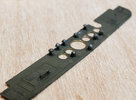
no, these aren't mini mushrooms, they are my attempt at giving a little more oomph to the dials and gauges!

05_20221017_174109.jpg

at this magnification, somewhat ridiculous, but as evidenced in the photo above of the frame, it worked! Don't ask how many of those flew off to sprout in some corner of my room!
I also took the liberty of gently scraping the paint away from the rims of the gauges... not authentic, but does provide a nice effect and contrast once the dials film was added from behind
 
I was starting to think I might just pull it off!

11_20221112_174935.jpg

13_20231031_223032.jpg
at this point, I hadn't decided to add a radio and antenna, so the hood (bonnet) ID is missing a letter ; (

17_20231103_205236.jpg

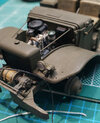
I wanted to expose the engine, so back to reference photos to see how it might be done... I think my approximation worked out Okay.
 
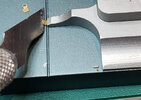
I had been using a knife and pliers and tweezers to bend PE, but on this one (knowing what other PE challenges awaited in the stash, I made the plunge and purchased a tool. Now it is my birthday every time I take it out!

06_20221017_183916.jpg

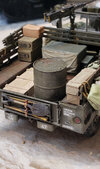
Time for stowage and radio!
26_20231115_212928.jpg

the radio is covered, but I found a very nice mount for antenna

20_20231109_132300.jpg

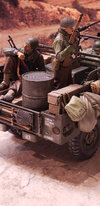
at this point I'm trying figures and stowage for placement, and have pretty well settled on the figures.

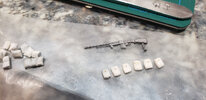
The reclining fellow, I thought should be loosely holding a BAR, so I'd need to provide him with the ammo pouches, sculpted in 2 part putty

22_20231114_134945.jpg
 
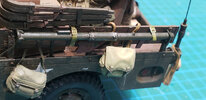
Hey, it's a weapons carrier right? how about that new fangled rocket tube?

30_20231119_202008.jpg

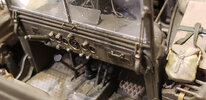
another view of the dash

27_20231115_213258.jpg

and a final test of figure placement. I opted to leave out the field mechanic because I couldn't get him close enough to the open engine compartment to be believable...

29_20231119_200651.jpg

24_20231115_212536.jpg
 
and it's done (except for that silvering that I have to fix) If you noticed a lot of dust in the picts, we were in the middle of renovations in our old 1876 home, mostly trim and painting at that stage, but the inevitable construction dust getting everywhere!

34_20231203_163309.jpg

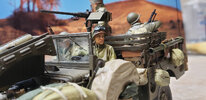
the driver seems to be saying: "I've got a bad feeling about this!"

33_20231203_163045.jpg

32_20231203_162947.jpg

that monster antenna was often tied down to the front of the vehicle. If I figure out how to do that, I just might! Best sleep a long time on it.
 
Last edited:
Oh, I forgot to mention the bit I was most proud of... learning to drybrush!
First I lay down a base coat as usual,
then used a slightly darker shade to give some relief around panels with the drybrush, followed with sparser highlights on upper surfaces.
Then worked back into the dark and light areas with the original base, again with the drybrush for a smooth blend.
Pretty subtle still, but the basic approach seems to work. and I like the slight pebblelike finish that picks up the light.

Not that special for you fancy flyers with the airbrushes, but very satisfying to accomplish with a brush!
 
Glad you like it!
At some point I wanna build another one, this time the WC-55 M6 gun truck.
It is on my shelf, so maybe this 'new' year when I get outta my Italian phase!
 
Last edited:
So, @BarleyBop , what is the history on the winch drum and cable cover on your model? I have not seen that before in WWII era vehicles.

I have made covers for my synthetic winch line on my real trucks and Jeeps, but have never seen it on WWII vehicles. I do it now for UV protection for the synthetic winch line. Why they did it then is a mystery to me.

Be well. Model on.

Eric
 
Hmmm, not knowing any better, it may be as simple as it was included in the aftermarket PE set... I'll get back to you on that one! I may have a photo reference somewhere as well:rolleyes:
In my defense though, don't you think it looks cool? Ha!
 
Thanks Rob! Great encouragement to wake up to on January 1st!
Have a great New Year!
 
Hmmm, not knowing any better, it may be as simple as it was included in the aftermarket PE set... I'll get back to you on that one! I may have a photo reference somewhere as well:rolleyes:
In my defense though, don't you think it looks cool? Ha!
Hey @OldManModeler, so I'm back at my PC, checking out my folder of reference picts...
a Google Lens (reverse image lookup) did provide a few hits!

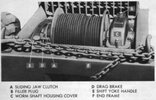
The first one which had great vehicle maintenance photos of the winch, which I gobbled up, not knowing the first thing about winches!
https://www.militarytrader.com/mv-101/maintaining-and-installing-mv-winches

winch.jpg

... and they had seconded your observation thusly:

"The military once advised pouring used engine oil on the wire rope to keep it from rusting, but then changed its mind because the oil rotted the fiber core. While some show vehicles have canvas winch covers, it's doubtful if many such items were actually used, or lasted very long during military service."

Unfortunately, many of my other references were of restorations, or re-enactments, and they hadn't read the fine print either

Like this one:
http://www.scalewarmachines.com/allcontent/figure-references-usa-ww2

I'll let you tell them!!

figure-references-usa-ww2_MG_3942.jpg

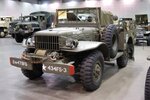
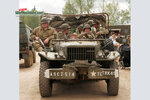
Oddly enough, my fave pict was also from Military Trader:
https://www.militarytrader.com/military-vehicles/buyers-guide-weapons-carrier

I had it as a .webp file, so have converted it to jpeg to post here

MTc1MjY2MjU3MDQwNDUwNjU1.jpeg

Finally, upon reviewing all this winch stuff, I realized I had mistakenly called it the WC51 when it should be WC52, precisely because of the extended front end to accommodate said winch!

D'oh! (smack upside the head)

cheers!
 

Latest posts

Back
Top