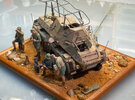
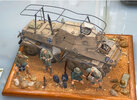
German 8 Wheeled 233 Build

OldManModeler

Active Member
Joined
Aug 25, 2024
Messages
132
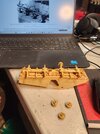
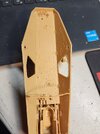
Pulled this out of my stash. Started it on this first day of 2025. Lots of PE and fiddly parts no one will ever see. Instruction booklet is nice8rad233.3.jpg and large. Actual build instructions for part placement is poor. Parts count is unknown, but probably in the 300 to 400 range. I built the frame, and by itself without suspension it is almost 30 parts. Just the frame, kids.
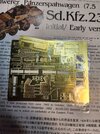
It is not Tamiya crispness on the sprues, with some flash. Fitment is OK so far. As long as you can figure out where the hell the part goes due to poor instructions for part placement. Lot's of fiddley stuff that could have just been molded onto the frame without detracting from the kit accuracy.

Kit includes a full interior minus the engine's top half. So I am giving it a go while playing Lili Marlene and war films. I expect this one to be a month long build. Including paint and weathering... At least.

I would give this kit 8.5 stars on a 10 star scale. With 10 being the best. But I just got started... my rating may go up or down.
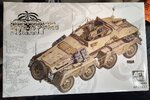
8Rad233.1.jpg
 
Last edited:
Lot's of fiddley stuff
It's an AFV Club kit, yep :) I've said it elsewhere too, but don't build an AFV Club kit if all you've put together so far have been Tamiya ones. You get all of the small detail parts that Tamiya moulds onto other parts or conveniently forgets exist, with slightly less good fit (but far better than many other manufacturers — you may have to drill out locating holes, but it's never a loose fit) but in the end you'll have a much more detailed model straight from the box. And they do many subjects nobody else would even touch.
 
I have, yes :) I would rate them, together with MiniArt, as probably the plastic kit manufacturer who tries to go for the most complete details they can provide. Which makes for complex kits, of course.
 
It's an AFV Club kit, yep :) I've said it elsewhere too, but don't build an AFV Club kit if all you've put together so far have been Tamiya ones. You get all of the small detail parts that Tamiya moulds onto other parts or conveniently forgets exist, with slightly less good fit (but far better than many other manufacturers — you may have to drill out locating holes, but it's never a loose fit) but in the end you'll have a much more detailed model straight from the box. And they do many subjects nobody else would even touch.
Thank you. This is not my first AFV Club kit. I actually prefer Dragon over any manufacturer, as I've had mostly good results and typically better detail than Tamiya. I think the detail is pretty good with Dragon. I have built many Italeri as well just because they offer a kit I want. I have many Tamiya, Italeri and Academy in my stash. And a few Das Werk and Trumpeter as well. But just because I can stash and build kits doesn't mean that I rate with you guys!

If I want a real challenge I'll start a AFV Club kit. So here we are. I have already had to remove flash from tiny <1/8th inch sized parts and used my pin vice for one locator pin. And I just started. LOL

Be well. Model on.

Eric
 
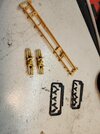
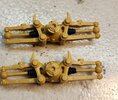
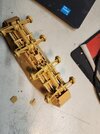
Getting the drive axles, diffs and suspension A-arms put together. Fiddly but not to the point of wanting to quit! Frame with rear driver pedals installed, and two of the four drive axle units are in the pic.
20250102_211518.jpg20250102_211528.jpg
Yes, those are tiny cv-joint axle boots made from flexible vinyl so the axle shaft follows the suspension arms up and down. How cool is that!? The suspension is totally movable at this point.

Once the hubs are installed it gets glued up tight. But now it is still flexible so you can pose the suspension articulated if needed for a diorama, etc.

Close up pics shows that I still have some sanding to do.
 
Last edited:
So, the build saga continues...

All this detail is getting covered up by armor panels. Makes me want to diorama this kit.

I bent the steering column for the rear driver's position when placing the floor onto the frame. Tried to heat it up to straighten it and the part turned into a slinky. Whoops. The instructions have you put the floor down on the frame after the rear steering column and pedals are in place on the frame. It's almost impossible to do unless the glue isn't dry for the pedals. I will use a common sewing pin to replicate the steering column when I get back into building the interior.

I bent the rear beam bulkhead support on install. It was very fragile and I am not too concerned as it will straighten out when I install the top hull. And that part will never been seen again.

Going to have the wheels turned just to point out that ability when finished. Like @plastickjunkie did in his awesome diorama. I got one wheel hub on... in the pic. After the hubs, the final steering linkages will go on.

Top side interior with pedals. These pedals actually mount to the frame underneath. Crazy detail AFV Club!

Had to cut off some details and install PE for the detail in the correct position. That was all in the instructions. A little Vallejo plastic putty and sanding and it's barely coming along.

I'm not frustrated, but very amused. I think the detail covered is a waste. But still having fun.20250107_051213.jpg20250107_051333.jpg

Onward ho!

Be well. Model on.

Eric20250107_051213.jpg
 
Last edited:
Nice: sometimes, MacGyvering a part is more fun to do than the actual one!

The true meaning of 'plastic surgery' :p

Keep on, keep on!
Yep. I agree. Scratch building or scratch repairing is the best form of plastic model enjoyment sometimes.

The steering column that I bent and ruined was a simple rod, with no details above the floor. All the real fine details for steering like the steering box and etc, are under the floor and on the frame. BTW all of which is covered up by skid plates and armor. Lol.

I am going through the motions but this super detailed kit is reminding me why an old dude like me needs to go with 1/16th scale or larger! But it is a fun challenge.

I am not posting this build for kudos, Lol, but just for the comradery of it all on this forum. And for everyone's critique and advice as they see fit.

Be well. Model on.

Eric
 
an old dude like me needs to go with 1/16th scale or larger!

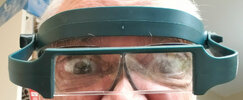
If it's the eyes, then:

20230103_183020-2.jpg

... yep, no wonder my figures look so alarmed, with me looking down on them!
(and yes, hamming it up for the camera)

Most of the time, I just rely on my Pinball Wizard enhanced senses!
... He plays by intuition,
... Plays by sense of smell!

or maybe those antennas popping over the rims! :eek:
 
So, the build slowly continues.

I like to put in the larger components prior to the smaller ones due to parts alignment.

And that is especially due to the fact that this is an AFV Club kit, with its few alignment pins and crap part location instructions.

One doesn't want to install tiny parts and find out later that the larger mandatory parts won't fit.

Overall, this kit is no Tamiya, even a Italeri, or even an old school Dragon. This kit has 2 times the detailed parts but no decent instructions! It is a best guess, part location dealio. Just put it somewhere near there,20250112_004042.jpg20250112_004126.jpg dude.

So, the larger components go in first.

I fixed the bulkhead framework, and finished the steering tie rods.

I am still at the point that I still want to complete this. Because I started it as a challenge to myself.

It's almost a scratch build resin kit.

I still care, but as a hack and 'it's just my free time hobby'. It might go to the 'back into the stash' point. I do this for neither money or glory. I do it for fun. It's still fun, but it's pushing it. The micro PE stuff is just silly to me. But I am installing it all.

I could build a better designed and engineered and molded kit, in half the time and have twice the fun.

Yet, I digress. The build will continue.

Be Well. Model on.

Eric
 
Last edited:
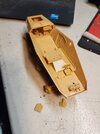
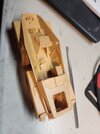
Got the fenders on, which brought a huge change in my attitude about this kit. It's starting to look like an Deutsche WWII 8 Rad instead of a boat with a drivetrain and fiddly sniddly frustration.

Grabbing strength. From various means.

One such place is from a book. Quotes from the book are: "The real cycle [model] you're working on, is a cycle [model] called 'yourself'." And another one: "If you want to know how to paint a perfect painting? It's easy. Make yourself perfect and then paint naturally".... Robert Pirsig. In the book: Zen and the Art of Motorcycle Maintenance. I have read the book many times over the years, and I am still striving for Quality as defined there-in. I am not into Zen, but I am into motorcycles and a dedicated life of principles, and the book is phenomenal. It's not about Zen, and only a bit about motorcycles. It is about quality in life. Quality in building. Quality in everything you do. If you build models, reading that book might be the best thing for you as a modeler. If you don't build models, reading that book might be the best thing for you as a person.

Yet, I digress... Back to this plastic model kit...

Next chapter, switching the gears...

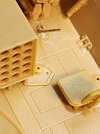
The wife doesn't sew anything, so I got a sewing kit from the dollar store for $1.25. It has pins and needles and thread and what- not. Perfect and cheap for a rag-tag modeler. So, I measured with my caliper and produced a rear- steering column to replace the one that I broke. A cut down sewing pin, CA glue and a bit of baking soda and I think, maybe foolishly, that I am back in the game.

Put some scratch marks with an X-Acto blade on the rear drive seat to simulate wear. Painting will define my intention of wear and damage. That seat is so close to the side access hatch, and from overhead abuse that it was probably walked on more than sat on.

1000007012.jpg

1000007010.jpg

Primer and paint AND WEATHERING will cover a bunch of glue sins, so I am going forward.

Going to build the 75mm gun next. Then, a bunch of PE fender parts and install some fiddly bits on the top hull interior and exterior, and then throw down some primer on the whole shebang. Including the wheels while still on the trees.

Be well. Model on.

Eric
 
Last edited:
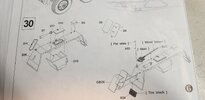
Here is a prime example of the kit's instruction mistakes or oversight.

On the upper left in the pic, see parts D17 and D7. It is a horn or something. Look at it's location, it is pointed out definitively . Then... look at it's location in the pic on the lower right. That is where the shovel goes!

Or. maybe the shovel is shown on the wrong fender. Seen that too in this kit.

1000007013.jpg

By the way, pin part locators are almost non-existent on this kit.

Ya gotta Wing it. LOL

I've used more Vallejo putty on this kit than any other armor kit that I can remember. Don't get me wrong, it is a HIGHLY detailed kit. It's perfect for scratch builders with particular vehicle historical knowledge. If you want a challenge, this kit is up there!

Be well. Model on.

Eric
 
Last edited:
On the upper left in the pic, see parts D17 and D7. It is a horn or something. Look at it's location, it is pointed out definitively . Then... look at it's location in the pic on the lower right. That is where the shovel goes!

Or. maybe the shovel is shown on the wrong fender. Seen that too in this kit.
I think what's going on there is that they drew the arrow for the horn too short. If you look at the second picture, you can see it in place on the inboard side of the mudguard, when the arrow in the first picture appears to point to the outboard side, where the shovel goes in the second. I would trust the second picture to show the horn in the right place, and build my model accordingly.
 

Latest posts

Back
Top