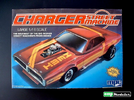
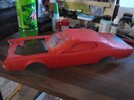
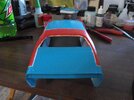
1/16 Scale Richard Petty 1973 Dodge Charger
- Thread starter wjbrandel
- Start date
airdave
Well-Known Member
- Joined
- Oct 11, 2012
- Messages
- 223
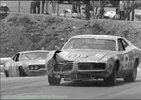
In 1973, Goodyear and Firestone were supplying all race tires for Nascar, and they were slicks.
Nascar did NOT race in the rain.
At least not on speedways.
(Firestone retired from Nascar in 1974, leaving Goodyear to be the sole supplier)
There were a couple of road race courses on the schedule at that time, like at Riverside California.
I guess it's possible there were treaded tires in case they had to run Caution laps in the rain,
...back then, Caution laps counted as race laps, so rather than stop a race...
but, I highly doubt it.
The cars did not have wipers so driving in the rain would have been an issue.
This seems more likely that the model was copied from one of the clone cars that exist
and those often drove on treaded tires so they could run in parades and on streets.
Just a theory.

Last edited:
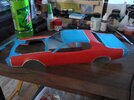
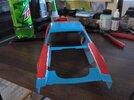
Work has been horrendous lately. I finally masked the body for the STP Red with a white border. I am hoping I will be able to paint it tonight if the wind dies down. the power switch on my paint booth went out, so I have parts ordered so I can fix the darn thing.
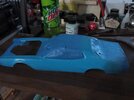
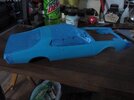
A good hours worth of masking. Mainly taking measurements and marking the borders with tailor's chalk (now wiped away) to make sure that I got everything as even as possible.


A good hours worth of masking. Mainly taking measurements and marking the borders with tailor's chalk (now wiped away) to make sure that I got everything as even as possible.
mustang1989
Active Member
- Joined
- Aug 6, 2022
- Messages
- 147
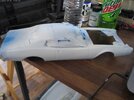
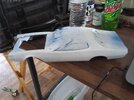
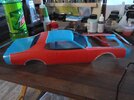
got the white down in preparation of the STP red that will be applied, but first one more step:
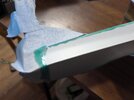
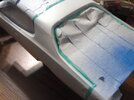
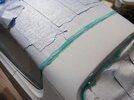
Used liquid mask to mask the white border around the STP red, which should be applied some time today.
Hmm, looking at the photos I can see some areas that need just a bit more work to even everything up.
airdave
Well-Known Member
- Joined
- Oct 11, 2012
- Messages
- 223
Agreed, orange peel can be sanded down and buried under clearcoat.
But that white stripe is a mess (and it will bother you in the future).
I guess I did not understand the whole liquid mask step.
It was totally the wrong method of masking.
Do everything in tape masking...only tape will give you that sharp clean straight edge.
I say this only as constructive help, and definitely not a criticism of your build so far.
I'm loving it!
This is just a hurdle.
Do you not have any fineline tape? or thin masking tapes.
If not, get some.
I prefer thin masking tape...never been a huge fan of vinyl fineline tapes, but I still use them.
Thinline tape (especially the vinyl stuff) can be slightly stretched and laid down in tight curves.
I used fineline(vinyl) tapes to lay out flames and pinstripes on helmets and gas tanks.
It can be used over top of white to block and save the stripe, while you then paint the red and blue areas.
(My suggestion: sand the model smooth. No need to strip all the paint.
Then loosely spray the white areas with no masking.
Then mask the white stripe with fine masking...and then respray the red and blue.
Then remove the fine tape to reveal the white stripe.)
Invest in decent masking tapes, it's worth it.
Better tape has cleaner, sharper edges, and better adhesion.
Some tapes are also more stretchy for curving.
And, after taping up an area to paint, spend a lot of extra time rubbing down edges for a tight seal.
I don't have a white paint pen, but I do have a liner brush that I've used in the past for delicate paint jobs (normally on figures. Thinking about touching up and correcting the border with that brush.Looking good. If you have a steady hand (I dont!) you could try a white paint pen on the stripes or even cut thin strips of white decal to use. The orange peel you could lightly sand out. Rather than stripping the whole thing.
Tried sanding it down but the orange peel reappeared when I applied the paint again. Just not as bad. What I'm thinking is that it is problem with the plastic due to the age of the kit and if I strip it down and maybe lightly sand it, that might clear the problem up. IDK though, thoughts?Agreed, orange peel can be sanded down and buried under clearcoat.
But that white stripe is a mess (and it will bother you in the future).
I guess I did not understand the whole liquid mask step.
It was totally the wrong method of masking.
Do everything in tape masking...only tape will give you that sharp clean straight edge.
I agree I should have used tape for the border, but I wanted to try the liquid mask since I've had good results using it on canopies and small area. As my Dad would say "That's what ya get trying something new. Now how do you fix it?"
And that's how I take it. Help and advice should always be welcome, and I do try to do that (doesn't always work that way I am human after allI say this only as constructive help, and definitely not a criticism of your build so far.
I'm loving it!
This is just a hurdle.
Not currently in my tool kit, I have actually never used it. I do have a little 3mm Tamiya tape (really need to get more). Can you get that fineline tape online and how much is it?Do you not have any fineline tape? or thin masking tapes.
If not, get some.
I prefer thin masking tape...never been a huge fan of vinyl fineline tapes, but I still use them.
Thinline tape (especially the vinyl stuff) can be slightly stretched and laid down in tight curves.
I used fineline(vinyl) tapes to lay out flames and pinstripes on helmets and gas tanks.
It can be used over top of white to block and save the stripe, while you then paint the red and blue areas.
(My suggestion: sand the model smooth. No need to strip all the paint.
Then loosely spray the white areas with no masking.
Then mask the white stripe with fine masking...and then respray the red and blue.
Then remove the fine tape to reveal the white stripe.)
Invest in decent masking tapes, it's worth it.
Better tape has cleaner, sharper edges, and better adhesion.
Some tapes are also more stretchy for curving.
And, after taping up an area to paint, spend a lot of extra time rubbing down edges for a tight seal.
airdave
Well-Known Member
- Joined
- Oct 11, 2012
- Messages
- 223
You could drop into your local auto paint supply shop.
Every town has at least one place where paint shops go for supplies.
Ask them what fine masking tapes they have (and they will most likely show you many)
Tapes can be had on places like amazon, or hobby supply sites.
Look for known brand names.
Specify a width when looking for tape.
That Tamiya tape is good stuff (or so I have heard).
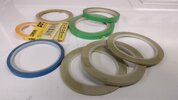
My thinnest vinyl, and thinnest paper tapes, are 3mm.
I have hand-cut thinner widths from tape applied to glass.
The 3mm AK tape (below) is proper paper masking tape and sticks well.
But it tears easily if you try to stretch it for tight curves.

Last edited:
airdave
Well-Known Member
- Joined
- Oct 11, 2012
- Messages
- 223
Agreedor, you could lay out a stripe of your current tape and slice it using a ruler and hobby knife into smaller strips...just sayin'
As I said "I have hand-cut thinner widths from tape applied to glass."
Unfortunately not everyone can cut straight...even with a rule! lol
I keep a small piece of glass from a picture frame for just this.
Just lay it on the bench and carefully apply a strip of masking tape.
Make sure it's clean.
Don't rub the tape down too hard, you need to easily pull off a thin strip.
Use a new sharp blade and a metal or metal edge rule, to cut thin strips.
- Joined
- Sep 4, 2022
- Messages
- 1,720
Yup, I have piece of safety glass from reno, great for cutting tape, PE, anything you don't want 'pushed' in, bent or distorted, with a clean edge.piece of glass
I fixed the paint job the best I could without stripping the body (didn't have a big enough tub for the monster). I should be doing the decals some time today. I probably would have had it done over the weekend but Road Trip! I went to Scarbourgh Renaissance Faire for the weekend. Left Friday and came back Sunday evening. Boy did I need that break.
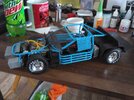
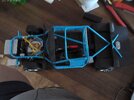
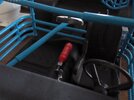
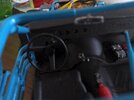
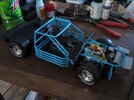
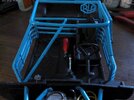
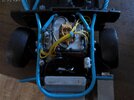
The chassis is completely done, I am slightly disappointed with the dashboard. The gauges didn't turn out like I wanted. What I was going for was a black background and the needle and lettering in white, what I got was what you see.
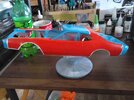
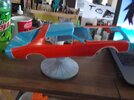
I sanded gently to remove the worst of the orange peel then reapplied the red with a brush. The white border was touched up by hand with a very fine brush and tamiya flat white, the vallejo I was going to use just didn't cover too well. There are a couple of areas where my brush wandered a hair, but I am happy with it.
Now all that is left are the decals, chrome bits, windows, and joining the two halves together.


The chassis is completely done, I am slightly disappointed with the dashboard. The gauges didn't turn out like I wanted. What I was going for was a black background and the needle and lettering in white, what I got was what you see.


I sanded gently to remove the worst of the orange peel then reapplied the red with a brush. The white border was touched up by hand with a very fine brush and tamiya flat white, the vallejo I was going to use just didn't cover too well. There are a couple of areas where my brush wandered a hair, but I am happy with it.
Now all that is left are the decals, chrome bits, windows, and joining the two halves together.
- Joined
- Sep 4, 2022
- Messages
- 1,720
Say no more! ...just turning out of the driveway, the prospect of an open road, a shared adventure and worries left on the stoop.Road Trip!
Slight delay in finishing it. I put the decals on (lost one not sure how) laid a coat of gloss over it and the trunk orange peeled on me. Now with the problems I've had painting it I am considering putting it away for a few days and working on something else before I try to fix it.

