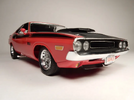
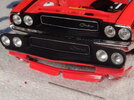
1/24 Testors Ultra Detail T Bucket

mustang1989

Active Member
Joined
Aug 6, 2022
Messages
113
I'm still working on a Ta-152 and am taking my sweet time with it to make sure that it turns out just the way I want it as well as not to rush something that I've spent the last 11 months building. In order to keep the urge to rush to the finish line down, I'm going to start a side build just to actually complete something for the year. A few weeks ago Mike Sharp completed one of these and it inspired me to buy one and give one a go myself.

I will be replacing the wheels and tires with something of my own choosing and adding a couple of things here and there to make things a little more interesting. I have a set of Tru Wire wheel/ tire assembly's that I have been chompin' at the bit to find a project for and this one looks like the ticket.

The kit:


jRhnE5.jpg
 
Alright gang. We start......

Those of you who know me, know that I can't leave well enough alone.....even for a pre-painted kit. For starters, I had to do something with the wheel and tire arrangement on this. This is not to say that the ones that came in the kit were all that bad BUT.......I've been itchin' for an opportunity to use some wheels and tires that I've had in the parts stash for such an occasion. The wire wheels included in the kit are among the best I've seen in plastic, and I will keep them around for a future build. What's really going to help throw this build over the top is the use of Tru Wires from Minicurtr8zing.


a1AZI3.jpg


oCqCKn.jpg


A quick side by side comparison will show that the kit wheels aren't all that bad but these Tru Wires are definitely "all that".


VaKbsJ.jpg


Rear wheels in the kit were a Cragar SS design but I had something more in mind. I got these from Teds Modeling Marketplace and these IMO are the best wheels anywhere in being aluminum and PE.


lrPHMp.jpg


I also had a set of 1/25 tires in the parts stash that these will fit perfectly in.


9Lp1jh.jpg
 
Thanks for the "Likes" fellas.

I also didn't like the rather predominant seam going right down the middle of the oil pan as well as the top and bottom of the transmission, so I glued the engine halves together instead of using the screw supplied in the kit to join the halves. Then I busted out with the sanding sticks and went to work removing all seams and primed everything in black.

Started here with the pre-painted long block freshly sanded with all seams and sprue joins removed. It was a shame to remove all of the pre-painted orange from the block but I think I've got just the right shade of orange to go right back on.


upHcva.jpg

Then black based everything. No more seam lines!
gs3Iwq


bknuk1.jpg


And shot the engine color right back on.

4gqFnx.jpg
 

Latest posts

Back
Top