1/35 ESCI LAV25 Command Vehicle

Eastrock

It's All About The Fun!!!
Joined
Feb 20, 2011
Messages
1,598
This is a donated kit given by friend of mine with no decals and instruction, since I'm havin a weekend boredom decide to rip it open and check the net for reference and one site pops out then I decided to follow the instruction. my only problem is the wheels is not very accurately molded. have to find a wheel replacement for this kit in order to run :p

Reference:http://www.modelbuilderinternational.com/en/articles/sbs-articles/item/471-lav-25-command-vehicle

http://en.wikipedia.org/wiki/LAV-25
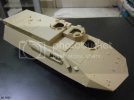
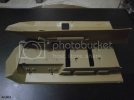
PB050004.jpg
Mock up :)

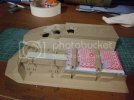
PB050005.jpg
First order of Battle - re-worked on the suspension and drilled out the exhaust tip

Thanks for checking out

Cheers!!
ER
 
bit update:

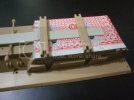
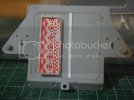
major surgery on the suspension, done. the styrene I used is from a plastic playing cards that is much cheaper than styrene and some scrap styrene, still a lot to do puttying and sanding to make more seamless, and for the upper hull I'll try my luck on the weld beads with use of styrene strips and cement.

Modifiedhull.jpg

Cheers!!
ER
 
Making progress on this ER!!! Even more so knowing you have no directions!!! Nicwe use of the playing card too!!! ;)
 
Thanks for checking guys,

I'm relying on the net for reference, the card is made of plastic and its much cheaper when you buy a sheet with the same thickness.
 
Looks like a fun and .not so easy kit. Some of those ESCI kits can be a lot of work, hence not fun. Off to a good start ER
 
Thanks, Rob!

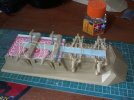
Major surgery of the suspension finish, applied 1st coating of filler I guess should leave it a day to dry, before I could reapply a 2nd coating.

PB070005.jpg

thanks for checking
ER
 
Sorry for the late update, here's the 2nd phase of the suspension work of the ESCI don't expect a detailed kit like the trumpeter, and have more patience a lot of scraping flashes, mold seam, sanding are needed this took me almost 2 days but still need a lot of filler and repair and its far from finish, the tie rods should be glued on the bottom with the guide pins as per internet reference

lavsuspension.jpg

and here's the an AM parts from trumpeter and see the different between the ESCI wheels. but surgery need to fit the wheels to the kit.


Thanks for checking!!!
ER
 
The little bit of surgery is well worth the effort!! The new wheels are sweet ER...nice suspension work as well!! Keep it going!!!
 
Thanks for checking in, Buddy :)

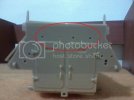
Btw should I extend the rear doors? What do you think guys?
lavrear.jpg

Thanks!
ER
 
Awesome work on the suspension. As far as the doors, you've definitely got the skill to do it so I say why not.
 
Hey thanks Buddy, right I'll try re-working on the doors since the kit has a spare rear panel.

Cheers!
ER
 
Nice tires. Lots of work going into this one, looking forward to the next update.
 
Thanks for checking in, Ken much appreciated

here's a small update, still working on the rear door just a bit slow due to the plastic is already brittle and I need to repair and work on the tool shed.

lavrear1.jpg

Cheers!
 
Geegad, your close bud its a jack of spade ;D

Thanks, T just havin with the quality of plastic I can't the line straight

cheers!
 

Latest posts

Back
Top