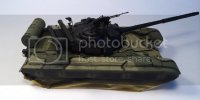
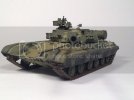
1/35 T-64A MOD 1981

adampolo13

New Member
Joined
Dec 7, 2011
Messages
2,633
Hey all, I recently reviewed this kit and have continued working on it a bit more today. You can read the review here:

http://armorama.com/modules.php?op=modload&name=Reviews&file=index&req=showcontent&id=9549

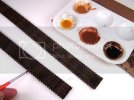
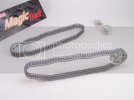
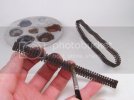
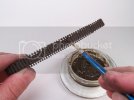
So far the biggest draw back has been the kit tracks and do to the way the kit goes together I have to paint the road wheels, tracks etc and then mask it off. That is where I started this morning, priming everything black and then painting. Thanks again to Ken Abrams, he showed me some wicked sweet techniques at Armorcon a few weeks ago and I'm working trying to get my color modulation technique down. You'll see in the pictures below that I did start chipping the drive sprocket etc. What do you guys think?


Thanks John!

I got a bit more work done on the track this morning but I'm now kind of at a stand still cause I don't know which direction to go.


So far I primed the track and then painted the track with some rust, hit it with a wash and then dry brushed with steel. I'm not happy with the seam line that still there and I don't know what to do next. Do I hit it with some dark earth pigments or do I hit it with track rust?
You guys tell me, what should I do?
 
I'm not happy with the seam line that still there and I don't know what to do next.

Seam line on what? The center of the road wheels? Depends really on what you are trying to depict. A newer tank would have a slight seam there, as the rubber wheel is made in much the same way as a plastic kit is, 2 halves to the mold and injected, so there will be a seam down the middle of the tire. However on an older used vehicle, those seams wouldn't be there as they would be worn off.

A well maintained but used vehicle would actually have a mix as new and old, but since they are painted already, I would just live with it.
 
Looks great, I find that the AK Track Rust Wash (I presume you mean that) can REALY darken down the tracks, so I thin it down a lot. Just my two pence.
 
Thanks Scott! John, I actually didn't put a wash on the whole track just highlighted a few bits. I guess my next question is do I add pigment to the track now or later when the whole thing is done. Keep in mind that I have to mask off the track and wheels to finish construction and paint the rest of the thing.
 
I always leave pigments until last mate, otherwise you gotta be super careful handling the thing.
 
You're talking about the seam line on the tracks right? Not the road wheels?

Yeah, it would have been better to clean that up beforehand as it wouldn't be there, but I don't know if you want to bother with it now.

I'd also save the the pigments for the absolute last thing but you can still do some more work with paints. Personally, I'd remove the tracks (they're rubber band correct?) Then I would use several colors to avoid the entire track length being one solid color, some rust colors and some steel/metal/iron like colors. Skip around to different links and even go over some and avoid others being as random as you can.

Here is a photo from the tiger one article in issue two showing the effect.


26_zps250601be.jpg
 
I forgot all about that in Issue 2! I'll go back tonight and re-read it. Ken you're the man!

They are not rubber band tracks, semi-individual link that has to be set before going on to the rest.
 
adampolo13 said:
They are not rubber band tracks, semi-individual link that has to be set before going on to the rest.

Okay, next time try to glue them up all except for one seam that you leave dry fit (I do it on the sprocket so the teeth help hold it tight).

Then you can remove them once dry (like 24 hours or more) and then you can paint and weather them separately, and fit them on later in the build.

Remember that StuG in Danbury?


test2_zps61df8063.jpg

test_zps72f8c4eb.jpg

17_zps6fd03890.jpg
 
A bit of an update.

I got the tracks in place. I did try to go back and use Ken's method for putting the tracks on last but unfortunately the tracks were too tight and would not go on after all the building is done.
I also got some more work done on the rear of the hull.


Thanks for checking out my work!
 
adampolo13 said:
I did try to go back and use Ken's method for putting the tracks on last but unfortunately the tracks were too tight and would not go on after all the building is done.

If you were trying to go over the sprockets, road wheels and such, yes. That's not going to happen.

However if you fit the sprocket into the tracks and then install, and then put in the idler, return rollers, road wheels after etc. it will work.


Watch this little video, now this isn't the exact same thing, but it should give you an idea of what I am talking about:

http://s52.photobucket.com/user/camokid/media/100_1350.mp4.html
 
Hey all, just so you don't think I haven't been working! The hull is completely built and primed and the turret is almost complete, one more hatch and the machine gun to assemble and then were off to the paint shop!


Thanks for stopping by!
 
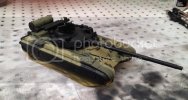
Hey guys, it's been AGES since I worked on this, almost 4 months. Well, I had the itch to pull something off the self and get things moving again. It also helps that I got the right thinners to use with the Vallejo Model Colors. Well, here's how I had left it a while ago.
T64BUILD23_zps72aa61e8.jpg
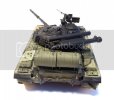
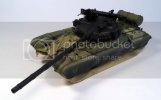
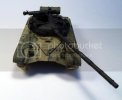
As you can see I had started the camouflage freehand which is something I've never done before. Well after this morning this is how she looked:
T64BUILD25_zps62fcc580.jpg
T64BUILD28_zps163f8c40.jpg
T64BUILD27_zps8419fa13.jpg
T64BUILD26_zps46381510.jpg

And after a bit more work tonight this is how it looks.

T64BUILD29_zps528e709b.jpg

Thanks for checking it out!
 

Latest posts

Back
Top