Jakko
Well-Known Member
- Joined
- Oct 9, 2024
- Messages
- 822
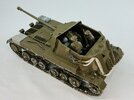
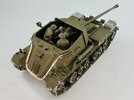
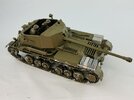
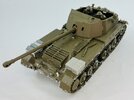
About a month and a half ago, I was at a model show for a weekend, where I bought this kit:
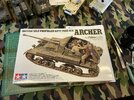
Though called Archer on the box top, and indeed by most people who know of the vehicle, the British Army never used that name for it. During the war, the Ministry of Supply had decided on the various "A" names for self-propelled artillery and used them in its correspondence etc. but the War Office actively rejected their use. To them, this vehicle was a 17-pounder SP Valentine, or a Valentine SP, or some variation on that which seems to have varied almost with the person using it.
Whatever it was called, the vehicle was developed from mid-1942 on in order to have a self-propelled 17-pounder anti-tank gun in service sooner rather than later. Because the Valentine infantry tank was reliable and in production, its hull was used but with a new fighting compartment replacing the turret and driver's compartment, with the gun firing over the engine deck rather than to the front because this resulted in a handier vehicle with a lot less overhang of the long gun barrel. All kinds of minor problems needed to be solved before it could be gotten into production, though, so it wasn't until early 1944 that the first prototypes were actually tested to see if they were suitable for the envisioned role. The first production vehicles were delivered from Vickers in May of 1944, and production continued until October 1945, by which time 655 had been built, out of the initially planned 800.

Though the backward-facing gun was a disadvantage at times, for crews it had an unexpected benefit, in that infantry commanders didn't generally view the vehicle as a "tank" — as they were likely to do with M10 SP guns, which had a turret. This meant the Valentine SPs were not often called upon to perform missions they were unsuitable for, because to the infantry, any tracked vehicle with a turret was a tank and expected to act like one.
There is a persistent misapprehension that, because of the rearward-firing gun, the driver of the Valentine SP would have to get out of his seat before firing, else he would be killed by the recoiling gun. However, the gun has a fixed recoil guard behind it, to prevent the driver from holding his head back far enough to be in the path of the gun after it fires. I'm sure new drivers would have been hesitant to stay in their seats, though
The kit
As you'll probably expect from Tamiya, this kit is very well-moulded and comes with excellent instructions (which you can view on Scalemates). It's moulded in medium green plastic with a small transparent sprue and a bit of cord to make tow cables. The kit only has link-and-length tracks, no one-piece, flexible ones, and also has three figures and markings for two vehicles: one Canadian in North-West Europe and one Polish in Italy. Not sure how accurate those are, but the colour indicated in the instructions is wrong: they say Tamiya XF-61, which is dark green, when the vehicle should be SCC 15 olive drab. I also find the crew slightly odd in that you get a commander, a loader and what's described as a gunner. But the "gunner" is standing behind the gunner's seat as if maybe he's about to climb into it, and the commander is hanging on to the outside of the vehicle as shown on the box top.
Oh, and I don't have sprue shots because I started building this at the show This is as far as I got:
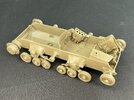
I just followed the instructions and built the lower hull and suspension. A few days later, I also installed the track on the left-hand side:
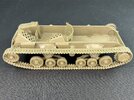
I don't normally do this, but with link-and-length tracks, fitting them before painting is about the only realistic option unless you leave the wheels loose and glue the track to those so you can take wheels-and-tracks off as a unit. I don't intend to do that, but will paint the whole lower part of the vehicle in a mud colour, removing the need to do detail painting in areas that are hard to reach with the track on. After the glue had dried, I also added the track on the other side, of course.
Here is the basic mount for the gun:
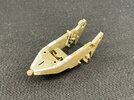
The ball joint you can see at the lower left goes into a pivot on the floor, so the whole thing can turn left or right around that.
The main part is the middle bit, to which two side plates have to be glued, but Chris Camfield's book on the Archer has a good photo that shows there were no seams like there are on the it parts, so I puttied them closed. I didn't take particular care at the bottom, because the spent shell bin will go over that.
It could use a little more work, though:
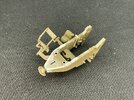
Aside from attaching the seat and controls, I also added some plastic strip, punched bolt heads and stretched sprue to replicate missing details.
On the gun, I filled the seams where the breech block goes, because I want to pose it open:
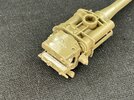
I also filled the two holes for locating pins in the side of the breech, one for the protective shield and one for the top of the breech operating lever — but I think I'll have to open the latter up again because I suspect it always returned to the vertical after use automatically. In any case, I filled the other hole because you can see the locating pin between the shield and the breech, when there wasn't one IRL, so I will cut it away.
There were also ejector pin markings to fill on the side armour and gun shield:
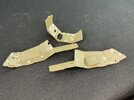
Here's the finished gun:
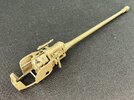
I cut away a locating pin for the guard on the right, because it would block the breech opening lever from working. I also cut away the bar underneath that connects the left and right guards, because it was moulded half on one side and half on the other, which would have given a join in the middle. Replacing it by some 1 mm plastic rod easily avoids that.
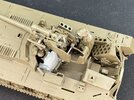
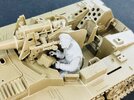
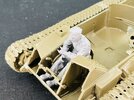
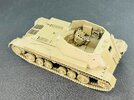
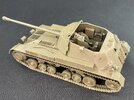
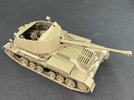
And now we're making real progress:
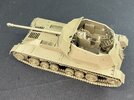
… or are we?
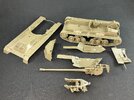
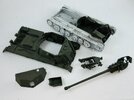
This is what's actually in the previous photo: everything is still loose. I will build the superstructure on the upper hull half, without the gun mounting, gun and shield, so I can paint inside and out in one go. The interior will have the same colour as the exterior, so I don't feel like painting it first, then fitting the gun etc. in, masking the open top, and then painting the outside if I can also do pretty much the same work without the masking and in one go for painting.

Though called Archer on the box top, and indeed by most people who know of the vehicle, the British Army never used that name for it. During the war, the Ministry of Supply had decided on the various "A" names for self-propelled artillery and used them in its correspondence etc. but the War Office actively rejected their use. To them, this vehicle was a 17-pounder SP Valentine, or a Valentine SP, or some variation on that which seems to have varied almost with the person using it.
Whatever it was called, the vehicle was developed from mid-1942 on in order to have a self-propelled 17-pounder anti-tank gun in service sooner rather than later. Because the Valentine infantry tank was reliable and in production, its hull was used but with a new fighting compartment replacing the turret and driver's compartment, with the gun firing over the engine deck rather than to the front because this resulted in a handier vehicle with a lot less overhang of the long gun barrel. All kinds of minor problems needed to be solved before it could be gotten into production, though, so it wasn't until early 1944 that the first prototypes were actually tested to see if they were suitable for the envisioned role. The first production vehicles were delivered from Vickers in May of 1944, and production continued until October 1945, by which time 655 had been built, out of the initially planned 800.

Though the backward-facing gun was a disadvantage at times, for crews it had an unexpected benefit, in that infantry commanders didn't generally view the vehicle as a "tank" — as they were likely to do with M10 SP guns, which had a turret. This meant the Valentine SPs were not often called upon to perform missions they were unsuitable for, because to the infantry, any tracked vehicle with a turret was a tank and expected to act like one.
There is a persistent misapprehension that, because of the rearward-firing gun, the driver of the Valentine SP would have to get out of his seat before firing, else he would be killed by the recoiling gun. However, the gun has a fixed recoil guard behind it, to prevent the driver from holding his head back far enough to be in the path of the gun after it fires. I'm sure new drivers would have been hesitant to stay in their seats, though
The kit
As you'll probably expect from Tamiya, this kit is very well-moulded and comes with excellent instructions (which you can view on Scalemates). It's moulded in medium green plastic with a small transparent sprue and a bit of cord to make tow cables. The kit only has link-and-length tracks, no one-piece, flexible ones, and also has three figures and markings for two vehicles: one Canadian in North-West Europe and one Polish in Italy. Not sure how accurate those are, but the colour indicated in the instructions is wrong: they say Tamiya XF-61, which is dark green, when the vehicle should be SCC 15 olive drab. I also find the crew slightly odd in that you get a commander, a loader and what's described as a gunner. But the "gunner" is standing behind the gunner's seat as if maybe he's about to climb into it, and the commander is hanging on to the outside of the vehicle as shown on the box top.
Oh, and I don't have sprue shots because I started building this at the show

I just followed the instructions and built the lower hull and suspension. A few days later, I also installed the track on the left-hand side:

I don't normally do this, but with link-and-length tracks, fitting them before painting is about the only realistic option unless you leave the wheels loose and glue the track to those so you can take wheels-and-tracks off as a unit. I don't intend to do that, but will paint the whole lower part of the vehicle in a mud colour, removing the need to do detail painting in areas that are hard to reach with the track on. After the glue had dried, I also added the track on the other side, of course.
Here is the basic mount for the gun:

The ball joint you can see at the lower left goes into a pivot on the floor, so the whole thing can turn left or right around that.
The main part is the middle bit, to which two side plates have to be glued, but Chris Camfield's book on the Archer has a good photo that shows there were no seams like there are on the it parts, so I puttied them closed. I didn't take particular care at the bottom, because the spent shell bin will go over that.
It could use a little more work, though:

Aside from attaching the seat and controls, I also added some plastic strip, punched bolt heads and stretched sprue to replicate missing details.
On the gun, I filled the seams where the breech block goes, because I want to pose it open:

I also filled the two holes for locating pins in the side of the breech, one for the protective shield and one for the top of the breech operating lever — but I think I'll have to open the latter up again because I suspect it always returned to the vertical after use automatically. In any case, I filled the other hole because you can see the locating pin between the shield and the breech, when there wasn't one IRL, so I will cut it away.
There were also ejector pin markings to fill on the side armour and gun shield:

Here's the finished gun:

I cut away a locating pin for the guard on the right, because it would block the breech opening lever from working. I also cut away the bar underneath that connects the left and right guards, because it was moulded half on one side and half on the other, which would have given a join in the middle. Replacing it by some 1 mm plastic rod easily avoids that.
And now we're making real progress:

… or are we?

This is what's actually in the previous photo: everything is still loose. I will build the superstructure on the upper hull half, without the gun mounting, gun and shield, so I can paint inside and out in one go. The interior will have the same colour as the exterior, so I don't feel like painting it first, then fitting the gun etc. in, masking the open top, and then painting the outside if I can also do pretty much the same work without the masking and in one go for painting.

