A Little Honey

rookie

This is not a toy
Joined
May 18, 2012
Messages
937
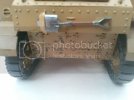
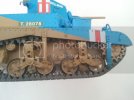
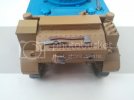
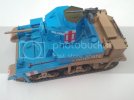
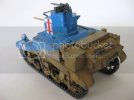
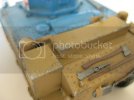
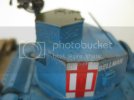
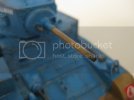
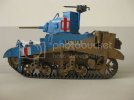
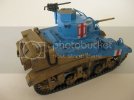
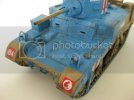
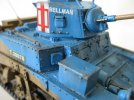
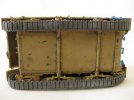
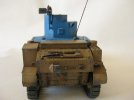
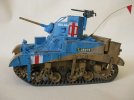
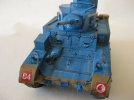
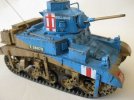
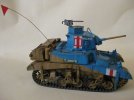
Here is a cool little kit, Academys M3 Stuart Honey. This was the 3rd kit I built and first with totaly using the airbrush. As you can see I had not heard of preshading at this time and didnt dare mix any colours, as a result the Blue is to "Blue " for my liking. I did try some salt chipping though and it came out pretty good.

My plan is to try and resurect this with some weathering and maybeeee put it on some kind of diorama base.

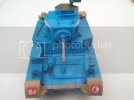
Any suggestions on how to try and tone down that blue would be good, I was thinking a heavy wash with white oil piant ? I dont realy want to go down the path of remasking and respraying... :(
2012-10-06171411.jpg
2012-10-06171324.jpg
2012-10-06171258.jpg
2012-10-06171237.jpg
2012-10-06171220.jpg

Thanks for looking 8)
 
Hey rookie this Little Honey is really nice!

Nice work on the construction, base painting and the chipping.

Before moving on to your washs/filters you might what to add more chipping...but not to much as this can be over done...LESS IS MORE!! I suggest using the sponge method. The following web site provides an advance method for chipping. follow this link Chipping With Depth What I want you to take away from this is the sponge that is being used. You will apply the chipping paint like dry brushing, meaning you will reomove almost all of the paint form the sponge before applying it to your model...Practice this on an old throwaway kit or some old plastic

Actually as for the "BLUE" it is still workable (I most likely would have done the something)...so here is my advice...

1) Practice this on an old throwaway kit or some old plastic. Paint this the same color blue that is on your HONEY.

2) The finial color I would try for would be more on the gray side with blue in it. If you use a white wash/filter it will really make it too light and more blue the gray.

3) Make up a wash/filter with your favorite gray paint, even oil paint would work here if you feel like giving them a try. To make your wash/filters mix (Washes are 75% Thinner and 25% Color) (Filters are 90% Thinner and 10% Color)

4) Since you are trying to tone down the Blue I suggest a Filter. Apply this to all the blue area. What is really Kool about filters is you can apply them in as many coats/layers as needed to get the results you want. (BTW you can also make a filter for the Brown areas too, just use a darker brown as you color). The difference between the Wash and Filter is that with the filter you are changing the color of your paint as with a wash you are highlighting details.

Remember to Practice this first so that you get the idea of how the filter will flow. Also if you do use oil paint it will take a bit longer to dry.

Lastly if you have any questions or problems PLEASE ask we are here to help and really want to see you succeed. This is a Kool kick butt HONEY you got here so keep at it!!! ;D
 
looks a quality little build bud..and go with errains sound advice you cant go wrong and if you do its all part of the learning curve just have'a the fun
 
Hey Rookie
The chipping you have attempted looks quite good! Just think logically as to where it would wear the most, as in highly trafficked areas and exposed edges. I agree the blue is strong but can be toned down. On the rear, the tool brackets should be the colour of the tank itself. Picture the tools removed, and it makes sense that the remaining bracket is painted so. You have done it for the shovel, but it should also be applied to the mattock head, handle and axe. I'm not sure the kit has the detail to make it more apparent, but on a tank this size, some additional straps would make it look great :)

Brad
 
Rookie;
Honeycut is spot on about thinking logically as to where you place chips so give it a bit of thought before you do. Also regarding the sponge method this will make what looks like worn/rubed off paint which "I" think is a bit more realistic. The end result will not be the same as that on the Chipping With Depth link I provided. Just wanted to let you know it will look different and not to freak out about it. ;)

A little model Philosophy if I may.....This is only a hobby and the only person you need to make happy is you, not everybody else. The are thousands upon thousands of ways to achieve the different effects you see on models and they are all correct if they work for YOU! Have fun and do what you are comfortable with...and did I say HAVE FUN!!!

One quick question for honeycut...
Is this the same honeycut from armorama...if so welcome to SMA!! I hope you enjoy this site as well its a BLAST! :D
 
Thanks for the advice and the links.
I will go ahead and try a filter to tone down the blue and give the sponge chipping method a go.

Cheers ;D
 
yep that's blue alright, but not a big loss, just a starting point. As has been suggested try a filter to tone it down. Apply several light filters being sure to let each dry completely so as not to ruin the previous filter. using oils you can do your dark shading and highlights. Then do pin washes. Once these steps are done there will be a huge difference in the color. Also the weathering will tone it down some more ie; dust colored wash and or pigments. Once you get the model dusty, as with the rel tank, it will all be toned down a lot.
 
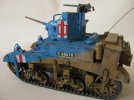
Played around with this over the last few days. Tried out a white filter which worked ok to tone down the blue.

Used the sponge method to get some chips (mmmmm chips ) ;D

Liked the result so thanks to all who posted advice and comments..

001.jpg
003-Copy.jpg
012-Copy.jpg
011-Copy.jpg
009-Copy.jpg
006-Copy.jpg
004-Copy.jpg

Got my Mojo back with this project... 8) still have some more work to do with more washes and filters but its looking 100% better than it was.
As always thanks for looking, comments and critiques welcome :)
 
Very unusual paint scheme-it really catches the eye.
I had a question that is unique about this paint scheme. There really is not a base color becase the blue and tan are about half and half. Should he use the same filter for the blue as for the tan, or try and go half and half on this?
 
i dont see the tactical advantage of this color scheme (in terms of camouflage) but its an interesting subject nonetheless! great work!
 
Hey Rookie sorry I didn't get back sooner to you on this. Your chipping looks really good there buddy. I think you have the basic idea behind the method. Just wondering if you got any new updates since the 15th of OCT?
 
Thanks for the comments guys.

Ken - no progress on anything in the last few weeks, got a new job and have spent alot of time traveling. Hope to spend some time on the bench this weekend...
 
Ok think I'm done with this.... :p

Played around with oils last night, not sure what else I can do with it.

8191780449_603dc8cd99.jpg
008 by

8191782033_b09b50145b.jpg
007 by

8191783727_cc2c87011e.jpg
006 by

8192872700_d20c454621.jpg
005 by

8192874336_cb04b8e8b9.jpg
004 by

8191788849_26f7b0dae6.jpg
003 by

8191790301_3c3d99e680.jpg
002 by

8192879200_37542d725c.jpg
001 by

Actualy looking at those pics , the tracks could do with some weathering, they are the viynl type, any suggestions ?

I cant imagine any kind of paint sticking to it very well.

AS always thanks for looking, critique and comments welcome ! ;)
 
BAM!!!

That looks totally awesome Rookie! you have gone a great job on this. I think you could even add a couple more layers of gray-ish filter over the blue and still look great. Your chipping look good here as well. One other suggestion is to go back and do a dark pin wash over the blue areas as well to help pull out the details.

Either way this really, really look AWESOME
 

Latest posts

Back
Top