Airfix Spitfire Mk.1a 1/72

longlance67

cry havoc and let slip the dogs of war -shakespear
Joined
Sep 21, 2011
Messages
656
P1100185.jpg

Hi all, picked this up yesterday ;D

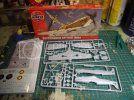
so continuing my Airfix drive (i have three more kits to build after this ;)) i went for their all new Spitfire mk.1 and i must say you wont be dissapointed with the detail for the such a reasonable pirce !
cracking open the box you'll find two medium grey sprues (including a nice cockpit), a clear spure and a small but busy decal sheet.......and all for 8euro bargin !!! ;D

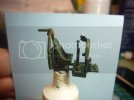
Starting with the cockpit which is a little basic but in my opinion more than enough for most modelers out there unless you feel like a spot of super detailing of course :p.
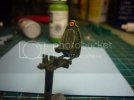
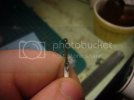
After priming the interior flat black, i coated the tub vallejo German Uniform 70920 followed with a wash of brunt umber.
P1100192.jpg

P1100190.jpg

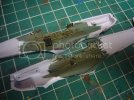
i then highlighted the raised areas with middlestone 70882 and a few scratches were also applied with a fine brush too
P1100187.jpg

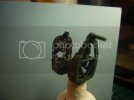
the gunsights got a coat of light sea grey and were highlighted with a little white to get a reflection effect
P1100199.jpg

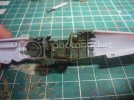
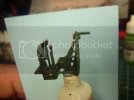
mounting the tub into the fuselarge was a little tricky and id recommend plenty of drykitting to get the fit spot on.
P1100201.jpg

P1100202.jpg

P1100211.jpg


next up is joining the halfs which will be done tomorrow ;D


cheer


shane
 
Hi Shane, great kit you got there!!! looking forward for your build. :)
 
Cheers buddy !!,

gonna go chech on it in a few hours and bit more it ;D
 
Not hanging about Shane huh :eek: Thats a nice little Spit ,I didnt realize they had a decent cockpit in the 1/72 scale !! You've made a fine job of it too ;)

Chris.
 
Chris S said:
Not hanging about Shane huh :eek: Thats a nice little Spit ,I didnt realize they had a decent cockpit in the 1/72 scale !! You've made a fine job of it too ;)

Chris.


you know me now, no hanging about ;)

its a nice little kit and good details for a great price


cheers


shane
 
Hi


sorry for the lack of activity of late, been a little busy with coursework for college, a lot of assaignments were due this week :-X........so busy busy busy :-[


but not to worry been sneaking a few hours on the bench ;)............very sneaky :p

the beauty of this kit, is the low part count means ultra quick building time.....so we can get down to the fun and mildly scarey part.....painting and weathering :)


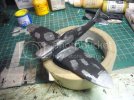
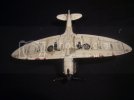
For the spit i intended to go for a very worn and battered machine from weeks of constant fighting. Always keen to try new weathering methods i first undercoated it in flat black. Once set i added spots of oily steel to areas of the plane that would receive a lot of wear

P1100218.jpg

then with a small peice of sponge i dabbed the model randomly with liquid mask and allow it dry fully before adding the camo scheme


plenty more updates to follow,

if anyone has a few good methods for doing exhaust stains please share as im looking for a good way to pull them off


cheers


shane
 
Quaralane said:
Interesting idea. I like it

cheers buddy i hope it works well, as the idea as i see it is fairly close to real weathering as the top layer of paint is being romoved exposing the material beneath....well thats the idea anyway :p

f2k said:
Looks very interesting. How did you mask the cockpit?

i use newtons & winsors liquid mask, you can get in one shape or form in most art supply shops mate

hopes this helps


shane
 
Interesting technique Shane ! look forward to how it works out . For exhaust stains you can use Pigments or ground pastels ,simply brush them on where the stain would be ,try to use dark brown rather than black and there is usually a lighter colour on top too ,kinda like a buff colour ;)

Chris.
 
Thanks very much for that Chris, was thinking hard how to pull of stains, that at least one headache resovled ;)


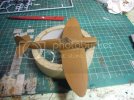
Moving on to another headache (a fun headache that is :p )............the camo scheme, the opted to put down the brown tone first, then mask it off and add the green areas later. Looking at the reference material, which has a few good photos of restored Spits in the two tone camo scheme. I noticed that the brown tone seemed to be glossy earth, i felt this would appear a little dull in 72 scale so i made a lighter mix of flat earth and light earth to get a lighter shade which i felt would look much better

P1100224.jpg


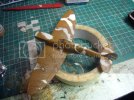
then it came the time to lay the maskes, used masking fluid as my tami masking tape is all out, i applied it using an old paint which i had to throw out after use

P1100225.jpg


once set ill fill in the green areas,


till then gents


shane
 
Howdie Gents,

firstly I want to wish you all a very happy Chirstmas and good health for 2012

Luckly the dreaded freeze that was coldest on record last year didnt befall us here ;D which is great as modelling in a shed in -10 isnt nice :-\

the spit is coming along very nicely, just added and sealed the decals and have begun the weathering process which started with applying MIG's shadow brown oil to the panel lines to pick them out


will have photo updates up soon


shane
 
Hi Shane ,Meery Christamas to you too buddy ;) Brown looks good ,it will darken a bit with the panel wash anyway , try using Blu Tak for masking your camo next time ,its a lot easier and less mess ,it will give you a slighty feathered edge too ;)

Chris.
 
Chris S said:
Hi Shane ,Meery Christamas to you too buddy ;) Brown looks good ,it will darken a bit with the panel wash anyway , try using Blu Tak for masking your camo next time ,its a lot easier and less mess ,it will give you a slighty feathered edge too ;)

Chris.

A very merry Chirstmas to you Chris :)

ive used blu-tac a couple of times in the past and got good results with it, just didnt have any blu-tak at the time of this build :(

the camo scheme came out very well and decals really bring out the character of this epic little fighter (pic up soon)

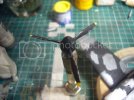
spent the yesterday evening working on the props and spinner and weathering them up, im really happy how they came out ;D

P1100220.jpg


cheers


shane.
 
Everything turning out nicely. Great weathering on that cockpit and that finish is going to look sweet.
Happy Christmas
 
- Quaralane, cheers for the kind words

- Myke, cheers buddy


merry chirstmas all


shane
 
Hi all,

Hope you all had a great new years ;)


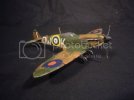
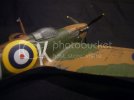
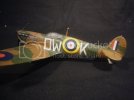
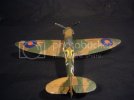
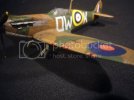
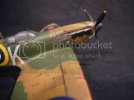
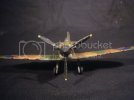
Have some good news finished the Spitfire over the break and just finished taking photos of finished model enjoy:

P1100262.jpg

P1100265.jpg

P1100276.jpg

P1100272.jpg

P1100290.jpg

P1100291.jpg

P1100277.jpg

P1100289.jpg


Cheers for all your comments gents


shane
 

Latest posts

Back
Top