AMT 1970 Corvette LT-1-Completed

mustang1989

Active Member
Joined
Aug 6, 2022
Messages
114
I'm still waiting on some things that are necessary to proceed with another ongoing build and I'm tired of not being able to be at the bench SOOOOO.......

I'm breaking out of the slump with a car that I've wanted to build for a very long time. A late 60's / early 70's Vette. This kit has a few pitfalls that affect the stance and wheel/ tire position but there are corrections that can be made and I'll be pointing those out. I'll be painting this one Brockhampton Blue and we'll be retaining the LT-1 350 small block for the car. The only external changes that'll be made are to the stance and wheel locations and I'll be going with BF-Goodrich T/A radials.

With that being said.....LET'S GO!!!


X1CoXJ.jpg
 
Last edited:
Got the long block assembled and all parts cleaned up for black basing and we'll start shooting color on these pieces after that. We'll be going with Bridgehampton Blue from MCW for the color on this one.

EAcGDq.jpg
 
I started the engine painting process by black basing everything. For me it's easier to go dark to lighter shades than it is light to darker shades. Plus there's some shadowing effects that can be carried out on the engine block and heads this way and it also makes a good base for the aluminum and steel colored parts to bring out more realism in the metal effects.

ukeHvC.jpg
 
I just bought this model. Haven't built a car since childhood. (I prefer aircraft and ships). Why did you paint the oil pan and intake manifold separate, and not glue them on the block first?
Won't they both be the same color as the block?
 
I just bought this model. Haven't built a car since childhood. (I prefer aircraft and ships). Why did you paint the oil pan and intake manifold separate, and not glue them on the block first?
Won't they both be the same color as the block?
Thanks for the response bud and I had forgotten that I posted this build here so thank you for the reminder. The oil pan is the same color as the block and you're probably right. I could get by with assembling the completed long block and painting up the whole thing. The intake.....well... that gets a little different treatment. That gets painted up using aluminum color and then a ever so slight dry brushing of ground up black pastel. Exhaust manifolds get painted with steel and get a heavier dry brushing of the ground up black pastel. I've actually got this build mostly completed after dang near 9 months of building.
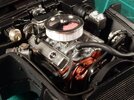
Completed engine bay:

2023-12-01 003.JPG
 
Wow! That looks quite realistic! Nice work...the heater hoses etc., are they scraps of wire? or some kind of custom parts?
 
Jeez guys. Sorry about the lack of posting on this one for the past.........year??!! I've finished this one but I'll post the highlights of the build in any case.
 
Ok......lets take off from here....

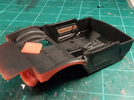
I decided to open the battery compartment up behind the drivers seat and have painted a battery all up and detailed it already. I'll be cutting the drivers seat to display it in the forward position to allow visibility back to the battery compartment in the coming updates. I've started on both door panels by painting the wood grain paneling & outlining the chrome strips on the panel as well as installing PE window crank handles.

1731966871728.png

The comfort weave pattern in the center of the seats is actually matte in appearance so I masked off and replicated the look. I also cut the drivers seat in half and put it back together like it is now to display it folded forward as to give a better view to the battery box behind the seat. OOB shifter is now installed after reworking and trimming it up to keep it from looking like a blob sticking out of the console and making it a bit more defined.


I also installed the PE door handles and picked out the details on the center console around the shifter as well. Battery is all painted up and detailed and this mock up shows what I've been building towards for the past few weeks. I may go back and paint the interior of the battery box area semi gloss black to add contrast between the interior and the compartment for added interest.

 
Primed and painted the steering column and installed the ignition switch and keys. I also installed the turn signal lever on the L/H side of the column.


R5FCuO.jpg


The dash is pretty much finished up. Couldn't help upgrading to at least a CD player. I'm gonna have to order a set of floor mats to top everything off for the interior but aside from that......we'll be moving on to the chassis as far as build up and proper set up goes now.....


hF5G3k.jpg
 
Dash in place. Almost forgot one of the most important things in this interior and something that I was preparing for when I first started this part of the build........the foot pedals. I fabbed up a swing pedal base and drilled three holes through the base to insert the three needles necessary for the pedal levers. Then I painted the levers a semi gloss black and installed the painted and detailed foot pedals to the levers.
The results turned out A LOT better than the pedals that were molded into the floor to start with.
ORSAY9.gif


Y5zVlN.jpg
 
What you're seeing here is anything but a boring black suspension. There are 3 different shades of that color along with some other similar but different colors splashed here and there. At this point I still had to put the brakes and wheel backs on, install the crossmember and exhaust system and apply black BMF to the fuel tank retaining straps.

8yZAqH.jpg


The following picture is just before the exhaust install, application of black BMF over the fuel tank retaining straps and toning the crossmember down to a semi-gloss finish.

Qx1YP4.jpg


Managed to clean the exhaust pipes up of all mold lines and paint them up. Mufflers were treated to a Matte Aluminum BMF. I mocked up a spare engine and set it in place with the chassis upside down to give me an idea of where to position the exhaust and once positioned, installed the crossmember and glued everything into place. Here is with Black BMF applied onto the fuel pump retaining straps and is pretty much complete save for the exhaust tips installation which will happen once the body is installed permanently over the chassis/ interior module.

7coYJX.jpg


rIahX8.jpg
 
Engine fitted and installed into frame.......


Some color on the body......


I noticed that the engine was in the bay at a weird angle so I took some time to straighten everything up as well as to get the heater hoses formed and installed. I managed to make some heater hose clamps too.


As with all detailed builds....a guy has to know when to call it and this is where I "called it". There were a couple more things that I could have added but how far does a guy go?

In any case....this part is completed.


Car body with BMF applied and the gloss coat only at this stage. Still got the polishing to go.....


The wheels and tires on this kit were a LOT of "fun" Wheel backs had to be sanded down to dang near nuthin' and I ended up "ovaling" the holes in the wheel backs as well to help put the stance on this car where it belonged. BF Goodrich lettering is decals and I shot a light coat of dull coat over the tires / cals to help blend them in to the tire a little.

Bw6bPd.jpg


I decided to use a spare tool set that I had laying around to put next to the battery compartment and made a red rag from red tissue paper that I waded up to get the wrinkle effect of a red rag. Here's the rag before wrinkling and the tool set before painting and detailing.....


And after. Note.....The emergency brake handle was originally molded in to the interior and looked just awful. I cut the molded in handle assy out and used a straight pin with some electrical wire insulation to fabricate a proper looking handle.


Wheels and tires finished and all mocked up to have a rolling chassis dry run....

 
Down to the short list now folks and thank you for all of the "likes" and comments so far.

1. Paint bottom of hood


2. Chrome front and rear bumpers and detail out the front one.


3. Paint all side marker lenses


4. Install the outside rearview mirror


5. Detail and install all emblems and badging

I now have the stance exactly where I want it. Lemme tell ya.....it took some fancy foot work to pull this off because despite all of my test fitting along the way, things did NOT want to go according to plan. This is the last update before the completed shots are posted gang.


Okeedokee folks. We're calling this one......done!!

When I started this project, I knew that this kit was a somewhat problematic build as far as getting the stance right. I spent a good amount of time in the planning phases, building up a complete unpainted model of it to help with the positioning of the wheels & tires relative to the wheel openings as well as getting all the mods necessary for pulling off the correct stance. All of that paid off in the fact that the stance came out exactly how I wanted it on the "real" build.

Starting with the engine I detailed it out as much as I could get by with using the OOB base engine and then working from there with some aftermarket and scratch-built items. I also didn't like the molded in details on the engine bay sides so I sanded all of that off and fabricated vacuum and electrical harnesses to replace that with.

When it came to the interior, I wanted to jog things up a bit by displaying the driver's seat back in the forward position and opening up the battery compartment and displaying a set of tools necessary to remove a battery with. Tool kit was from spares along with the PE wrench. Red rag was fabricated from red tissue paper and given "the treatment". Some other areas that got some "lovin" was the replacement of the molded in park brake handle with an actual handle made from a needle and some electrical wire insulation for the handle, the replacement of the stock radio with a CD player, and the addition of foot pedals. The whole OOB toe board with the foot pedals molded in were removed and PE parts and fabricated swing levers were swapped in. Instrument panel faces were drilled out and decals placed on plastic backings were installed from the rear of the dash to create a more convincing IP. The steering column and steering wheel ring are the only OOB parts used on that part of the interior. An AM steering wheel, ignition lock cylinder face and ignition keys were used from the Model Car Garage PE set for this car. The door panels were upgraded by adding PE window crank and door handles (that were modified to look a little more convincing). OOB shifter was cleaned up (A LOT) and utilized and shifter plate details picked out with a Prismacolor Silver Lead pencil. Battery compartment lid bottom saw the addition of scratch built latches, retaining straps with PE screws and fasteners. Battery was taken from spare parts I had laying around.


I was going to use some AM Bf Goodrich T/A radials, but they proved to be GROSSLY big for this car, so the OOB tires were used with Bf Goodrich T/A Radial decals that I had and I picked the details out on the OOB wheels and used those. Color is Bridgehampton Blue from MCW with Testors Wet Look Clear that was decanted from the can and shot through the airbrush. I know it's not a factory shine on the car, but I just couldn't help but to make this car shine and Wet Look does a great job of that. PE scripts from the Model Car Garage set was used for the emblems.

Thank you all who either dropped in on this build, commented or posted a "Like" to this build. Here is the results of a lot of hard work on this car.


eWdJqh.jpg


WDevEA.jpg


b1AqoU.jpg


IcqbVK.jpg


xu0iXZ.jpg


7VZgOw.jpg


h8hqx6.jpg


1aPIZd.jpg


YVpiph.jpg


fQGr8e.jpg


XnS8bk.jpg


Y5zVlN.jpg
 
Last edited:
Back
Top