mustang1989
Active Member
- Joined
- Aug 6, 2022
- Messages
- 153
Well folks, I've got this one finished up after almost 6 months. This is not my usual automotive area as I normally build classic cars and trucks, however, a good friend of mine was set to retire late last year and owns one of these cars & I wanted to build one for him.
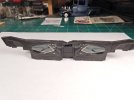
AMT just so happens to have this very car in kit form, so I bought one. Upon opening the kit and going over the instructions I could not believe the amount of detail that AMT put into this model. Engine detail was better than most other models out there and the interior had a lot as well. What caught my eye was the number of parts and attention given to the suspension. This not only stuck out to me on the instruction sheet but during the build as well. There are nearly 50 parts to the suspension/ undercarriage with most of those dedicated to the intricate rear suspension. Just beautiful.
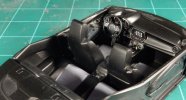
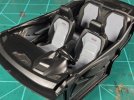
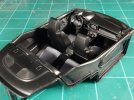
The good points on this build are, as mentioned, the chassis, engine and engine bay and the interior are well thought out and detailed. The chassis required a lot of tedious building but is very rewarding when finished. Engine assembly and installation was straight forward as the interior. One thing that I got hung up on with the interior was the two-tone colors of the seats and how to replicate them. I chose grey decals that I ended up making templates for, cutting out and applying.
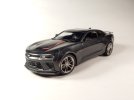
Areas of frustration with the kit were the headlight lenses with locator pins on each side which results in a very unconvincing look. I cut both locator pins off but then found out that the headlight lenses were very thick causing them to give the front end a bug-eyed look when fitted. After thinning the OOB lenses and trimming I found that on installation the lenses didn't fill the headlight cavity sufficiently sooooo......I had to source another pair of lenses.... and completely remove the headlight buckets from the nose. After that I shot a coat of black over the lenses and coated that with a good coat of Testors Wet Look Clear shot through an airbrush. THAT....gave me the look that I was hoping for and the headlight lenses sat recessed in the headlight cavities giving a much more convincing look.
Before the correction. You can see what I'm talking about with the lenses.
Another area of concern is fitting the chassis/ interior into the body. I had to trim the leading edge of the dash all the way across the width of the dash. I also had to trim back the leading edge of the windshield because it contacted the dash and then repaint the inside black so as not to have blemishes along the bottom of the windshield. The exhaust tips are shown to be installed at the very start of the build. I saved this for the very end of the build so I could get the spacing correct.
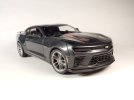
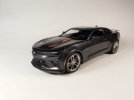
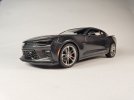
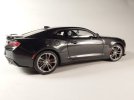
This was a fun model to put together and was very rewarding at the end aside from a couple of kit shortcomings. I used Gravity Colors Nightfall Grey for the body color and Testors Wet Look Gloss Clear dispensed and shot through an airbrush. This is a mostly OOB build save for the rear license plate which carries the personalized tag that my friend has on his car. Other liberties that were taken by me was to lower the car all the way around by a scale 1" all the way around and display the driver's window in the down position by removing that part of the glass assembly.
The finished product.....with the corrected lenses.


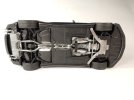
AMT just so happens to have this very car in kit form, so I bought one. Upon opening the kit and going over the instructions I could not believe the amount of detail that AMT put into this model. Engine detail was better than most other models out there and the interior had a lot as well. What caught my eye was the number of parts and attention given to the suspension. This not only stuck out to me on the instruction sheet but during the build as well. There are nearly 50 parts to the suspension/ undercarriage with most of those dedicated to the intricate rear suspension. Just beautiful.
The good points on this build are, as mentioned, the chassis, engine and engine bay and the interior are well thought out and detailed. The chassis required a lot of tedious building but is very rewarding when finished. Engine assembly and installation was straight forward as the interior. One thing that I got hung up on with the interior was the two-tone colors of the seats and how to replicate them. I chose grey decals that I ended up making templates for, cutting out and applying.
Areas of frustration with the kit were the headlight lenses with locator pins on each side which results in a very unconvincing look. I cut both locator pins off but then found out that the headlight lenses were very thick causing them to give the front end a bug-eyed look when fitted. After thinning the OOB lenses and trimming I found that on installation the lenses didn't fill the headlight cavity sufficiently sooooo......I had to source another pair of lenses.... and completely remove the headlight buckets from the nose. After that I shot a coat of black over the lenses and coated that with a good coat of Testors Wet Look Clear shot through an airbrush. THAT....gave me the look that I was hoping for and the headlight lenses sat recessed in the headlight cavities giving a much more convincing look.
Before the correction. You can see what I'm talking about with the lenses.

Another area of concern is fitting the chassis/ interior into the body. I had to trim the leading edge of the dash all the way across the width of the dash. I also had to trim back the leading edge of the windshield because it contacted the dash and then repaint the inside black so as not to have blemishes along the bottom of the windshield. The exhaust tips are shown to be installed at the very start of the build. I saved this for the very end of the build so I could get the spacing correct.
This was a fun model to put together and was very rewarding at the end aside from a couple of kit shortcomings. I used Gravity Colors Nightfall Grey for the body color and Testors Wet Look Gloss Clear dispensed and shot through an airbrush. This is a mostly OOB build save for the rear license plate which carries the personalized tag that my friend has on his car. Other liberties that were taken by me was to lower the car all the way around by a scale 1" all the way around and display the driver's window in the down position by removing that part of the glass assembly.
The finished product.....with the corrected lenses.


