First there was a kit...


Then, you had the sprues... And kit parts talked "let's the game begin !".

All this is a matter of how to deal with the various kit parts. You need in general plan, an idea, a concept. Here, what you want to do is obtain a Starship with a long nose, a single man cockpit, small wings and a big rear parts, 3 engines at least, that will give it a dynamic look. To obtain that, it could be better to cut (I love to use my photo-etched saw, it's better than a dremel, more precise, it's a fast process...) the bigger parts here, and use some glue (I try to do all my kitbashes with the same kind of platic so I'll need only modeler cement).


You can see here that my first objective is to obtain a long nose. The cockpit is used as is, the rear section has been cut with the right length and the nose is done with sprues, and some gears parts.

Adding the wings, you already have a general pattern here...

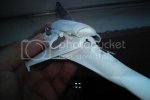
Adding the engine section, you can see the almost final look of your starship. The engine is formed with the cut section of the YF-16 hull. I used also the parts of the air entry of the F-16. The kit parts presents several segments, very useful here. There's some option parts, some kit parts from other models but essentially you have the 1/72 YF-16 from hasegawa here. All in white it's already a beauty. This work was done in one night. First steps can be a quick process...


The very next day some sprues parts were added to give it a Viper look, plus some wiresfrom an old race car model kit (from the 70's). The thrusters are kinda identical, can't remember if there was optionnal thrusters, but that's sometime a good way to have various parts to use on a kitbash project. All in all, I've got several options for thrusters, a lot of donor kits, some bottle caps... The upper wing is from another kit, allright, but really can't tell you from what. The Viper Dolphin is almost done here. The next phase will be the detailing.


The nose had received very little amount of putty (white, the best, fine and easy to use with a wood spoon, you can save a lot of matter, of sanding... Time and money guys !). The edge is a detail from a Gundam kit, most certainly the Strike Gundam no grade 1/100. Up is a part from a gun-rifle form a 1/72 Valkyrie, chromed for the 15th anniversary, from Bandai. The parts merged perfectly. It seems


The air entry are done, as I said, with only the YF-16 kit parts. The interior though are option parts (Kotobukiya, Wave, can't really tell you what...), very useful for this kind of detailing.


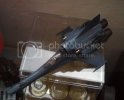
Paint it black, it's a primer color, not a definitive one. But going from white to black is kinda stranger.


Here the model is placed in the original model kit box, you can judge for yourself the scale, and proportion of this humble kitbash.

I masked the Canopy to paint and paint the hull a beautiful blue color... Kinda like the color of the Viper Mk VII don't you think ? The result is shown on the top subject. Nothing has evolved so far since I used this model for various exhibitions, with a WIP logic in it... I really have "only" some decision to make concerning the final color or markings...


