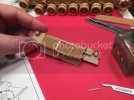
ARMOR - Academy 1/35 M1A1

UncleDredd

New Member
Joined
May 9, 2011
Messages
30
Hey everyone... so I watch the vids on YouTube, and I've lurked the forums in the past, but this will actually be my first attempt at building a scale model (I'm more of a wargamer, so the stuff I've done to-date is small (1/100th) and simple). Went to Hobby Lobby today and found this on the shelves:
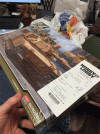
modelproof_zpsge7cqvwn.gif

Figured I'd use my 40% off coupon and try it out! Researching more about the tank and about this specific kit this weekend. Already seeing that maybe the tracks can be replaced with something called bigfoot kit... can you tell I'm new at this?

Wish me luck!
 
Nice. Good luck! I jump between wargaming and model building.

The one thing about military kits is there is an aftermarket resin or photo etch kit for nearly everything. Metal tracks, metals gun, resin turret upgrades, it just goes and goes. In sure someone makes more accurate rivets for the kit as well.

The hyper accuracy is cool if that's your thing. But going down that hole can add a lot of time to the build. That said I'm sure some of the folks here can point you to upgrade parts that'll make your life easier. New tracks, replacement barrel.
 
Thanks, Derek; I appreciate it. It's always nice to see the cross-over between the two hobbies... since I relocated across the country last Summer (from San Diego to Atlanta), most of my wargaming fix is found through following others on Instagram. I should get out meet some of locals, I suppose. ;)

As for the extras, I think I've settled on replacing the tracks with the Bronco AB3522 kit. Assembling it'll add some extra work, but that's something I can do while watching TV with the wife or catching up on Netflix stuff. Don't think I'll do anything else outside of what's in the box.

Thanks again!
 
Put together a quick unboxing video... mostly I'll do these for me to track my progress as I go, I think.

[youtube]https://youtu.be/n6ZWAZMmD2c[/youtube]
 
Welcome to crowd. I have the same kit in my stash. I'll be watching for your progress.
 
Welcome to the heard, glade you found us. Having built those tracks, my advice would be use as little glue as possible. Looking forward to seeing your progress on this.
 
I appreciate the welcome, guys. Advice on the tracks is noted!

I made a very small amount of progress today (most of Step 1). Here's 5 minutes of me being confused:
[youtube]http://youtu.be/dGUW2qCY57w[/youtube]

I do have a quick question at the last minute of the video; if anyone is inclined to watch and let me know what you think, I'd be grateful. :)
 
UncleDredd yes sir you are correct. Clean up the edges on those raised flat areas with a sanding stick and glue them up. Not sure what glue you are using but I would suggest Tamiya extra thin cement. Clean bond with no stringy mess of the testors gel cement..

Good luck on the build! I built this kit, its a fun build!
 
Hey man, great start on those wheels. Something to keep in mind, you may want to go back and glue those road wheels together. When the instructions say no glue, they mean just the poly cap. In essence the poly cap will spin free inside the wheel. Get what I'm saying?
 
UncleDredd said:
Oooohhhhh. Ok, I get it, yeah. Makes complete sense. Thanks for that tip!

My pleasure man. Just glad to see you having fun! Keep at it, you'll be happy with the results.
 
Made a tiny bit more progress tonight, starting on Step 2. Here's my next quick vid:

[youtube]http://youtu.be/hd-o9Dyk6Ag[/youtube]

While I didn't expect to get this far tonight, it's pretty simple to this point (before the back panel work), so here we go:

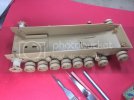
0B0D6324-E7FF-439B-99D6-2B1BF7D54023_zpsxtswuy1w.jpg

The wheels all spin pretty freely; some are more snug than others.

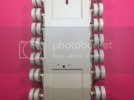
I do have one quick question for the experts here. In the pic below, should I be filling and sanding the seam around circular plug that is in the bottom of the hull?

8CAA5C29-D336-4F67-A659-277C8EF116D4_zpsrtiz2joy.jpg

It doesn't look like it is meant to represent a hatch or anything (no handles), so I thought I might ask around. Maybe it's a standard thing on models like this. (Kinda reminded me of putting a rubber plug into the bottom of a piggy bank!)

Thanks, guys.
 
Great progress so far.

I'm pretty sure that mark is from the injection moulding process and can be sanded and filled in.
 
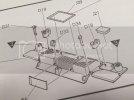
Thanks, fellas. Tried to make a little more progress on Step 2 tonight by assembling the parts on the rear panel of the lower hull. This is what I was tasked with:

D8BECDE6-0205-453E-9DAC-D24FA38D5887_zps59ynafqr.jpg

After locating the little parts on the different sprues, I cut them all out and moved my operation downstairs (to do a little work while watching TV with the wife). Here's where I started:

57EDFACD-9349-43A8-AAAA-F9070985BBBA_zpslybltmvu.jpg

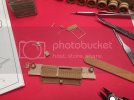
After some cleanup and some fiddling, I think I got it all together. Ran out of time to attach the panel to the hull, so I stopped at this point:

1BFAE901-8C4A-4B91-AA82-E0C14CC9A49E_zpsonry0jjx.jpg

Calling it a night. Thanks for the feedback, y'all.
 

Latest posts

Back
Top