Greets to one and all. This is my first post here. You can blame panzerace007 for telling me about this great site.
To avoid any confusion, it's P-A-S-T-E-L, not P-A-S-T-A.
Well, not quite a panzer. It's a StuG. I just couldn't think of anything lame enough to call the StuG. Anyway, I bought my eight year old son the Revell Germany 1/72 Surmgeschutz IV and helped him build it. We built it to represent the famous "StuG IV from an unknown unit, Eastern/Western Front 1944/5". There aren't any markings because they would detract from the historical accuracy in depicting this well known and and legendary vehicle.
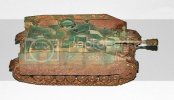
It was a straight OOB. I couldn't find an interior set or metal tracks for it. ;D My son did the construction work and I, per his request, did the painting and weathering. He wanted the model to look like the picture of tank he saw, bogged down in mud, in one of my books. "Painting" is somewhat innacurate, though. The only paint used was a basecoat of AKAN 81081 Dunkelgelb RAL 7028. The other camouflage and weathering colors were applied using Alphacolor Soft Pastel sticks.
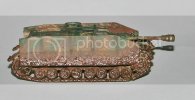
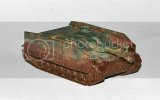
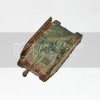
After applying the basecoat, I applied finely ground Alphacolor Soft Pastels, mixed with Polly Scale Flat Finish, in successive layers, using microbrushes.
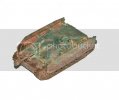
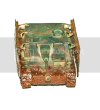
Once the camo scheme was layered on, I used the dry powder to add some depth to the pattern. Again, using microbrushes, along with 0 and 1 sable brushes, I rubbed and outlined the colors to obtain subtle variations and replicate a soft-edged appearance.
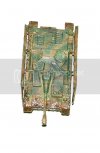
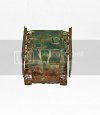
I highlighted edges on various locations with powdered grahite (pencils are like, yah, so pedestrian, man) to get a worn-to-the-skin bare metal look. I also gouged fine lines into the schurtzen with a scribe and layered orange, yellow, gray, brown and black pastel powders to simulate oxidizing scrapes. To blend and weather it all together, I lightly scrubbed different earthtone pastel powders over the schurtzen and vehicle. Using a worn toothbrush, I lightly burnished the model to create a slightly worn, semigloss finish.
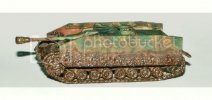
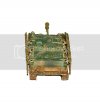
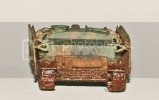
The final step was to slap on some mud onto this mini steel beast. I mixed various brown, ochre and yellow pastel powders with Model Master Acryl Gloss Finish to simulate wet, slimy mud and applied this goop to the lower areas of the hull and schurtzen. If done properly, you can get a nice, realistic sludge buildup. Once the "mud" was dry, I applied some flat finish on the area immediately above the "wet" mess to simulate a damp, drying transitional boundary.
Well, it was a welcome and interesting break fom my Trumpy KT project, which should be completed before the first scheduled manned mission to Mars. I hope that some of you might find the idea of applying alternate materials as a finishing medium useful for your own projects.
To avoid any confusion, it's P-A-S-T-E-L, not P-A-S-T-A.
Well, not quite a panzer. It's a StuG. I just couldn't think of anything lame enough to call the StuG. Anyway, I bought my eight year old son the Revell Germany 1/72 Surmgeschutz IV and helped him build it. We built it to represent the famous "StuG IV from an unknown unit, Eastern/Western Front 1944/5". There aren't any markings because they would detract from the historical accuracy in depicting this well known and and legendary vehicle.

It was a straight OOB. I couldn't find an interior set or metal tracks for it. ;D My son did the construction work and I, per his request, did the painting and weathering. He wanted the model to look like the picture of tank he saw, bogged down in mud, in one of my books. "Painting" is somewhat innacurate, though. The only paint used was a basecoat of AKAN 81081 Dunkelgelb RAL 7028. The other camouflage and weathering colors were applied using Alphacolor Soft Pastel sticks.


After applying the basecoat, I applied finely ground Alphacolor Soft Pastels, mixed with Polly Scale Flat Finish, in successive layers, using microbrushes.


Once the camo scheme was layered on, I used the dry powder to add some depth to the pattern. Again, using microbrushes, along with 0 and 1 sable brushes, I rubbed and outlined the colors to obtain subtle variations and replicate a soft-edged appearance.


I highlighted edges on various locations with powdered grahite (pencils are like, yah, so pedestrian, man) to get a worn-to-the-skin bare metal look. I also gouged fine lines into the schurtzen with a scribe and layered orange, yellow, gray, brown and black pastel powders to simulate oxidizing scrapes. To blend and weather it all together, I lightly scrubbed different earthtone pastel powders over the schurtzen and vehicle. Using a worn toothbrush, I lightly burnished the model to create a slightly worn, semigloss finish.


The final step was to slap on some mud onto this mini steel beast. I mixed various brown, ochre and yellow pastel powders with Model Master Acryl Gloss Finish to simulate wet, slimy mud and applied this goop to the lower areas of the hull and schurtzen. If done properly, you can get a nice, realistic sludge buildup. Once the "mud" was dry, I applied some flat finish on the area immediately above the "wet" mess to simulate a damp, drying transitional boundary.
Well, it was a welcome and interesting break fom my Trumpy KT project, which should be completed before the first scheduled manned mission to Mars. I hope that some of you might find the idea of applying alternate materials as a finishing medium useful for your own projects.
