Bad Grendels: The Dinorama...

Grendels

Active Member
Joined
Nov 24, 2009
Messages
9,092
  • Yep it will be in the Dinorama category:

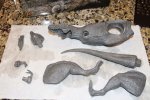
    The starting photos:
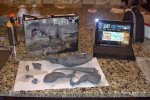
    IMG_6474.jpgIMG_6471.jpg

    And of course YouTube:

    https://youtu.be/NtXZ7xTIx9U

    Why this particular model?

    Two reasons:

    [listl]
    • I think it is the best T-rex model I have found
    • And I got to interview those that made the model at Pegasus hobbies and learned the back story about it
 
Ahhh cool man, been looking at this kit for a while, seems pretty massive, I'm sure you'll knock it out of the park.
 
John - This contest is fast becoming hard on my wallet. Helicopters, and now I want to purchase a dinosaur.

Very cool contest entry.
 
Thanks all! So far it has been fun to work with. I will have a progress update soon. The biggest challenge has been replicating the surface detail when seam filling.
 
G, I have an old abandoned T-Rex model from Jurassic Park 2: The Lost World,....styrene,....I filled all (huge) gaps with model filler & smoothed the joints down.

Then I scraped wrinkles with a scalpel blade, you can be as random & artistic as you like,....when I made any mistakes or too much filler came away I just refilled that bit,......I haven't gone back to this kit for years

But seeing your T-Rex & the new JP movie might move me to get back to it

T-Rex%203.jpg
T-Rex%202.jpg
T-Rex%201.jpg
 
Very cool indeed.. That blade, your going prehistoric on it..LOL...Nice work on it so far.... ;D
 
something tells me, this one will look like Godzilla lol just joking, john!!

where can I bang my head lol


Cheers!!
 
Thanks All!

John: This guy has a very different texture to him. It is more like tiny little pebbles all over the surface. So I can't use the method you described. Instead I am trying to add texture back with using either Aves apoxie sculpt or bondo surface putty. I will get some photos in a bit so you can see what I am talking about.

Eastrock:

Not Godzilla, but well, something close....I have plans for this guy.

No need to bang your head this time....
 
G, I'm wondering if you could get sand or some fine gravel tha may be close to what is there now. Fill it back in over the seams. Kind of like adding anti slip to a tank. Get what I'm trying to say?
 
Hey G,....just had a thought, if you use silicone putty:
$_12.JPG

http://www.ebay.co.uk/itm/Sili-Put-Silicone-Putty-RTV-Gum-Mould-Making-Moulding-Rubber-Siligum-/171030151826?pt=LH_DefaultDomain_3&var=&hash=item27d2310292

Its dead cheap,....£3 for a tub,....make a mould of an area for the texture,.....when its cured press the copied texture negative onto the filler to imprint the bumps

J
 
Adam, I know what you are talking about, but I don't know if it will work. I do have sand fine enough. (I just read Jaitea's post where he tried chinchilla powder. I also watch Norm Lajoie's videos where he talks about it all the time. )

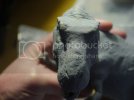
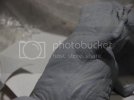
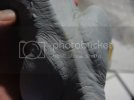
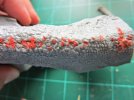
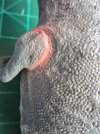
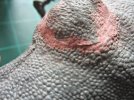
Here are some photos so you can see where I am with him:

IMG_2264.jpg
IMG_2265.JPG


These first few look sloppy, but to the naked eye they don't. The zoom on the camera shows everything in glorious detail!

IMG_2266.jpg
IMG_2267.JPG
IMG_2268.jpg
IMG_2269.JPG


So you can see I need to add the texture back. My idea is to use Aves apoxie sculpt and make small little balls of it and attach them one at a time......
 
Jaitea said:
Hey G,....just had a thought, if you use silicone putty:
$_12.JPG

http://www.ebay.co.uk/itm/Sili-Put-Silicone-Putty-RTV-Gum-Mould-Making-Moulding-Rubber-Siligum-/171030151826?pt=LH_DefaultDomain_3&var=&hash=item27d2310292

Its dead cheap,....£3 for a tub,....make a mould of an area for the texture,.....when its cured press the copied texture negative onto the filler to imprint the bumps

J

I have tried that before, with limited success. One way is to make a mold as you suggest and then pour a very thin layer of resin in that mold. Creating a skin if you like. I might go that route.
 

Latest posts

Back
Top