ModelMan
New Member
- Joined
- Aug 30, 2009
- Messages
- 148
[youtube]http://www.youtube.com/watch?v=_zhnd1WXVRg[/youtube]
Supplies Needed:
Directions:
[*]Flip the smaller can over and hammer a pile of holes into it.
[*]Put the smaller can, bottom up, into the larger jar/can.
[*]Fill to just over the smaller can's bottom.
[*]Enjoy the $ savings
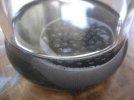
Now, everytime you swish your brush across the holed-up can bottom, the paint will disburse and settle in the bottom, leaving your brush free of muck and frsh with clean thinner. Over the coarse of months, the paint will goop up on the bottom and you will have fresh thinner forever. As some thinner will leave with the brush, top every few months.
Learned this one back in oil painting class near 20 yrs ago.

Supplies Needed:
- one sealable jar or tin can.
- one slightly smaller tin can
- one hammer
- one nail
- an amount of thinner, water or whatever is appropriate to your paint medium.
Directions:
[*]Flip the smaller can over and hammer a pile of holes into it.
[*]Put the smaller can, bottom up, into the larger jar/can.
[*]Fill to just over the smaller can's bottom.
[*]Enjoy the $ savings
Now, everytime you swish your brush across the holed-up can bottom, the paint will disburse and settle in the bottom, leaving your brush free of muck and frsh with clean thinner. Over the coarse of months, the paint will goop up on the bottom and you will have fresh thinner forever. As some thinner will leave with the brush, top every few months.
Learned this one back in oil painting class near 20 yrs ago.

