Diorama

GaryG64

Well-Known Member
Joined
Sep 8, 2022
Messages
2,285
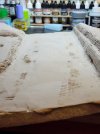
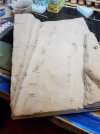
Well, here goes my first attempt with a diorama.

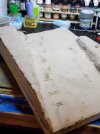
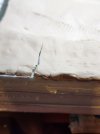
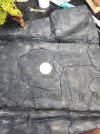
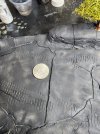
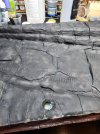
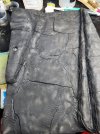
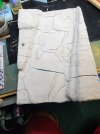
I've seen that the air-dry clay base has started to crack but that's OK they can be covered up with turf, shrubs, or a blob of clay, so no big deal to me. I could not find sculptamold at Hobby Lobby so I am trying the clay. I'll be checking Michael's Sunday.

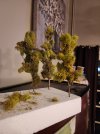
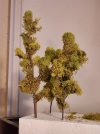
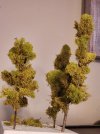
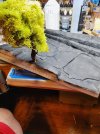
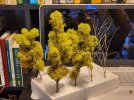
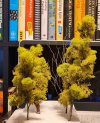
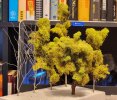
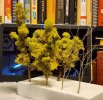
The trees I'm making are twigs and I'm using lichens for the foliage. I've only made 4 of the 13.
All of this is harder than I thought. :D But a learning experience. And figuring out what works best.
 

Attachments

  • 20221120_002857.jpg
    20221120_002857.jpg
    188.4 KB · Views: 9
  • 20221120_002430.jpg
    20221120_002430.jpg
    258.9 KB · Views: 10
  • 20221120_002504.jpg
    20221120_002504.jpg
    333.9 KB · Views: 10
  • 20221120_002520.jpg
    20221120_002520.jpg
    316.3 KB · Views: 8
  • 20221120_002718.jpg
    20221120_002718.jpg
    232.9 KB · Views: 7
  • 20221120_002807.jpg
    20221120_002807.jpg
    233.3 KB · Views: 7
  • 20221120_002820.jpg
    20221120_002820.jpg
    168 KB · Views: 7
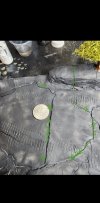
Es no bueno! :(
The clay cracked all over. I figur I could try making it work as an old creekbed. I drew on one of the pics with grass growing through the cracks. I painted it all black for the basecoat and shadows then top it off with earthtones. Then add brown and green turf.
so my question is should I continue with this project as is and incorporate the numerous cracks, or add more clay on the cracks to cover them up, or rip it all out and start over with sculptamold?
 

Attachments

  • Screenshot_20221120_230225_Gallery.jpg
    Screenshot_20221120_230225_Gallery.jpg
    246.4 KB · Views: 10
  • 20221120_225557.jpg
    20221120_225557.jpg
    523.6 KB · Views: 8
  • 20221120_225550.jpg
    20221120_225550.jpg
    576.3 KB · Views: 8
  • 20221120_225518.jpg
    20221120_225518.jpg
    378.4 KB · Views: 8
  • 20221120_225418.jpg
    20221120_225418.jpg
    422.4 KB · Views: 8
  • 20221120_225401.jpg
    20221120_225401.jpg
    509.2 KB · Views: 9
  • 20221120_204154.jpg
    20221120_204154.jpg
    296.2 KB · Views: 8
Last edited:
If you are planning a dry creek bed look you are going to have to do a lot of work on the banks so to speak so that it does look like a dry creek bed. If it were me I would just cover the cracks with say plaster of paris and see what happens. I use plaster on all my bases and have never had an issue with cracks. Sorry mate, I am not much help but I wouldn't scrap it.
 
Es no bueno! :(
The clay cracked all over. I figur I could try making it work as an old creekbed. I drew on one of the pics with grass growing through the cracks. I painted it all black for the basecoat and shadows then top it off with earthtones. Then add brown and green turf.
so my question is should I continue with this project as is and incorporate the numerous cracks, or add more clay on the cracks to cover them up, or rip it all out and start over with sculptamold?
You could use a flexible wall grout or even some decorating caulk, comes in a tube, we use it to fill walls that have cracked.
Pantherman
 
I actually like where you're going with the grass growing through.I agree about the bank though,I think personally,you should fill those cracks,it just doesn't look quite right being the same as the Creek bed ;)
Got good potential this has... Certainly don't bin it. :)
 
Thank you for the great feed back and awesomeadvice. :)
I had a feeling it would crack but not to the extent of this! lol
I'll fill in the cracks.
Always keep going to the bitter end, never good to bin the builds no matter how wrong it goes. More satisfying sometimes as you know the extra effort taken to finish it.
Pantherman
 
I had some experience years ago with air dry clay (sculpting masks over foam mannequin heads.

(I have a lot less experience with current diorama modeling techniques and materials, so I admit my limits in that regard)

air dry clay shrinks dramatically.
it also does not adhere to styrofoam.
styrofoam further aggravates by giving off a lot of heat between the clay and foam,
basically lifting the clay from the surface as it tries to shrink and dry.

I like the cracks. Very realistic in my opinion.
Unfortunately I would be more concerned with entire sections lifting/falling off off the styrofoam.
I'm not sure how you can securely anchor it at this point.

How long as it been curing? it may continue to shrink.
I agree that it may continue to shrink as that was the first 24 hours.
I tried to prep the base with a water/glue mixture (aprox 70% glue - 30% water) before applying the clay. But as you mentioned sections could still lift off the base. Maybe if I sanded the Styrofoam a little to give to some "tooth" before any application might have helped a little?
As this was my very first attempt I'd say it was a good learning piece.
My next attempt, after this one, I will order Sculptamold.
 
Tiger Diorama "Redux"

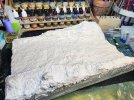
The air dry clay proved to be unreliable as it only continued to crack more and more. I ordered some Sculptamold (very lumpy stuff) and decided to redo the base. After watching Andy's Hobbies on YouTube I learned I can sand out the lumps. This diorama has been a challenge and a learning process.
What, if any, color should the base be painted, black, brown, or plaid. :D

Another learning topic is the trees. I've never made trees before but, I just looked at what I thought could work and went with it. I also bought HO scale trees they're not too bad looking. To add detail to the HO trees I'll need to doctor them up a bit and highlight the trunks and branches.
However, I will most likely paint the foliage on my trees and the store-bought trees to give them some depth.

This is where I am so far...
 

Attachments

  • 20221123_011948.jpg
    20221123_011948.jpg
    375.2 KB · Views: 9
  • 20221123_011837.jpg
    20221123_011837.jpg
    404.8 KB · Views: 9
  • 20221123_011813.jpg
    20221123_011813.jpg
    493.8 KB · Views: 9
  • 20221123_011721.jpg
    20221123_011721.jpg
    461.5 KB · Views: 9
  • 20221123_011631.jpg
    20221123_011631.jpg
    477.7 KB · Views: 9
Now we are cooking.....looking good my friend. Some will disagree with me but I always paint my bases (not the trees) black before I start. I then just layer lighter earth tones over the top. I also have used HO scale trees with some doctoring and they look pretty good to me. Besides, purchasing a Verlinden tree or two just makes the whole thing too expensive and I have yet to learn how to make a tree from wire and clay.

Phil
Thanks Phil,

Yes some trees can get quite expensive and I'm planning for about 14 trees. However, I'm leaving a few bare as dead trees. I've seen a few videos for making pine trees that I'll give a try for later builds.


The Tiger just fits the road now. Sculptamold is very poofy. :D
 
One technique I have seen model railroaders use is to twist wire the dip the branches in flocking

They actually look pretty good and you also can have a variety of shapes compared to pre-made ones

 
One technique I have seen model railroaders use is to twist wire the dip the branches in flocking

They actually look pretty good and you also can have a variety of shapes compared to pre-made ones


I'm laughing right now because I tried to make a wire tree. But, it ended up looking like Pick from the J.K. Rowling series Fantastic Beast and Where to Find Them.

But yes if done right they are very cool.
 

Attachments

  • Pickett.jpg
    Pickett.jpg
    158.3 KB · Views: 5

Latest posts

Back
Top