Carsenault
Member
- Joined
- May 7, 2009
- Messages
- 846
Hey guys...
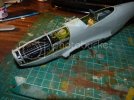
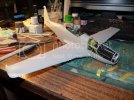
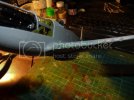
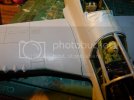
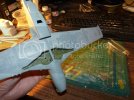
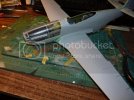
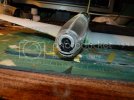
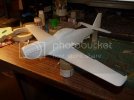
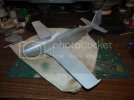
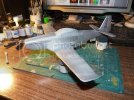
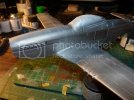
Started this kit about a week ago. I am really inspired by a bunch of great /32 Mustang builds happening now at ARC by a number of builders. Been slow going but I finally have enough pics to show a little progress. The kit is Dragon's 1/32 P-51D-5NA kit (P-51D Early Production), to that I'm adding some decals from BarracudaCals for the famous "Lou IV" of the 361st. Fighter Group, the lead aircraft in this picture...

This has always been one of my favorite Mustangs. I love the contrast of the bare metal and painted areas.

This build will basically be a leadup to an eventual build of the Tamiya 1/32 kit. I dont want to go too much into interior detail with this kit, just basically trying out a few new techniques and practice my bare metal finish using Alclad II. I do have a set of Eduard's cockpit placards which I will use to help buzy up the cockpit.
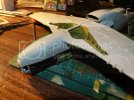
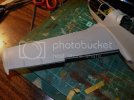
This kit came out a few years before Tamiya's. While it had lots of detail, not all of it is accurate. Some fit issues have been noted and the panel lines and rivet detail is really over done, especially on the wings. The initial Dragon Mustang kits were for the late P-51Ds and had consistantly deep panel line trenches on the wings and fuselage and heavy rivet detail too. This kit had the tools slightly modified for the earlier style tail so they toned down the engraved detail on the new fuselage halves. No matter, Ill be filling in most of the lines and rivets on the wings anyways.
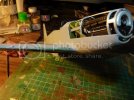
I started with the engine. Its not bad detail wise, but nowhere near as nice as the Tamiya engine. Fit is a bit iffy as well. Once assembled, I sprayed a few quick coats of satin black and picked out some detail with some chrome silver paint. I may add some ignition wires later on, but not much else.
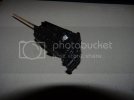
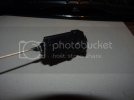
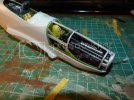
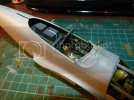
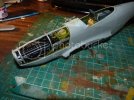
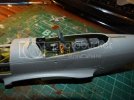
The sidewalls were first painted with MM interior green enamel then some drybrushing of british interior green. Some detail picked out with Nato black, some fading using panzer gray, and a bit of drybrushing. I then added the placards , sealed everything in Future then did an oil wash. The IP was painted with nato black, then I used the kit instrument decals, added a few placards and picked out some detail with white and red. Finally a drop of Future over each decal to simulate glass. The gun sight was tough to put together. I bought this kit second hand and it didnt have an assembly guide so I copied one online from Hobbysearch.com. Thier scans are not very clear so I had to do a lot of guessing with the orientation of some smaller parts. This gunsight is made up of about 8 small parts. I still have the reflector glass to attach late ron in the assembly sequence.
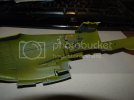
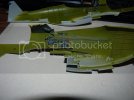
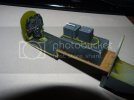
The cockpit floor wasnt too bad. base coat of interior green. I then hand painted the plywood sections with Tamiya dark yellow, then a thin brushing of raw umber oil paint to simulate the wood grain. The actual plywood floors were painted black so I did the same but not before a few coats of hairspray so I could scuff the floor later. I finished up with detail painting of the aft fuel tank and radio frame. The radio and battery are just dryfitted here. One odd thing I discovered os the kit supplied photo etch radiator screens are much wider than the space they are supposed to occupy. I had to trim a couple of millimetres off the sides and upper edge so it would fit in place. 2 pieces of radiator mesh are supplied, but only the back of the rad is visible so I only used the one section.
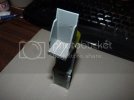
The seat and armor plating look pretty good actually, missing a little detail but definitely looks the part, especially with the added photoetch braces and harnesses.
Started this kit about a week ago. I am really inspired by a bunch of great /32 Mustang builds happening now at ARC by a number of builders. Been slow going but I finally have enough pics to show a little progress. The kit is Dragon's 1/32 P-51D-5NA kit (P-51D Early Production), to that I'm adding some decals from BarracudaCals for the famous "Lou IV" of the 361st. Fighter Group, the lead aircraft in this picture...

This has always been one of my favorite Mustangs. I love the contrast of the bare metal and painted areas.

This build will basically be a leadup to an eventual build of the Tamiya 1/32 kit. I dont want to go too much into interior detail with this kit, just basically trying out a few new techniques and practice my bare metal finish using Alclad II. I do have a set of Eduard's cockpit placards which I will use to help buzy up the cockpit.
This kit came out a few years before Tamiya's. While it had lots of detail, not all of it is accurate. Some fit issues have been noted and the panel lines and rivet detail is really over done, especially on the wings. The initial Dragon Mustang kits were for the late P-51Ds and had consistantly deep panel line trenches on the wings and fuselage and heavy rivet detail too. This kit had the tools slightly modified for the earlier style tail so they toned down the engraved detail on the new fuselage halves. No matter, Ill be filling in most of the lines and rivets on the wings anyways.
I started with the engine. Its not bad detail wise, but nowhere near as nice as the Tamiya engine. Fit is a bit iffy as well. Once assembled, I sprayed a few quick coats of satin black and picked out some detail with some chrome silver paint. I may add some ignition wires later on, but not much else.


The sidewalls were first painted with MM interior green enamel then some drybrushing of british interior green. Some detail picked out with Nato black, some fading using panzer gray, and a bit of drybrushing. I then added the placards , sealed everything in Future then did an oil wash. The IP was painted with nato black, then I used the kit instrument decals, added a few placards and picked out some detail with white and red. Finally a drop of Future over each decal to simulate glass. The gun sight was tough to put together. I bought this kit second hand and it didnt have an assembly guide so I copied one online from Hobbysearch.com. Thier scans are not very clear so I had to do a lot of guessing with the orientation of some smaller parts. This gunsight is made up of about 8 small parts. I still have the reflector glass to attach late ron in the assembly sequence.


The cockpit floor wasnt too bad. base coat of interior green. I then hand painted the plywood sections with Tamiya dark yellow, then a thin brushing of raw umber oil paint to simulate the wood grain. The actual plywood floors were painted black so I did the same but not before a few coats of hairspray so I could scuff the floor later. I finished up with detail painting of the aft fuel tank and radio frame. The radio and battery are just dryfitted here. One odd thing I discovered os the kit supplied photo etch radiator screens are much wider than the space they are supposed to occupy. I had to trim a couple of millimetres off the sides and upper edge so it would fit in place. 2 pieces of radiator mesh are supplied, but only the back of the rad is visible so I only used the one section.
The seat and armor plating look pretty good actually, missing a little detail but definitely looks the part, especially with the added photoetch braces and harnesses.


