Photon
Active Member
- Joined
- Feb 26, 2020
- Messages
- 41
This is a project I've been quietly working on (and off) in the background during the past year
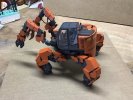
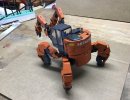
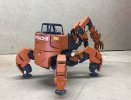
It's a sort of chance meeting on an operating table between a sewing machine and an umbrella, or in this case, between a 1:35 scale Hitachi Zaxis excavator and a couple of Gundam kits. It's based on a model that I saw on a Japanese social media site a couple of years ago by a modeler called "Surume0407". You can see his work here: <https://twoucan.com/profile/surume0407>

I really liked it and wanted to try to make my own version, but while the use of the Hasegawa excavator kit was obvious, I had no idea what kits were used for the robot bits. I bought the excavator kit, figuring it would be fun to build regardless if I attempted the kit bash or not. Some time later, while looking at pictures of other people's models on the web (a hobby in itself), I recognized some of the major bits in a photo of a Gundam 'Graze' figure. And with that, I was off to the races.

This will be a fast one, so I'll let the pictures do the talking. Hang on, there's a years worth of work squished into one post.
The chassis was 3D printed out of polystyrene. It took a few tries to get proportions that I liked. This shows the underside. The white tubes are attachment points for the rear legs.

The feet are 1:35 tank wheels and some styrene tube. 5/32" is close enough to 4mm that it seems to work ok with the Gundam poly-caps. I had to add some Tamiya putty in some cases to tune the fit.

Leg armour squared off with epoxy putty to somewhat reduce their 'gundamosity'.

The extension for the counterweight was modeled in Fusion 360 and printed in polystyrene.

I was unable to identify several of the armour pieces, so I decided to make my own. Here's the prototype sheet styrene knee armour and the printed final.

Scratchbuilt a new piece for the top of the shear to match the size of the one on the claw and to make room for the Gundam ball attachment.

The manipulators were made from a combination of the 1/144 scale leg and arm parts.

The main Gundam torso was glued to a printed stryrene bar that fit into a groove in the chassis


I busied up the sides of the chassis with some kit parts.


So here are most of the parts laid out. All that needs to be done at this point is prime and assemble.

Primer

A lot of the original Hitachi parts are not glued to make painting easier, so everything is a bit precarious at this stage. All of the Gundam points of articulation are still functional, making posing this thing rather difficult (Much respect to Mr. Ray Harryhausen).


Thanks for looking.
Next up final assembly, paint, decals, and weathering.
It's a sort of chance meeting on an operating table between a sewing machine and an umbrella, or in this case, between a 1:35 scale Hitachi Zaxis excavator and a couple of Gundam kits. It's based on a model that I saw on a Japanese social media site a couple of years ago by a modeler called "Surume0407". You can see his work here: <https://twoucan.com/profile/surume0407>

I really liked it and wanted to try to make my own version, but while the use of the Hasegawa excavator kit was obvious, I had no idea what kits were used for the robot bits. I bought the excavator kit, figuring it would be fun to build regardless if I attempted the kit bash or not. Some time later, while looking at pictures of other people's models on the web (a hobby in itself), I recognized some of the major bits in a photo of a Gundam 'Graze' figure. And with that, I was off to the races.

This will be a fast one, so I'll let the pictures do the talking. Hang on, there's a years worth of work squished into one post.
The chassis was 3D printed out of polystyrene. It took a few tries to get proportions that I liked. This shows the underside. The white tubes are attachment points for the rear legs.

The feet are 1:35 tank wheels and some styrene tube. 5/32" is close enough to 4mm that it seems to work ok with the Gundam poly-caps. I had to add some Tamiya putty in some cases to tune the fit.

Leg armour squared off with epoxy putty to somewhat reduce their 'gundamosity'.

The extension for the counterweight was modeled in Fusion 360 and printed in polystyrene.

I was unable to identify several of the armour pieces, so I decided to make my own. Here's the prototype sheet styrene knee armour and the printed final.

Scratchbuilt a new piece for the top of the shear to match the size of the one on the claw and to make room for the Gundam ball attachment.

The manipulators were made from a combination of the 1/144 scale leg and arm parts.

The main Gundam torso was glued to a printed stryrene bar that fit into a groove in the chassis


I busied up the sides of the chassis with some kit parts.


So here are most of the parts laid out. All that needs to be done at this point is prime and assemble.

Primer

A lot of the original Hitachi parts are not glued to make painting easier, so everything is a bit precarious at this stage. All of the Gundam points of articulation are still functional, making posing this thing rather difficult (Much respect to Mr. Ray Harryhausen).


Thanks for looking.
Next up final assembly, paint, decals, and weathering.


