Scootypuffjunior
Member
- Joined
- Dec 1, 2013
- Messages
- 74
I managed to get most of the craft built in a couple of hours. The engineering on this kit is great; you can build, paint, and weather the S-foils separately before joining them with the fuselage. I opted to leave off the laser cannons so I don't run the risk of damaging them. I then began priming all of the parts with black Vallejo Surface Primer. I am also painting the landing gear because I haven't decided if I want to display the craft in flight or not. You also get two canopy options; one closed and a two-part one if you want to display it open.
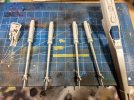
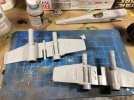
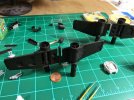
I decided to go with the color the kit calls out, which is a mix of Tamiya Flat White (XF-2) and Medium Gray (XF-20). I was more or less pleased with the color as it is a slightly warm light grey that turned out quite nice over the black basecoat. I might play around with this color by adding a tiny amount of Tamiya Buff (XF-57) to mix to warm it even more.
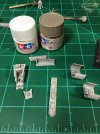
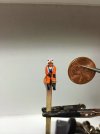
I preshaded Luke with VMA Tank Brown before masking off the helmet and painting the flight suit with VMA Orange. The boots and gloves are VMA Black and the vest and helmet are VGC Ghost Grey with a VMC Grey wash. The chest device is VMA Intermediate Blue with a VMA Black square painted on it. The harness is GW Codex Grey while the leg strap is RMS Olive Drab with VMA Steel used to pick out the cylinders. His skin is GW Dwarf Flesh with a wash of GW Orygen Flesh. The visor is undercoated with VMA Steel and then painted with Tamiya Clear Orange (X-26). He has three decals on his helmet: two starbirds and the caution stripes/red stripe on the crest. Of course, he will be buried in the cockpit with most of this not even visible, but I wouldn't be happy with myself unless he was fully painted.
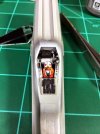
I inserted the cockpit tub into the fuselage. I had added a couple of strips of .01" styrene to fill the gaps between the cockpit tub and fuselage. After allowing the glue to cure, I attached the canopy with a couple of dabs of Micro Kristal Klear and applied the vinyl canopy masks and glued the two halves of the fuselage together. There was a small gap on the nose that I filled with Vallejo putty and sanded smooth. After that was done, it was ready for priming.
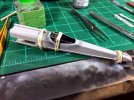
After giving them a basecoat of my X-wing color (Medium Gray + Flat White), I started painting various panels. The kit comes with a fairly extensive decal kit but I decided to hand paint them where ever I could. I started with the green panels (2:1 mix of VMA Pale Green and VMA Yellow) on the lower starboard wing. Here is where I hit the first setback of the project. I decided to use Micro Mask masking fluid to mask off the interior of the wing. After painting it, I tried to remove the mask and it pulled up the basecoat and some of the primer! Frustrated, I removed as much as I could and repainted the insert. The second time around, I used the decal sheet to cut a mask out of 18mm Tamiya Tape and used that instead. I painted the exposed engines with a mix of VMA Steel and VMA Black, gave them a wash of GW Badab Black and highlighted them with some Tamiya steel pigments.
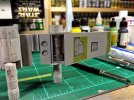
I moved on to the top starboard wing and painted a light blue panel with Tamiya Light Blue (XF-23). This panel was not in the decal sheet but it is plainly visible in the photographs of the studio model. I also painted painted the top port intake cover Tamiya Flat Yellow (XF-2), another marking not called out on the decal/color sheet. I protected everything with a light coat of Future after these panels were done.
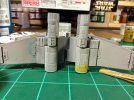
Now it was time to seriously test my patience. Like the panels, I decided against using the kit decals for the Red Squadron markings. Using a combination of the decal sheet, excellent photos of the studio model, and a ruler, I managed to get all of the masking down for the red markings... and let's just say to took a lot of effort (and lots of ripping tape off in frustration). In the end, I was pleased with how it looked and after carefully studying it (and getting a second opinion from my wife), I decided it was pretty symmetrical. Before spraying the red, I dabbed on some Vallejo Liquid Mask with a piece of foam to simulate paint chips on the red markings.
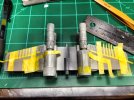
After the masking fluid dried, it was time to spray the red markings on. I had first decided to use Tamiay Flat Red (XF-7) as the red color. I thought it was a little too bright, but nothing I couldn't darken after a couple of filters, washes, and weathering. When I first started spraying the red, I quickly discovered that I had thinned it too much, and combined with the coat of Future, it started running everywhere. I tried to wipe most of it up with it was still wet but ended up with a fingerprint in the red area. Since red is a translucent color, I decided to try and remove it with a little bit of alcohol. This turned out to be a mistake as the alcohol attacked the Future in the soon-to-be red area and ate away some of the base color. I repaired the exposed area with the base color and sprayed the red paint, this time using a mixture of VMA Italian Red and VMA Hull Red mixed 2:1. After the pain dried I used a piece of poster tack to remove the liquid mask. Upon removing the mask, I discovered that the alcohol had bleed underneath and damaged the paint, so I fixed that area which ended up making that part brighter than the rest of the wing. That should be okay because filters, washes, and weathering will darken it. Plus, the X-wing has a little bit of a mottled look due to the wear and tear on them. I added the brownish panel on the port wing using Tamiya Buff (XF-57), yet another detail missed in the kit instructions but clearly visible on the studio model.
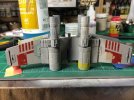
The blue canopy was painted with Tamiya Light Blue (XF-23), then I dabbed on masking fluid and painted it with a coat of Tamiya Light Blue (XF-23) and Medium Blue (XF-18) mixed 2:1. I also put two layers of Mig Productions Brown Filter to warm the model up some and give a nice foundation to begin weathering. However, I will have to coat the model in Future to put on the decals for all the little details on the model; there are numerous black squares and other stuff like that around the model that are just too small to paint.
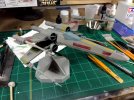
I finished the tiny decals on the X-wing. In short, they were a total pain and I don't like how they went down. Fine Molds decals are very thick and getting them to lay down smoothly is a pain. I plan on giving them a few more coats of MicroSol and I might even give the model a dusting of the base color to brighten the model a little.
I also added a panel decal that I forgot to paint. That decal went down pretty good but I'm unsatisfied with the color; a few filters and coats of oil paint might fix it though.
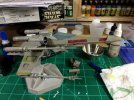
After the decals were down, I protected them with some gloss varnish and gave the model a spray of Dullcote. After the Dullcote dried, I started to discolor the entire model. I used a couple of 502 Abteilung oils to do so, dabbing some spots of oil on the model and then blending it with a large brush wet with thinner. After that layer dried, I started to discolor individual panels with more oils. For that, I used German Ocher, Faded Grey, Faded UN White, Starship Filth, and Dark Mud in various mixes. After the oil dried, I used some pigments for further weathering, using the studio model as a guide. This was the result:
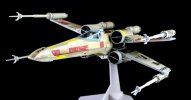
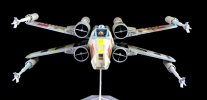
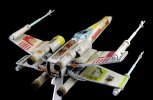
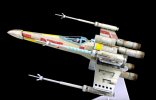
Overal, I'm not that happy with how it turned out. I don't like the base color, the pigments are not how I want them, and the decals still piss me off. Personally, I think the photos look better than the model (for once). I still have three more of these guys to build so I definitely learned a lot moving forward.


I decided to go with the color the kit calls out, which is a mix of Tamiya Flat White (XF-2) and Medium Gray (XF-20). I was more or less pleased with the color as it is a slightly warm light grey that turned out quite nice over the black basecoat. I might play around with this color by adding a tiny amount of Tamiya Buff (XF-57) to mix to warm it even more.

I preshaded Luke with VMA Tank Brown before masking off the helmet and painting the flight suit with VMA Orange. The boots and gloves are VMA Black and the vest and helmet are VGC Ghost Grey with a VMC Grey wash. The chest device is VMA Intermediate Blue with a VMA Black square painted on it. The harness is GW Codex Grey while the leg strap is RMS Olive Drab with VMA Steel used to pick out the cylinders. His skin is GW Dwarf Flesh with a wash of GW Orygen Flesh. The visor is undercoated with VMA Steel and then painted with Tamiya Clear Orange (X-26). He has three decals on his helmet: two starbirds and the caution stripes/red stripe on the crest. Of course, he will be buried in the cockpit with most of this not even visible, but I wouldn't be happy with myself unless he was fully painted.

I inserted the cockpit tub into the fuselage. I had added a couple of strips of .01" styrene to fill the gaps between the cockpit tub and fuselage. After allowing the glue to cure, I attached the canopy with a couple of dabs of Micro Kristal Klear and applied the vinyl canopy masks and glued the two halves of the fuselage together. There was a small gap on the nose that I filled with Vallejo putty and sanded smooth. After that was done, it was ready for priming.


After giving them a basecoat of my X-wing color (Medium Gray + Flat White), I started painting various panels. The kit comes with a fairly extensive decal kit but I decided to hand paint them where ever I could. I started with the green panels (2:1 mix of VMA Pale Green and VMA Yellow) on the lower starboard wing. Here is where I hit the first setback of the project. I decided to use Micro Mask masking fluid to mask off the interior of the wing. After painting it, I tried to remove the mask and it pulled up the basecoat and some of the primer! Frustrated, I removed as much as I could and repainted the insert. The second time around, I used the decal sheet to cut a mask out of 18mm Tamiya Tape and used that instead. I painted the exposed engines with a mix of VMA Steel and VMA Black, gave them a wash of GW Badab Black and highlighted them with some Tamiya steel pigments.

I moved on to the top starboard wing and painted a light blue panel with Tamiya Light Blue (XF-23). This panel was not in the decal sheet but it is plainly visible in the photographs of the studio model. I also painted painted the top port intake cover Tamiya Flat Yellow (XF-2), another marking not called out on the decal/color sheet. I protected everything with a light coat of Future after these panels were done.

Now it was time to seriously test my patience. Like the panels, I decided against using the kit decals for the Red Squadron markings. Using a combination of the decal sheet, excellent photos of the studio model, and a ruler, I managed to get all of the masking down for the red markings... and let's just say to took a lot of effort (and lots of ripping tape off in frustration). In the end, I was pleased with how it looked and after carefully studying it (and getting a second opinion from my wife), I decided it was pretty symmetrical. Before spraying the red, I dabbed on some Vallejo Liquid Mask with a piece of foam to simulate paint chips on the red markings.

After the masking fluid dried, it was time to spray the red markings on. I had first decided to use Tamiay Flat Red (XF-7) as the red color. I thought it was a little too bright, but nothing I couldn't darken after a couple of filters, washes, and weathering. When I first started spraying the red, I quickly discovered that I had thinned it too much, and combined with the coat of Future, it started running everywhere. I tried to wipe most of it up with it was still wet but ended up with a fingerprint in the red area. Since red is a translucent color, I decided to try and remove it with a little bit of alcohol. This turned out to be a mistake as the alcohol attacked the Future in the soon-to-be red area and ate away some of the base color. I repaired the exposed area with the base color and sprayed the red paint, this time using a mixture of VMA Italian Red and VMA Hull Red mixed 2:1. After the pain dried I used a piece of poster tack to remove the liquid mask. Upon removing the mask, I discovered that the alcohol had bleed underneath and damaged the paint, so I fixed that area which ended up making that part brighter than the rest of the wing. That should be okay because filters, washes, and weathering will darken it. Plus, the X-wing has a little bit of a mottled look due to the wear and tear on them. I added the brownish panel on the port wing using Tamiya Buff (XF-57), yet another detail missed in the kit instructions but clearly visible on the studio model.

The blue canopy was painted with Tamiya Light Blue (XF-23), then I dabbed on masking fluid and painted it with a coat of Tamiya Light Blue (XF-23) and Medium Blue (XF-18) mixed 2:1. I also put two layers of Mig Productions Brown Filter to warm the model up some and give a nice foundation to begin weathering. However, I will have to coat the model in Future to put on the decals for all the little details on the model; there are numerous black squares and other stuff like that around the model that are just too small to paint.

I finished the tiny decals on the X-wing. In short, they were a total pain and I don't like how they went down. Fine Molds decals are very thick and getting them to lay down smoothly is a pain. I plan on giving them a few more coats of MicroSol and I might even give the model a dusting of the base color to brighten the model a little.
I also added a panel decal that I forgot to paint. That decal went down pretty good but I'm unsatisfied with the color; a few filters and coats of oil paint might fix it though.

After the decals were down, I protected them with some gloss varnish and gave the model a spray of Dullcote. After the Dullcote dried, I started to discolor the entire model. I used a couple of 502 Abteilung oils to do so, dabbing some spots of oil on the model and then blending it with a large brush wet with thinner. After that layer dried, I started to discolor individual panels with more oils. For that, I used German Ocher, Faded Grey, Faded UN White, Starship Filth, and Dark Mud in various mixes. After the oil dried, I used some pigments for further weathering, using the studio model as a guide. This was the result:


Overal, I'm not that happy with how it turned out. I don't like the base color, the pigments are not how I want them, and the decals still piss me off. Personally, I think the photos look better than the model (for once). I still have three more of these guys to build so I definitely learned a lot moving forward.
