It's been 50½ years… first impressions since returning

BigKahunaFL

New Member
Joined
May 15, 2023
Messages
4
First and foremost is the expense. Obviously, it's much more expensive, but in reality, what isn't? So THAT is really a wash. But it's still a shock. The last time I purchased a model, it was a car, I think it was the AeroVette (Revell?), and I probably paid around $4.50 for it. I just saw one on fleaBay for over six times that amount, and it doesn't include shipping. I'll have to think about that…

So I decided on a model to make my return with; the Bell 47D Army 4077th M*A*S*H Helicopter - 1/35 Scale 1993 MRC Model Kit#: BA102. Quality-wise, it's about what I expected and recall. Certainly, nothing to get excited about. Instructions leave a LOT to be desired! This is going to be a challenge, to say the least.

Time to BUILD! Don't worry, I won't be wasting your time with a full-blown step-by-step commentary, but I really need to get this started.

Glue the two halves of the engine block together. I'm using Tamiya Extra-Thin cement. Well, THIS is different. I grew up using the thick, red tube, by Testor's. It stunk to high heaven! I'm certain that it's why I was so "creative" back then; Everything was so much, uh, brighter. But this new stuff works. It's just weird putting the glue on AFTER you put the parts together.

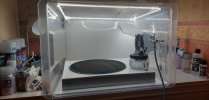
Paint the block. Okay. This SUCKS! I've been convinced by many on YouTube (which is why I'm here…to learn) that acrylic paints are the way to go. Fine. I purchased a bunch of Tamiya colors that I figured I would need. It doesn't stick to the plastic! Back in the day, I used Testor's Enamel which came in little square bottles. Open, stir, stick in the brush, spread it on the part(s), and let it dry. DONE. NOW? Wash the parts to remove any oils or mold release. Prime, to give the paint something to "bite" into. Brush the paint on? NOPE. Buy an airbrush to spray it on. Mix the paint with thinner, add "leveling" chemicals, and maybe "extender" so it doesn't dry too fast. Then, once dry, Spray it with a clear coat to add gloss if it's flat or "DULL-coat" if it's glossy. And what the heck is with the FUTURE FLOOR POLISH? So much work to do to an engine block assembly just to add the exhaust manifolds!!

What the HELL have I gotten myself into?!?!
You are only at the top of the rabbit hole. You haven't mentioned weathering, pigments, washes, CA glue, spru goo and PE.

Isn't this a great fun hobby. It soon becomes an enjoyable addiction !!

Starting with an ICM kit probably going to be frustrating as most instructions leave a fair bit to the modeler to figure out where thing's go. Talking of figures, that's a whole other world of torment.

So to sum up......it's a great hobby, don't get bogged down by getting it right to start with. If you're not having fun, put it back in the box.
Pantherman
 
It might not be as expensive as you think, at first glance. If we want to compare what it costs today, with what it cost us when we were kids (for me, that was the 70s), we need to look not just at the price, but inflation over time and the value of our money, and the amount of time we have to work to earn the money to buy the kit and supplies, too.

But besides that, we're in a golden age, as far as the availability and variety of kits is concerned, as well as in the selection of supplies and accessories, compared to when I was a kid. And I think the general level of quality is the highest it's ever been.
You're absolutely right. It's all relative. I'm just hoping that once I get over this "start-up hump", the fun and enjoyment of it all comes back to me.
 
Yeah I jumped into what I knew from my youth and it was monogram then I discovered Tamiya which has some inexpensive 1/48th scale Japanese WWII kits. They are great kits to start back with. Easy instructions to follow, little to no flash, enough detail to test different techniques on, etc. https://www.hobbylinc.com/tamiya-plastic-model-airplanes-1:40-1:49-scale I use Tamiya acrylics as well and have never had a problem with the paint sticking to the plastic when spraying and I don't wash the plastic first either. If you are brushing it on you should use their retarder it does make it cover much better, and if you are in a dry region you may want to use it when you spray to avoid the dry tip. You do not have to go down the current list of step by steps you mention. Just try different techniques and use the ones that you enjoy using to get the build you want. Good luck.
 
I can commiserate with wondering "what the heck?!?' with watching YouTube and reading articles. It's a much expanded hobby than when I stopped 25 years ago. The startup hump is a kick in the shorts but I know it will ease up a bit in time.
 
I can commiserate with wondering "what the heck?!?' with watching YouTube and reading articles. It's a much expanded hobby than when I stopped 25 years ago. The startup hump is a kick in the shorts but I know it will ease up a bit in time.
I only started modeling 18 months ago and the best advice I got was buy cheap and then slowly replace the cheaper kit with the better ones.

Also, if you can make a half decent model with cheap tools it's so much easier with the better ones. And you don't ruin expensive kit with lack of knowledge.

Paints are a big expense but you use very little so they go a long way. I try to buy at least 2 per month but also keep an eye out for offers on paint set's to help.

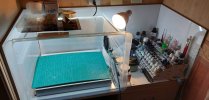
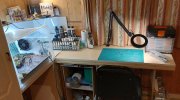
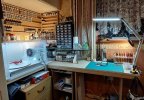
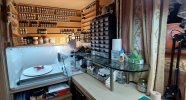
All you really need is a cheap craft set, cheap spru cutter and a cheap model to get started. You can always paint later as your paint stash improves. I have posted some photos to show where I started and where I am now.
Pantherman
 

Attachments

  • 20220524_211908.jpg
    20220524_211908.jpg
    160 KB · Views: 4
  • 20220727_214232.jpg
    20220727_214232.jpg
    217.1 KB · Views: 3
  • 20221021_213313.jpg
    20221021_213313.jpg
    271 KB · Views: 2
  • 20230410_211415.jpg
    20230410_211415.jpg
    344 KB · Views: 3
  • 20230410_211433.jpg
    20230410_211433.jpg
    268 KB · Views: 4
When I got back into building models after my hiatus (1982 to around 1998), the biggest change I noticed was that figures had disappeared from almost all kits. I grew up building Monogram airplanes and armor, Revell's 1/32 scale airplanes, Airfix, Lindberg, Aurora. Figures were a natural part of so many models. But I learned that in that interval that I was out of the hobby, manufacturers responded to the market. Fewer and fewer modelers bothered with the figures, mostly because they were intimidated by them, and the box art photos. "I can't paint figures that well!" So manufacturers could save a little in development and leave them out. And aftermarket makers stepped in and produced figures, for those who wanted them.
 
I used to build a model in a few days, now I can spend months on them. It's a grand obsession for me. Modeling takes patience and money…. and a few other things, like the ability to correct mistakes. Just remember, when things go south, and you feel like chucking it in the trash, keep on going - "Never give up! Never surrender!"
 

Latest posts

Back
Top