TRM
New Member
- Joined
- Mar 18, 2011
- Messages
- 5,024
K4 Weathering products Review
A while back I received a nice little unassuming package in the mail from a good friend and member here on SMA, Richard Ordenes. Inside this package was jam packed with a huge assortment of new handmade weathering products from K4.
Richard has started out to add his twist to the weathering products out there offered to us. K4 has a Rust Base and Catalysts System, Some washes, oils and a whole slue of pigments at the moment with a tremendous selction of other products still waiting to be brought out.
My review here will be hopefully honest and mostly cover the K4 Rust Base and Catalyst System; however it is hard not to touch on some of there other products, including his line of pigments and washes.
Forward…
Contents:
Base Black, Base Grey, 8 Catalysts
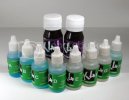
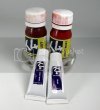
Rust Wash, Light Rust Wash, Rust & Light Wash Oils
31 Pigments
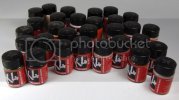
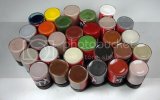
First thing you notice right off is the packaging. Great looking logo and a very appealing product from just looking at the way it is marketed in the package. The Rust bases, catalysts and washes are all supplied in standardized plastic bottles. The oils are in standard tubes and the pigments are supplied in small glass jars. The glass is a nice touch, makes you feel like you have something special…however, they do break. I know because I lost one in the course of this review. Let’s take a look at some of the products.
The Base:
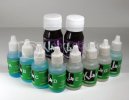
Richard has 2 grades of bases for his rusting system. There is a Base Black and a Base Grey. The difference between the two is easy to see. The Base Black has much smaller granules within the mixture. These granules will give texture to what you are attempting to add a rusting effect to. The Base Black is more in the scale of 1/24 to 1/35, but not limited to these scales, the Base Grey is more of 1:1 scale, a very coarse mix.
Application:
There is a couple of ways to basically apply the Base coat in the system. The first would be direct application over a primed or painted surface. For the review I chose to apply over a plain grey base and I added a sample with no primer, just clean resin.
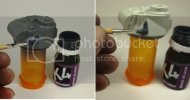
Using an older brush, just simply dip in the Base and apply to where you would like to see rust. Here, for the purposes of showing definition and colors I liberally applied the base to both turrets as well as applying the base to half of a third turret while the other half just a spotted application.

Allow to dry for a minimum of 4 to 5 minutes or longer. You can aid the drying process with the help of a hair dryer. After the base has had the chance to dry to the touch. You will need to choose a catalyst depending on what base color of rust you are looking for.
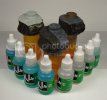
The Catalysts are labeled A through H. Each catalyst performs a different coloring effect to the base coat. You can either place a few drops in a small cup or a drop or two directly to the surface and spread around using a thick bristled brush or spray the catalyst directly from your airbrush.
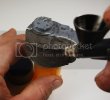
The second method would be to place some of the base into a small disposable cup. Place a couple drops, depending on how much base you have. I would have to say about a 10:1 mix of Base Black being the 10 and one of the catalysts being 1. By adding more catalyst, you will thin the mixture to get a lighter rusting for your application.
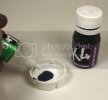
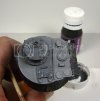
Allow drying. In both methods, the process will take approximately 24 hours to see the rusting results.
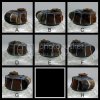
The Rust, like magic, appears fully within 24 hours. If you look closely the colors from A to H shift from light to darker. If you like, you can reapply more catalyst or even different lettered catalysts over you first application. Within 24 hours you will have completely different tones showing on your first application. The Pre-mix Base/Catalyst coating seemed to work really nice on the top of the turret.
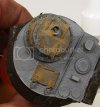
Using an airbrush for the second application I would say would be a preferred method. Being able to lightly highlight areas with a dusting effect is a nice touch.
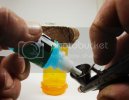
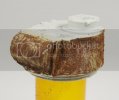
By now you have noticed how thick the applications come out. This can be an issue if you are looking for a lighter approach. This full application works really well if you a working on a complete wreck or an old abandoned clunker that has been weathered to the hilt. This is where the second application comes into play. By mixing the base and catalyst this will thin down what is applied.
After getting to know how the K4 Base and Catalyst System work, it was time to play around a bit and see what I could come up with. I grabbed the turret that had the K4 Base applied full application to one side and spotted to the other.
I laid down a quick paint job using a Russian Green Color Modulation set from AK Interactive…..yes, I did know that the Matilda was probably never drabbed in Russian Green….did I mention how much fun it is to break rules sometimes? Here we go.
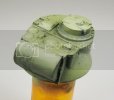
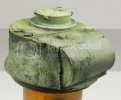
After coating the turret, I chipped away to reveal the K4 Base beneath. At this point there is was no catalyst applied….time to get started.
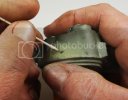
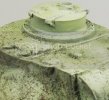
I found that I needed to make a couple applications of the catalyst to get close to the effect I was looking for…
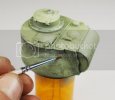
But, I think I got it.
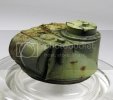
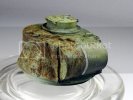
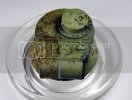
Up until this point, I have not applied any other weathering products. Now I think I can play with some more of the K4 Line….
Grabbing the Rust washes I attacked the heavy thick based side with the Darker Rust and the Light Rust was applied to the side with the lighter coat of Base.
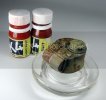
I also applied a tiny bit of the unmixed rust washes to create some streaking effects.
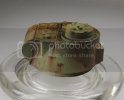
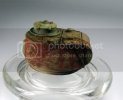
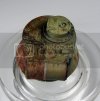
Now I went after the whole thing with some of the K4 Pigments. Using some of the greens, Green Rust and Moss and a plain Dust.
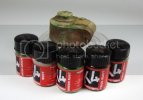
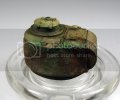
For good measure and since I was setup and ready…Added a couple tuffs of Silflor’s Buffalo Grass and some Woodland Scenic’s lichen
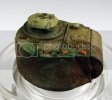
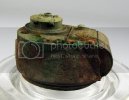
All in all, K4 Base Rust and Catalyst System is unique approach to the application of light to heavy type rusting to the modeling world. There is a sort of learning curve that needs to be surpassed in using the System, but, this is relatively quick to overcome. I feel confident adding this product into my toolbox. The process is kind of fun actually. The waiting to see how the catalyst reacts and changes the color of the base is exciting, you really will not know until you wake up the next day as to what it will look like. But, you will like it!
I think you will like the Pigments. The jars are slightly smaller than other name brands, but the quality is certainly there. I think I would dare to say the selection as well. Acrylic based, they can be applied with water or solvents. Please keep a look out for a form of pigment fixer too. These are hand made and packaged. The True Rust looks like rust…because it is rust! One more really great standout amongst all the others is the Chilean Desert. K4 is based in Chili and this is a sweet little addition to the collection.
As for cost on any of these products from K4, I have not obtained as of yet. From what I understand at the present, pricing will be pretty much right around where all the other players in the weathering game are located.
Some other applications…
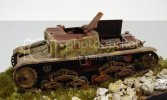
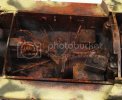
K4 Smoke, Ash, Dark Ash, Rubble, Brick Dust, Concrete Dust and Dirty Dust
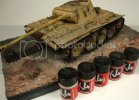
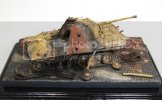
K4 Rust Baser Black, Catalysts A, B, G, Pigments Dirty Dust, Smoke, Light Dust
Please Check out any other build by K4 (Richard) right here on Scale Model Addict and see the creator of K4 using his own product to the full extent of it’s uses!
I would like thank Richard Ordenes (K4) of K4 Weathering Products of Chili for supplying the review samples
I would like to thank SMA for the space to make this review possible
I would like to thank Celticwerks for help in supplying some test base materials
A while back I received a nice little unassuming package in the mail from a good friend and member here on SMA, Richard Ordenes. Inside this package was jam packed with a huge assortment of new handmade weathering products from K4.
Richard has started out to add his twist to the weathering products out there offered to us. K4 has a Rust Base and Catalysts System, Some washes, oils and a whole slue of pigments at the moment with a tremendous selction of other products still waiting to be brought out.
My review here will be hopefully honest and mostly cover the K4 Rust Base and Catalyst System; however it is hard not to touch on some of there other products, including his line of pigments and washes.
Forward…
Contents:
Base Black, Base Grey, 8 Catalysts

Rust Wash, Light Rust Wash, Rust & Light Wash Oils

31 Pigments


First thing you notice right off is the packaging. Great looking logo and a very appealing product from just looking at the way it is marketed in the package. The Rust bases, catalysts and washes are all supplied in standardized plastic bottles. The oils are in standard tubes and the pigments are supplied in small glass jars. The glass is a nice touch, makes you feel like you have something special…however, they do break. I know because I lost one in the course of this review. Let’s take a look at some of the products.
The Base:

Richard has 2 grades of bases for his rusting system. There is a Base Black and a Base Grey. The difference between the two is easy to see. The Base Black has much smaller granules within the mixture. These granules will give texture to what you are attempting to add a rusting effect to. The Base Black is more in the scale of 1/24 to 1/35, but not limited to these scales, the Base Grey is more of 1:1 scale, a very coarse mix.
Application:
There is a couple of ways to basically apply the Base coat in the system. The first would be direct application over a primed or painted surface. For the review I chose to apply over a plain grey base and I added a sample with no primer, just clean resin.

Using an older brush, just simply dip in the Base and apply to where you would like to see rust. Here, for the purposes of showing definition and colors I liberally applied the base to both turrets as well as applying the base to half of a third turret while the other half just a spotted application.

Allow to dry for a minimum of 4 to 5 minutes or longer. You can aid the drying process with the help of a hair dryer. After the base has had the chance to dry to the touch. You will need to choose a catalyst depending on what base color of rust you are looking for.

The Catalysts are labeled A through H. Each catalyst performs a different coloring effect to the base coat. You can either place a few drops in a small cup or a drop or two directly to the surface and spread around using a thick bristled brush or spray the catalyst directly from your airbrush.

The second method would be to place some of the base into a small disposable cup. Place a couple drops, depending on how much base you have. I would have to say about a 10:1 mix of Base Black being the 10 and one of the catalysts being 1. By adding more catalyst, you will thin the mixture to get a lighter rusting for your application.


Allow drying. In both methods, the process will take approximately 24 hours to see the rusting results.

The Rust, like magic, appears fully within 24 hours. If you look closely the colors from A to H shift from light to darker. If you like, you can reapply more catalyst or even different lettered catalysts over you first application. Within 24 hours you will have completely different tones showing on your first application. The Pre-mix Base/Catalyst coating seemed to work really nice on the top of the turret.

Using an airbrush for the second application I would say would be a preferred method. Being able to lightly highlight areas with a dusting effect is a nice touch.


By now you have noticed how thick the applications come out. This can be an issue if you are looking for a lighter approach. This full application works really well if you a working on a complete wreck or an old abandoned clunker that has been weathered to the hilt. This is where the second application comes into play. By mixing the base and catalyst this will thin down what is applied.
After getting to know how the K4 Base and Catalyst System work, it was time to play around a bit and see what I could come up with. I grabbed the turret that had the K4 Base applied full application to one side and spotted to the other.
I laid down a quick paint job using a Russian Green Color Modulation set from AK Interactive…..yes, I did know that the Matilda was probably never drabbed in Russian Green….did I mention how much fun it is to break rules sometimes? Here we go.


After coating the turret, I chipped away to reveal the K4 Base beneath. At this point there is was no catalyst applied….time to get started.


I found that I needed to make a couple applications of the catalyst to get close to the effect I was looking for…

But, I think I got it.


Up until this point, I have not applied any other weathering products. Now I think I can play with some more of the K4 Line….
Grabbing the Rust washes I attacked the heavy thick based side with the Darker Rust and the Light Rust was applied to the side with the lighter coat of Base.

I also applied a tiny bit of the unmixed rust washes to create some streaking effects.


Now I went after the whole thing with some of the K4 Pigments. Using some of the greens, Green Rust and Moss and a plain Dust.


For good measure and since I was setup and ready…Added a couple tuffs of Silflor’s Buffalo Grass and some Woodland Scenic’s lichen


All in all, K4 Base Rust and Catalyst System is unique approach to the application of light to heavy type rusting to the modeling world. There is a sort of learning curve that needs to be surpassed in using the System, but, this is relatively quick to overcome. I feel confident adding this product into my toolbox. The process is kind of fun actually. The waiting to see how the catalyst reacts and changes the color of the base is exciting, you really will not know until you wake up the next day as to what it will look like. But, you will like it!
I think you will like the Pigments. The jars are slightly smaller than other name brands, but the quality is certainly there. I think I would dare to say the selection as well. Acrylic based, they can be applied with water or solvents. Please keep a look out for a form of pigment fixer too. These are hand made and packaged. The True Rust looks like rust…because it is rust! One more really great standout amongst all the others is the Chilean Desert. K4 is based in Chili and this is a sweet little addition to the collection.
As for cost on any of these products from K4, I have not obtained as of yet. From what I understand at the present, pricing will be pretty much right around where all the other players in the weathering game are located.
Some other applications…
K4 Smoke, Ash, Dark Ash, Rubble, Brick Dust, Concrete Dust and Dirty Dust


K4 Rust Baser Black, Catalysts A, B, G, Pigments Dirty Dust, Smoke, Light Dust


Please Check out any other build by K4 (Richard) right here on Scale Model Addict and see the creator of K4 using his own product to the full extent of it’s uses!
I would like thank Richard Ordenes (K4) of K4 Weathering Products of Chili for supplying the review samples
I would like to thank SMA for the space to make this review possible
I would like to thank Celticwerks for help in supplying some test base materials
