YOULI
That which does not kill us makes us stronger !
- Joined
- Nov 28, 2011
- Messages
- 947
Here is a special project started 3 years ago.
I found two "donor kits" for my various kitbashes projects. I discovered that two F-16 kits were actually issued on the very same mold. One should be a bootleg I think.
The idea was to develop two different viper-like one-man starships from the very same kit. In fact simply take what parts was needed for one and for another.
Here is what I ended up with...

Here are the model kits boxes, 1/72. Those are very gross, and ugly kits but that's the perfect opportunity to a kitbash ! No moral questions. No hesitation what'so ever...

Kit parts. Note the dark F-16 already started...


I start by cutting the F-16 still on the sprue. I thought to gather the two parts (the edges of the cockpit) to build the nose. I will change my mind, the general line would have been too thin !

I use some sprue to build the nose part. The back is cut to complete the Engine Area.

The other F-16 get the two air entries, all for itself, and I really love the look of it.

Problem of scale. 1/72 ? 1/48 ? 1/60 ? What's the more logical ?

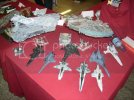
The two birdies are almost done in their general line. What I didn't use for one, is use for the other. That's the purpose and the logic in that "excercise". Some kits parts, and other sources will be added like the rocket engines, but for the most parts, only the two F-16 were used here.


Some check phase to determine what wings to use here. The F-16 wings are too common and too heavy. I have to give it an elegant look, a dynamic design. I've got the little wings of the F-16, some VF-0 stuff, i've done some pictures to the front and to the rear to find out if a YF-19 look would be fine here. That would defenitly give a Sci-fi look too...
But I will first add some parts and details on the engine block. Some VT-1 parts, even Strike Gundam weapons...


All of this could have been fine but I choose to complicate things with parts from a WWII plane, the Black Widow, that could be, once cut, the answer of what I need.

With this paper sheet to hide the rear part, you'll see what I see...

The result once cut.

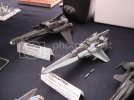
The two birdies took form... They already have a very different look...

The Viper XI is like a dart. I will add the back wings of the F-16, that will give him a "Matsumoto" look, a design i really appreciate.

Here we can see the black widow parts, that seems the perfect fit for this one. The more you use parts like this, the less you use putty or resin to fill the gap. Plus, it's certainly is the perfect answer to glue on the future wings.

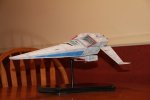
Here is the Viper XI with its wings and the Viper XII with a nose done with Valkyrie VT-1 arm, and a up version with F-16 wings. More "wipeout" like, but I really like the result... Will check on it later...


As usual, stay tune folks !
I found two "donor kits" for my various kitbashes projects. I discovered that two F-16 kits were actually issued on the very same mold. One should be a bootleg I think.
The idea was to develop two different viper-like one-man starships from the very same kit. In fact simply take what parts was needed for one and for another.
Here is what I ended up with...

Here are the model kits boxes, 1/72. Those are very gross, and ugly kits but that's the perfect opportunity to a kitbash ! No moral questions. No hesitation what'so ever...

Kit parts. Note the dark F-16 already started...


I start by cutting the F-16 still on the sprue. I thought to gather the two parts (the edges of the cockpit) to build the nose. I will change my mind, the general line would have been too thin !

I use some sprue to build the nose part. The back is cut to complete the Engine Area.

The other F-16 get the two air entries, all for itself, and I really love the look of it.

Problem of scale. 1/72 ? 1/48 ? 1/60 ? What's the more logical ?

The two birdies are almost done in their general line. What I didn't use for one, is use for the other. That's the purpose and the logic in that "excercise". Some kits parts, and other sources will be added like the rocket engines, but for the most parts, only the two F-16 were used here.


Some check phase to determine what wings to use here. The F-16 wings are too common and too heavy. I have to give it an elegant look, a dynamic design. I've got the little wings of the F-16, some VF-0 stuff, i've done some pictures to the front and to the rear to find out if a YF-19 look would be fine here. That would defenitly give a Sci-fi look too...
But I will first add some parts and details on the engine block. Some VT-1 parts, even Strike Gundam weapons...


All of this could have been fine but I choose to complicate things with parts from a WWII plane, the Black Widow, that could be, once cut, the answer of what I need.

With this paper sheet to hide the rear part, you'll see what I see...

The result once cut.

The two birdies took form... They already have a very different look...

The Viper XI is like a dart. I will add the back wings of the F-16, that will give him a "Matsumoto" look, a design i really appreciate.

Here we can see the black widow parts, that seems the perfect fit for this one. The more you use parts like this, the less you use putty or resin to fill the gap. Plus, it's certainly is the perfect answer to glue on the future wings.

Here is the Viper XI with its wings and the Viper XII with a nose done with Valkyrie VT-1 arm, and a up version with F-16 wings. More "wipeout" like, but I really like the result... Will check on it later...


As usual, stay tune folks !


