Ma.K Camel

MrNatural

my head is falling off my head
Joined
May 27, 2009
Messages
983
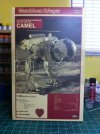
Alrighty boys, here we go again! Some of you know I've been frothing at the mouth waiting for this kit. The Luna Tactical Reconnaissance Machine LUM-168 Camel finally showed up yesterday just in time for the start of the contest! I was so pumped. I cant believe I have to go to work right now, so eager to tare into this thing. I'll get some more pics of the parts and stuff later tonight. I would really love to throw some lights in this thing, but we'll just have to wait and see about that.
002_zps96eb9970.jpg
001_zps62513e2d.jpg

Lots more to come!
 
I knew that you would enter this....

I will be watching, because I want one!
 
Thanks fellas! This is a really nice kit, with plenty of crisp detail and a really nice figure. Most of the kit is cast in a nice off white plastic. Like all the other Ma.k kits I've built, this one is not without its fair share of sink holes, ejector pin marks, and mold lines.

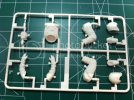
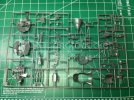
Here is a look at the sprues. Working on getting a better camera...

You get a really nice full figure for the pilot, even his shoes are molded separately.
df2_zpsefb8d07b.jpg

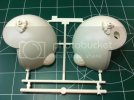
The head.
54545_zpsf254bb75.jpg

You get two identical sprues for the main leg parts. After going over these I can see its going to be quite a challenge figuring out how to run wire through the legs.
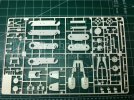
012_zpse5efb764.jpg

Another sprue of superbly cast, detailed parts.
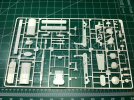
011_zpsde9409c8.jpg

The main hull and some cockpit parts. The photo is not doing this justice at all. The hull is very impressive, its just such a unique design in my opinion. Nice, crisp engraved panel lines as well.
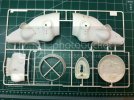
df1_zpsc3c65ae1.jpg

Closer look at the cockpit. Lots of cool detail to paint up.
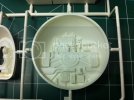
014_zpsf4fa9f40.jpg

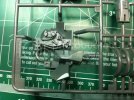
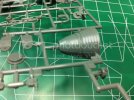
Dark grey sprue with the bulk of the cock pit, a nice big thruster bell molded in one piece which is nice, and some more mechanical detail.
008_zps1e0e5fcf.jpg
009_zps8da05d0a.jpg

Gnarly mold line on the thruster to deal with.
010_zps408c8b1b.jpg

Tinted windshield
007_zpsd17d0015.jpg

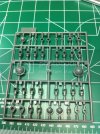
I thought this was really interesting, you get a sprue of polyethylene caps and bushings that look so similar to the ones you would find in a 1/100 Gundam kit from Bandai.
006_zps8fd815ca.jpg

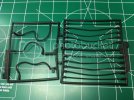
rubber hoses and tubing, these are cool but I'll probably end up switching these out for something else, there is just a horrible mold line running down these that would take years to remove from this extremely rubbery material.
005_zpsa1068a5e.jpg

Some more rubber hoses and a brass rod
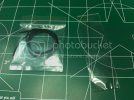
015_zps9bf9277e.jpg

I love the smell of a fresh set of dekulz
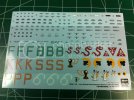
018_zps943a69c0.jpg

That's it for now, I got the rest of the day and tomorrow off so I plan on getting a good jump on him. Me and my Camel ;D
 
Les said:
This looks like it will be a fun build! I will enjoy this one. :)

So far it has been nothing but fun, but we're only 2 days in!

Myke said:
OH man... this is gonna be sweet!!

Got that right 8)

rookie said:
Awesome looking kit

Yeah, I tend to buy up whatever Ma.K stuff I can find, just love the stuff, but I really thought the design of this kit stood out from the pack a little bit.

Solander said:
Pure awesomeness!

Yup!

adampolo13 said:
This kit looks pretty sweet to say the least!!!

yeah I slept with it next to me the day it showed up.

Got my first little official wip post for you fine gentlemen. I forgot to mention that this is a Hasegawa kit, so far I've only built the Wave Ma.K kits, but I havn't noticed any real differences in quality. Been a real nice weekend so far of just cleaning up parts, going over the kit, and trying to get an idea of how I'm going to light this thing. My initial thought was to run the wire down through the legs, and have my power supply and switch hidden under a base of some kind. But now im thinking it may take way too much time to channel out the legs for wire because there is not much room to work within the legs. So now im thinking about trying to install the battery and switch directly in the hull somehow.

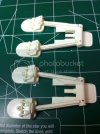
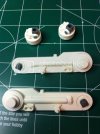
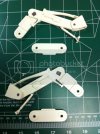
So far I've been working on the legs getting all the parts cleaned up and test fitted. About 90% of the leg construction is snap-fit, so I've also been modifying certain parts to allow me to pull the sub assemblies apart after test fitting.
003_zps443fff0c.jpg
002_zpsed8e2981.jpg
001_zps822aba01.jpg

I'll try to get another update up tonight. Thanks for looking. Later!
 
Off to a good start MrNatural. Details of this kit look sharp. Can't wait to see this one finished.
 

Latest posts

Back
Top