the Baron
Ich bin ja, Herr, in Deiner Macht
- Joined
- May 12, 2009
- Messages
- 2,275
Hi, all!
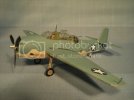
This is a Monogram 1/48th TBF, which I modified slightly to make it a TBF-1C, in markings from VT-10 in 1942:
This is one of my Resolutions Builds for this year, kits that I started in the past 3 years, but never finished. My resolution is to finish them this year. I also entered this in a fellowship build over at AgapeModels.com. Here is a shot from the starboard side:
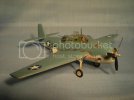
I had started out with the intention to finish her as one of the 6 TBFs from Torpedo 8, that flew from Midway during the Battle of Midway. But I outsmarted myself-those Turkeys were TBF-1s, with a nose gun, and I had already started modifying the kit into a -1C, which had the nose gun removed and wing guns installed. So instead of Torpedo 8, she's from Torpedo 10, which entered combat later in 1942.
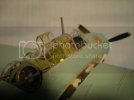
Here's a closer shot of the greenhouse, and some of the detailing that I did:
I'm a nostalgia builder; I have sought out and bought the kits that I built as a kid, to rebuild them now, applying the things I've learned in the meantime. So this old Monogram kit was to be an exercise in scratchbuilding, adding interior details, though I didn't want to go overboard.
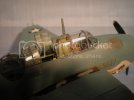
You can see, I opened the canopy-the TBF had a sliding panel over the middle cockpit. The next time I do this, I'll use a vacuformed canopy. The clear styrene of the kit canopy is very brittle and doesn't take well to scribing and cutting.
In the cockpit, I added a bit of detailing which, while not contest-accurate, embellished the kit parts. That is, Monogram included a decal of a generic instrument panel, that the modeler would apply to a flat area at the front of the office. What I did was to take a piece of clear plastic, and using a photocopy of the decal (deckle, for you New Brunswickers ) as a template, I punched holes where the instruments would go. I painted this clear piece flat black, applied the decal to a piece of sheet styrene, then glued the punched-out piece over it. The goal was to give the instrument panel some thickness and depth. I was happy with the result, even if it doesn't look like an actual TBF instrument panel.
Here's a shot through the aft hatch, into the radioman's compartment:
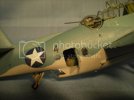
I added some details, like junction boxes, control lines, and the radioman's seat, most of which can't be seen, anyway. But I wanted to show that the old Monogram kits can serve as the basis for something more detailed. When I was a kid, that's all we had, there was no resin, or photo-etch, or Accurate Miniatures. You smashed open an old radio and scavenged it for wire, transistors, capacitors, etc, anything that could be used to look like something.
I had only one major snag with this kit, and that was the turret, and the sequence in which I assembled the model. I did a little detailing in the turret, leaving it off until I had assembled the two fuselage halves. But then I found that I could not fit the turret into the hole at the back of the greenhouse. I puzzled and puzzled 'til my puzzler was sore. Eventually, what I came up with was to lift the deck at the back of the canopy, until I could fit the turret in. But the deck did not sit back in its original position, and so, the canopy would sit right. You can see it in the shots from the starboard side or from overhead:
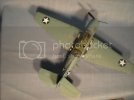
I built two of these at the same time, and after dealing with the problem on this one, I was able to take care of the problem with the other one, by scribing the deck and removing a little bit, enough to allow the turret to drop into place. without fuss.
Despite that, and some other little irritations, I enjoyed building this kit. I really like the old Monogram kits. They take me back to those years in the 70s when I was a kid building models, and they are also good starting points to build a model as detailed as you like. When I was a kid, these were top of the line, especially the kits in the late 70s, the big, four-engined bombers, and the TBD, and the P-61. And with the diorama tips from Shep Paine, they inspired many a diorama builder.
Don't get me wrong-I'm eager to pick up the Accurate Miniatures TBF kit and build that. But I really enjoy building these Monogram kits, and Lindberg, and even Aurora. You can make them as simple or as detailed as you want.
Anyway, I'm pleased with my pair of Turkeys. More Monograms on the bench--2 P-47Ds, 2 P-40Bs, an SBD, and a TBD, all part of the Resolution Build.
Thanks for looking!
Regards,
Brad
This is a Monogram 1/48th TBF, which I modified slightly to make it a TBF-1C, in markings from VT-10 in 1942:

This is one of my Resolutions Builds for this year, kits that I started in the past 3 years, but never finished. My resolution is to finish them this year. I also entered this in a fellowship build over at AgapeModels.com. Here is a shot from the starboard side:

I had started out with the intention to finish her as one of the 6 TBFs from Torpedo 8, that flew from Midway during the Battle of Midway. But I outsmarted myself-those Turkeys were TBF-1s, with a nose gun, and I had already started modifying the kit into a -1C, which had the nose gun removed and wing guns installed. So instead of Torpedo 8, she's from Torpedo 10, which entered combat later in 1942.
Here's a closer shot of the greenhouse, and some of the detailing that I did:

I'm a nostalgia builder; I have sought out and bought the kits that I built as a kid, to rebuild them now, applying the things I've learned in the meantime. So this old Monogram kit was to be an exercise in scratchbuilding, adding interior details, though I didn't want to go overboard.

You can see, I opened the canopy-the TBF had a sliding panel over the middle cockpit. The next time I do this, I'll use a vacuformed canopy. The clear styrene of the kit canopy is very brittle and doesn't take well to scribing and cutting.
In the cockpit, I added a bit of detailing which, while not contest-accurate, embellished the kit parts. That is, Monogram included a decal of a generic instrument panel, that the modeler would apply to a flat area at the front of the office. What I did was to take a piece of clear plastic, and using a photocopy of the decal (deckle, for you New Brunswickers
Here's a shot through the aft hatch, into the radioman's compartment:

I added some details, like junction boxes, control lines, and the radioman's seat, most of which can't be seen, anyway. But I wanted to show that the old Monogram kits can serve as the basis for something more detailed. When I was a kid, that's all we had, there was no resin, or photo-etch, or Accurate Miniatures. You smashed open an old radio and scavenged it for wire, transistors, capacitors, etc, anything that could be used to look like something.
I had only one major snag with this kit, and that was the turret, and the sequence in which I assembled the model. I did a little detailing in the turret, leaving it off until I had assembled the two fuselage halves. But then I found that I could not fit the turret into the hole at the back of the greenhouse. I puzzled and puzzled 'til my puzzler was sore. Eventually, what I came up with was to lift the deck at the back of the canopy, until I could fit the turret in. But the deck did not sit back in its original position, and so, the canopy would sit right. You can see it in the shots from the starboard side or from overhead:

I built two of these at the same time, and after dealing with the problem on this one, I was able to take care of the problem with the other one, by scribing the deck and removing a little bit, enough to allow the turret to drop into place. without fuss.
Despite that, and some other little irritations, I enjoyed building this kit. I really like the old Monogram kits. They take me back to those years in the 70s when I was a kid building models, and they are also good starting points to build a model as detailed as you like. When I was a kid, these were top of the line, especially the kits in the late 70s, the big, four-engined bombers, and the TBD, and the P-61. And with the diorama tips from Shep Paine, they inspired many a diorama builder.
Don't get me wrong-I'm eager to pick up the Accurate Miniatures TBF kit and build that. But I really enjoy building these Monogram kits, and Lindberg, and even Aurora. You can make them as simple or as detailed as you want.
Anyway, I'm pleased with my pair of Turkeys. More Monograms on the bench--2 P-47Ds, 2 P-40Bs, an SBD, and a TBD, all part of the Resolution Build.
Thanks for looking!
Regards,
Brad
