Thundergod
New Member
- Joined
- Jul 26, 2013
- Messages
- 202
A few years ago , I picked up the "Snap Fit" 1/1000 scale ( Original Series) Enterprise from a model fair , basically because it was a bargain ( £5 ) and when I got it home , after a quick perusal of the parts , decals etc , put it away with the rest of my unbuilt kits , as a possible rainy day project for sometime in the future . On re-discovering it last week ( I'd actually forgotten I had it ) , I took a proper look inside the box and was pleasantly surprised as what I had originally thought of as an o.k "entry level " kit , was actually a very good and surprisingly accurate model , with parts and decals for not only all 3 different versions of the original studio model , but decals for another 3 "Constitution Class " starships and even the "Mirror Universe " version of the Enterprise for good measure !
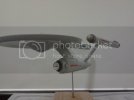
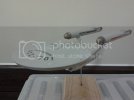
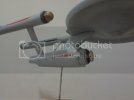
The kit went together quickly and within a day was ready for some paint . The build wasn't exactly problem free though , as the system for attaching both the nacelles to the "pilons" and the pilons to the secondary hull left a lot to be desired . I initially thought this was a simple job of applying a little filler etc . but it wasn't as easy as that . The problem was that the ( very ) soft plastic of the kit was significantly softer than the filler I used and so the sanding of the joins was not as straight forward as it should have been . Anyway , I got some paint on the little beast ( a light grey can of car paint I had handy ) and began to think about the decals . I wasn't hugely optimistic , as the ( very extensive ) sheet seemed to have a large amount of backing joining all the tiny windows, lights etc . together and the possibility of this "silvering" filled me with dread ! The bloody things didn't seem to want to adhere to the model either , which didn't help . But eventually they behaved themselves and I added a flat coat before they had chance to "disappear " . Actually , the silvering wasn't too bad and I'm hoping what IS present will lessen when I add my final top coat . That's were the model stands at the moment , as I'm giving it a couple of days for the flat coat to fully cure , before I continue with the rest of the decals ( I'd left the ones off the areas where they were likely to be damaged/rubbed off with handling ) and use a smooth sanding pad to "buff/burnish" the paintwork before I add the final details. Despite the little niggles though , I'm enjoying this build and recommend the kit to people who would like a neat "little" Enterprise on their shelf/desk , but haven't got the time or inclination for a months long superdetailing project .


 [/quote]
The kit went together quickly and within a day was ready for some paint . The build wasn't exactly problem free though , as the system for attaching both the nacelles to the "pilons" and the pilons to the secondary hull left a lot to be desired . I initially thought this was a simple job of applying a little filler etc . but it wasn't as easy as that . The problem was that the ( very ) soft plastic of the kit was significantly softer than the filler I used and so the sanding of the joins was not as straight forward as it should have been . Anyway , I got some paint on the little beast ( a light grey can of car paint I had handy ) and began to think about the decals . I wasn't hugely optimistic , as the ( very extensive ) sheet seemed to have a large amount of backing joining all the tiny windows, lights etc . together and the possibility of this "silvering" filled me with dread ! The bloody things didn't seem to want to adhere to the model either , which didn't help . But eventually they behaved themselves and I added a flat coat before they had chance to "disappear " . Actually , the silvering wasn't too bad and I'm hoping what IS present will lessen when I add my final top coat . That's were the model stands at the moment , as I'm giving it a couple of days for the flat coat to fully cure , before I continue with the rest of the decals ( I'd left the ones off the areas where they were likely to be damaged/rubbed off with handling ) and use a smooth sanding pad to "buff/burnish" the paintwork before I add the final details. Despite the little niggles though , I'm enjoying this build and recommend the kit to people who would like a neat "little" Enterprise on their shelf/desk , but haven't got the time or inclination for a months long superdetailing project .


 [/quote]