Restarting the Maybach !

longlance67

cry havoc and let slip the dogs of war -shakespear
Joined
Sep 21, 2011
Messages
656
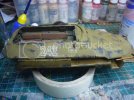
Its time to take AFV's Sd.Kfz.251/D off dust gathering shelf and restart the project after it kinda burned out :-X
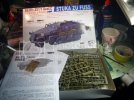

P1100151-1.jpg


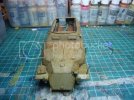
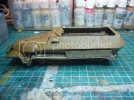
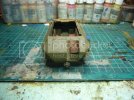
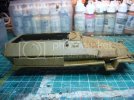
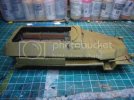
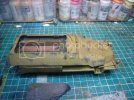
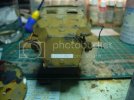
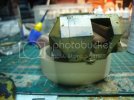
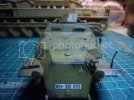
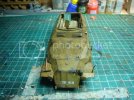
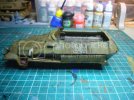
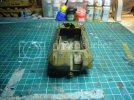
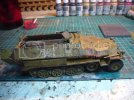
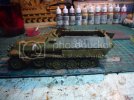
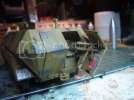
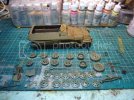
having decided to left the rocket launcher platforms off and model the 251 as a standard troop carrier as the parts were too tricky to work with. Ive painted up the 251 in a simple dark yellow scheme and gonna use it as a platform to try out some new methods of weathering.....in short im gonna weather the balls out of it ;)
P1110146.jpg


the hull:

P1110147.jpg

P1110148.jpg

P1110149.jpg

P1110150.jpg

what i need to do lists as:

paint the road wheels

rear door

MG's & AA mount

Add decals


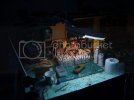
also got me a new lamp for the work bench which im chuffed about ;D
P1110152.jpg


more to follow soon gents,

thanks for looking :)


shane.
 
oh nice one shane. :) lamp is nice where did ya nab that from?
 
Spud, an unicle of mine picked up the lamp from a company that used make them that recently went under

the build goes well just in the process of chippin the paint using the good old sponge method will have pics up very soon


till then gents


cheers,


shane
 
Howide gents,


as i promised i have an update to share with yee :)

been working on the first stages of weathering the 251, im aiming to depict a machine belonging to one of DAK's panzer gren regiments so this will give me a nice subject but also a great platform in which to try some heavy weathering methods ;)


The first received a highlight of model colour middle stone drybrushed over the basecoat to give it what i hope comes across as a sun faded effect.

P1110154.jpg

once that set, it was time to break out the sponge and paint and go play school mode ;) i stippled the model with model colours german grey to give its heavy chipping, later i went back over certain areas where further wear would reveal the steel

P1110157.jpg

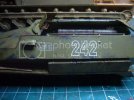
Then it was on to decals....the one stage where things go so badly wrong, i think many of you out there will argee :-X

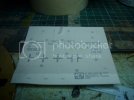
something very strange happen to the decals supplied in the kit, it looks like they dried out, never seen it happen before, but the kit has been sitting in the workshop for 8 months so i think moisture may have gotten at them....any thoughts ?

P1110160.jpg

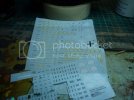
but not too worry have a wealth of 251 decals left over from a danger build years ago, which is very extensive in terms of units included :)

P1110161.jpg

got the first batch of decalling done tonight and will do the numbering for the plates which are blank :-X tomorrow

P1110162.jpg

P1110166.jpg

P1110168.jpg


thats all for now gents :)

all feedback welcome


thanks,


shane.
 
Hi Jelly,

sorry i havent been around as much of late, had a mini burn out with so many builds on the go at once, and then discovered the tabletop game Flames of War which i must say is one of hell of a good game ;D

thanks for sharing the vid man, i remenber hearing that when Rommels panzers came ashore and were perading he had each tank go around twice to give the impression that he had double the number :p


cheers,


shane.
 
Hi All,

quick update,

still in the progress of decalling the individual nembers for plates from a spare DML sheet i have lying around, they most be one of the smallest and tricky bit of decalling ive done to date, its driving me crazy, but im almost there, just have to hope i dont lose my sanity before the next photo update


thanks for looking in,


shane.
 
Hi Folks,

update time and a taste of things to come ;)

So im happy to report i got the decals done, and im over joyed as i managed to do number plates without them falling to peices, the model has been given a couple of coats of Matt varnish to seal everthing in before the i begin the last stages of weathering the halftrack. And there maybe a small clue to what im intending to build next but trust me it might be hard to spot ! :p ;D

P1110179.jpg

P1110183.jpg

P1110184.jpg

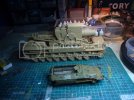
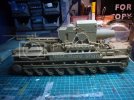
and just in case you missed the clue my next build will be finishing off this monster ;)

P1110188.jpg
 
hmm ive no idea.... ;D

is that sponging for chipping? or is it camo? reason im asking if its chipping i would have dryed out the sponge more as it looks more like camo ;D
 
- Spud, the hint is very easy to miss alright ;D

as the grey patches they were meant to be scracthes :-X
so should i let the paint slightly dry on sponge before appling it ?

Geegad, thanks for the comment mate :)

im looking forward to getting crack on the monster, it'll be a pig to brush paint but itll be fu :)n


thanks all


shane.
 
lol, what you do is get almost all of the paint out of the sponge and what you after is a subtle effect and just build it up :)
 
spud said:
lol, what you do is get almost all of the paint out of the sponge and what you after is a subtle effect and just build it up :)


Hi Spud,

a bit of stupid question i know, but it was important i had that i got this method down and tight, so i wouldnt have to deal with the same problem in the future ;)


Build update:

the weathering continues on another horrible Irish summer's day, its been lashing here with heavy rain must of the day, I think Spud will knows what im talking about ;) And just to prove the irish weather has a mean sense of humor we had lovely spells of sunshine to lure us out hahahahaha :-\

any how back on topic, been weathering away,decals have been sealed away safe and out came the washes, the model was given plenty of pin washes of shadrow brown and gave me a very nice worn effect :)

P1110193.jpg

P1110194.jpg

P1110197.jpg


more updates to follow


thanks gents


shane.
 
Ferris & Spud - thanks very much for your encouragement and supports gents it means alot :)


Now on to the long part of the build the wheels....the many.............many wheels :-X ;D
ive started painting them up, in between looking after my dad's dog and painting of a friends Airborne platoon for Flames of War as a gift


so ill have pics up in the next or so, theres alot of painting in these ;)


thanks all


shane.
 
Howdie all,

quick update chaps :)

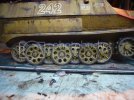
the wheel-aton is finaly done...and it wasnt too bad, now the halftrack actually looks like a halftrack ;)

P1110210.jpg


P1110211.jpg


P1110214.jpg


P1110212.jpg


almost there now chaps


shane.
 
- andrei383, thanks bud ;D

- Spud, thanks for the kind words mate ;D


update time :)

the model has got a few coats of matt varnish on and is ready for weathering process. nearly there now chaps the tracks went on last last night but proved be a little tricky getting the rubber band style tracks to sag realisticly but the good thing about AFV rubber tracks is that normal plastic glue will work on them just fine


P1110220.jpg


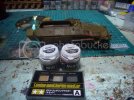
all to do now is to go to town with the weathering pigments, im really liking tamyia's little makeup format pigment sets, though i prefer mig's range, these little sets are growing on me as they offer a handy selection of colours in each set, however a coat of matt will haev to go on again after weathering to prevent the tamiya pigments from wiping off due to to handling


more to follow soon


thanks,


shane :) .
 

Latest posts

Back
Top