You are using an out of date browser. It may not display this or other websites correctly.
You should upgrade or use an alternative browser.
You should upgrade or use an alternative browser.
Revell 1:48 Do 335-V10 Night Fighter
- Thread starter JMac
- Start date
JMac
cut. glue. paint. repeat.
- Joined
- May 24, 2009
- Messages
- 2,812
Just wanted to share some info on this kit before I start building next week.
Here's the box art;

I've attached a picture of the kit sprues below. The panel lines are raised (the kit is marked with the 1974 release date). But the parts generally look good, I noticed flash only really in a few minor spots.
The instructions are printed as a 12 page letter sized booklet, and can be found at the below attached link;
http://manuals.hobbico.com/rmx/85-5858.pdf
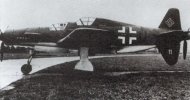
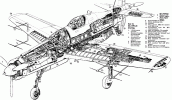
I'll be building the night fighter version. It had a crew of two and a distinctive "humped" second cockpit. Looks kind of like this;


Jason
[attachment deleted by admin]
Here's the box art;

I've attached a picture of the kit sprues below. The panel lines are raised (the kit is marked with the 1974 release date). But the parts generally look good, I noticed flash only really in a few minor spots.
The instructions are printed as a 12 page letter sized booklet, and can be found at the below attached link;
http://manuals.hobbico.com/rmx/85-5858.pdf
I'll be building the night fighter version. It had a crew of two and a distinctive "humped" second cockpit. Looks kind of like this;


Jason
[attachment deleted by admin]
JMac
cut. glue. paint. repeat.
- Joined
- May 24, 2009
- Messages
- 2,812
Thanks guys. I've a bunch of German late war and Luft '46 stuff in the stash at home - and I wanted to pick something that I think should be a fun quick build - but I have said that before...
The other thing is that I have all the paint colours and materials required to build this one OOB - so it should be easy on my (decimated) hobby budget.
Because I don't want to get to bogged down re-scribing all the raised panel lines, I'm planning to leave 'em raised. I'll do the prime black, paint camo, and then sand back to reveal the panel line thing (just like I did on my 1:72 HE 219).
Really looking forward to starting this one. Might even do a video build log.
Jason
The other thing is that I have all the paint colours and materials required to build this one OOB - so it should be easy on my (decimated) hobby budget.
Chris S said:Are you going to rescribe the panel lines ,or just go with it ?
Because I don't want to get to bogged down re-scribing all the raised panel lines, I'm planning to leave 'em raised. I'll do the prime black, paint camo, and then sand back to reveal the panel line thing (just like I did on my 1:72 HE 219).
Really looking forward to starting this one. Might even do a video build log.
Jason
THE NEW ONE
follow me on twitter @SpaceSavy
- Joined
- Oct 4, 2011
- Messages
- 346
good detail 8)
Peppylepugh
Active Member
- Joined
- Mar 27, 2012
- Messages
- 247
Jason,
I think you will like this very much. I built this a while
back as a kid. I just remember wing root gaps, nothing
really to get in the way.
I think you will like this very much. I built this a while
back as a kid. I just remember wing root gaps, nothing
really to get in the way.
JMac
cut. glue. paint. repeat.
- Joined
- May 24, 2009
- Messages
- 2,812
Thanks for the positive comments guys, and the heads up on the wing roots Peppylepugh.
My wonderful wife gave me the entire afternoon to build some models at my bench. Spent most of the time working on the 335. The cockpits have been rough painted, I noticed some areas that I would like to touch up after taking the macro photos. I more or less followed the Tamiya instructions, online photos, and the Monogram Profile book on the 335 for the front cockpit. The back station, I was at a loss, so I painted it up like(ish) the (very basic) kit instructions.
I think the cockpits look not to bad in person...the front one is only about 2" long, and the rear one about 1.5".
Thanks for looking. Comments always welcome.
Jason
[attachment deleted by admin]
JMac
cut. glue. paint. repeat.
- Joined
- May 24, 2009
- Messages
- 2,812
Thanks John, Andrei and, Ferris. 
I'm having a great time with this build. So far no major hiccups - not bad for a mold that was originally released in 1974.
Today I washed the cockpits today with a mix of Vallejo burnt umber and black washes (73203 and 73201). I followed that up with a few swipes from a silver pencil. Then I assembled the fuselage halves. The pictures show a test fit with the lower wing half...
Thanks for looking. Comments are always very appreciated.
Jason
[attachment deleted by admin]
JMac
cut. glue. paint. repeat.
- Joined
- May 24, 2009
- Messages
- 2,812
Most of the larger subassemblies are glued together - so I thought I would heed Peppylepughs warning about the wing roots and do a little test fitting before I actually commit to gluing things into their final locations. I'm pretty happy with what I'm seeing - I think I can close most of the gaps by carefully applying pressure to properly align the parts as I glue them.
Remember that this is from a mold released in 1974.
Jason
[attachment deleted by admin]
Remember that this is from a mold released in 1974.
Jason
[attachment deleted by admin]
JMac
cut. glue. paint. repeat.
- Joined
- May 24, 2009
- Messages
- 2,812
Thanks Ferris.
A quick update today.
I managed to get everything glued together over the weekend. I tried to get the seams to line up as best as I could - but I still have some trouble spots. I've begun to do the seam work; puttying and sanding.
During the filling and sanding I've also lost some of the panel lines and fastener marks I was originally hoping to save. I'm not sure, I might re-scribe now. It will depend on the number of panel lines I obliterate during the seam work...
Thanks for following along. Comments always welcome.
Jason
[attachment deleted by admin]
