Revell SpPz Luchs A2

andrei383

New Member
Joined
Feb 29, 2012
Messages
506
Hi all,

working on a new project, this time the Revell SpPz Luchs A2. I lost some steam on the Tamiya Merkava over the summer and decided to start a new project to get back into model building. Its a fairly old kit and its details are not up to today's standards but for the price, it will be a nice practice kit for me to refresh my skills

Pictures to follow once i get a new SD card for the camera
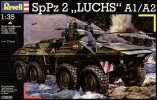
reve03036.jpg
 
Always wanted to build this one. You would be suprised what you can do to an old kit with just a few added details.

Looking forward to watching this one.

Terry 8)
 
ok, i borrowed an SD card from my flatmate, so here's some preliminary pics:

the entire suspension assembly was built according to instruction, but i did not glue any parts to the lower hull. this way, the entire unit can be removed for easy painting/weathering. you can also see the use of correction fluid in filling the ejector/sink marks
DSC_4477.jpg


the turret was also started. i first hollowed out the muzzle of the 20mm gun. the sight on the right was detailed with small pieces of styrene to outline the "glass," this area will be filled with gloss during the painting process. another small piece of styrene was used to the right of the gun assembly where Revell omitted a bit of metal (see reference photo). again, correction fluid used to fill seams.
DSC_4478.jpg


Untitled-1.jpg
 
some continued work today:

fixed up some parts of the suspension. i posted a tip in the quick tip thread about using correction fluid to fill seams and sink/ejection marks and here is an example of the results. also a bit of scratch building on one of the parts which was lost to the laminate floor monster!
DSC_4489.jpg


the tow bar was detailed with bits of styrene and sprue, holes drilled out, and a retaining pin added from some wire
DSC_4483.jpg


the hull build was also started with the main bit of work so far being to patch a small part of the lower hull where Revell mistakenly added a foot step where none existed
DSC_4486.jpg


thanks for looking! ;D
 
Great work!
This is a great subject. I built mine earlier this year. The only problems I had was the suspension, it's a bit tricky. It came out mostly level. :)
 
thanks guys! @Ferris, i agree the suspension is quite complex, luckily i have all the wheels touching the ground!
 
most of the hull details have been added. ive never realized just how big this vehicle is compared to a 1/35th figure! its even taller with the suspension and wheels on!
DSC_4494.jpg


the front mudflaps were scratchbuilt as the Revell ones are undersized and of the wrong shape to fit correctly
DSC_4495.jpg


first coat of paint has been put on the suspension: rattlecan primer
DSC_4497.jpg


thanks for looking! ;D
 
at last the turret build is done with the front lifting hooks and some bits at the base of the gun barrel. theres still the warning beacon and smoke launcher chains to be added but that will come after painting to prevent breakage.
DSC_4500.jpg


hopefully i could get this primed tomorrow. thanks for looking!
 
thanks spud and Peppy! ;D

the turret and trim vane were primed
DSC_4507.jpg


while that was drying, hull build was completed with the addition of headlight guards from copper wire and driver hatch supports. now it just needs to be degreased and primed. some more additions such as lights and the tools will be added after painting
DSC_4503.jpg


thats all for this weekend, university classes start again tomorrow!
 
primer looks dam good enough to be mistaken for molded grey ;D
 
Andrei,


looking really good, the turret and scratch building work looks top notch mate !


great stuff keep it up mate :)
 
thank you for the comments spud, longlance67, geegad, and, Beobachtungsbereich.

the hull has been primed already, luckily i had just enough primer to finish it. ill upload the photos tomorrow and the base coat of NATO green should come this weekend.

thanks for looking! ;D
 
You're doing great!! Those little details make the difference.

Terry ;D
 
andrei383 said:
thank you for the comments spud, longlance67, geegad, and, Beobachtungsbereich.

the hull has been primed already, luckily i had just enough primer to finish it. ill upload the photos tomorrow and the base coat of NATO green should come this weekend.

thanks for looking! ;D


looking forward to seeing the camo scheme mate ;D
 

Latest posts

Back
Top