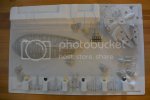
Star Wars - Empire Strikes Back - Rebel Base

The Swedish DR. Plastic

Pleas enter, the day has gone to hell any way.
Joined
Mar 10, 2014
Messages
185
Hi guys here I will be taking you guys through the proses of finishing my Star Wars - Empire Strikes Back - Rebel Base, and were starting of whit the Millennium Falcon.

[youtube]https://youtu.be/BHy3Ng9NwSI[/youtube]

Feel free to leave a comment even if it's a ban one.
 
OK so I figured I might as well shear the story about this particular Diorama model whit you.

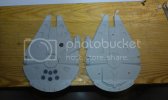
I bought this one quite a while back i think it's like 20 years, back then it cost me 220 sk:- (25.32 US$). Any way I let it lay on the shelf for a while, had other models going at the time. So when i started work on this the first this i noticed were those dam ugly side panels.
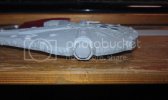
IMAG0098_zpsxfowpybl.jpg

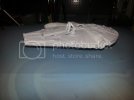
Now to get them somewhat straight wen sanding, it is best to do it wen the model is clamped together. Ore replace them completely and as you replace them you can glue the new panels base a millimeter inside to get the lip at the edge.

However sense i didn't do the later, ore the former. I sanded them individually and thus sanded of a bit to much to have a clean edge all around. So to hide my bad sanding i had to ad some styrene.
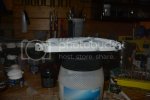
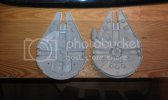
DSC_0239_zpsrqrsumdp.jpg
Image taken from early second re build when i was playing around whit witch panels should be panted.

So doing it this way i had to ad the lip around the edge whit more styrene.
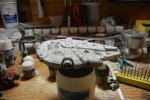
DSC_0237_zpsd4mdbmyy.jpg
Image taken from early second re build when i was playing around whit witch panels should be panted.

And I ended up whit some thing that looked like a joke
IMAG0138_zpsykbx7e2h.jpg
Mind you this proses has taken about 20 years, is been laying in storage fore about 6 of those.

So last year i started on the second try on this, and you might say it is the one I'm on right now. It's just taken a few steps back here and there.

Ill continue put up pic as i upload vids.
 
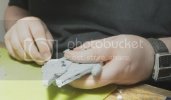
Second thing i did was to cut out the top's backward molded quad laser housing and twist it around. Actualy judging by the picture, it was probably the first thing i did.

IMAG0102_zps0iyolr6q.jpg

next step was filing down the side panels, and ading the styreen to the top and botom of the sides.
IMAG0106_zpszkbyikyj.jpg

Here is an image showing how bad the filing got and why i used styreen to mask it

DSC09825_zpsivaj8rnq.jpg

And this weeks episode.

[youtube]https://youtu.be/0YO0ojLUt_E[/youtube]
 
In this episode I work on removing the boarding ramp.

[youtube]http://youtu.be/OpqhLzUcQ84[/youtube]

sorry about the camera angel episode 2,3 I didn't remember to tilt the camera down.
 
So in this episode I am starting work on the front landing gear.

[youtube]http://youtu.be/UWLICU9f1Dw[/youtube]

Here you can se the end result, alltho theere is one more video of me working on the rear landing struts.

20150409_195326_zpsthez1r5o.jpg

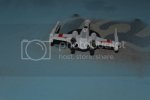
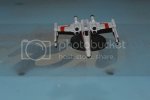
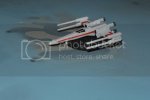
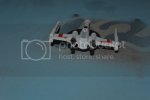
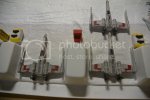
And here is a bonus image of how my X-wings turned out

DSC_0395_zpsxmbamppo.jpg

compared to the original

IMAG0137-b_zpshwjshdz1.jpg
 
Hi guys, in this episode I work on the aft landing gear.

[youtube]http://youtu.be/AS-4ooFQons[/youtube]

And you saw the end result in the previous post.
 
Hi guys hers another one for you.

This video turned out to be a cut & paste video were i walk about various plans for the model, as well as some progress between the clips. The two major step forward were the Deflector dish and the replacement of the Escape pods housings.

[youtube]http://youtu.be/V_MSSv1RTac[/youtube]

Some pars get repeated and I'm sorry for that.
 
Hi guys in this episode i continue the work on the side panels

[youtube]http://youtu.be/KCSxE_mWrts[/youtube]
 
In this video i continue whit more work on the side panels, as well as some other work.

[youtube]http://youtu.be/kklj8gsa6cg[/youtube]

Comments are appreciated, even bad ones. And next weekend if i remember I have a face-palm video fore you guys to watch.
 
Ok to day you get 2 videos at the same time. Apparently i didn't hit post on the one this morning.

These are both of me finishing up the side panel work on the falcon.

Part 10
[youtube]https://youtu.be/A3sH6vcOLqE [/youtube]

Part 11
[youtube]http://youtu.be/WRgZ-ZT6BzQ[/youtube]

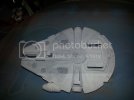
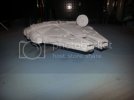
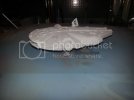
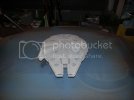
So By the end of part 11 the falcon looked something like this.

20150409_195245_zpsrvuynmei.jpg

20150409_195235_zpsyca7elbp.jpg

20150409_195223_zpsdqpqypw9.jpg

20150409_195212_zpsrst0gset.jpg
 
So finally starting to get some were whit this build

In part 1 I ad the final coat of a of white color, before sealing it whit vanish.

[youtube]https://youtu.be/nzNjvHhHsGE[/youtube]

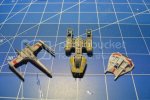
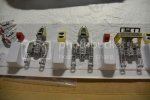
In part 2 I start work on the fighters.

[youtube]https://youtu.be/0ZAQxzYZrxs[/youtube]
 
Just me hawing fun whit windows media studio on a left out part.

BTW if any one want to see what kind of brain farts i get watch the beginning of part 12 part 2.

[youtube]http://youtu.be/nyawTOxlH9M[/youtube]
 
In this part I finally realize I had built my snap kit X-wing a bit wrong, as I work on the small ones.

[youtube]http://youtu.be/zGLF5a3VvSI[/youtube]
 
In this episode i concentrate on finishing up the lasers for the X-wings.

[youtube]http://youtu.be/LjiagJLgbaY[/youtube]
 
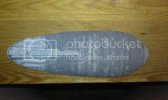
In this episode I'm doing some prep work on the ewer so joyful Troop transport.

As you can see by the image, i started this early on in the build UN-knowingly at the time.

IMAG0155_zpsmd8dg2nz.jpg

this time however to facilitate a better outcome. I removed the 4 extra engine housing, they were a pain to work around on my previous attempts.

DSC_0371_zpspxyiqtxi.jpg

[youtube]http://youtu.be/gycfpOp-s3w[/youtube]
 
In this episode I make the new engine exhausts for the Y-wings, on my NEW lathe.

[youtube]http://youtu.be/Nb_UU8L8T0U[/youtube]
 

Latest posts

Back
Top