Jason Abbadon
Member
- Joined
- Nov 1, 2015
- Messages
- 139
Okay, I started a thread on this a year ago (more!) but I'm back on task and done painting the amazing Flurry carrier from Cosmos models(available in the SSM Store- which wont work for me for some reason!).
This is what you get by way of parts- there's also an excellent color diagram of how the kit goes together:

Obviously I'll need to carefully remove the pour stubs- I might just sand them down with a nail file. I want it as though they were never there- same goes for the engines- but those are easier than the sharp angled lip of the main hull.
For the sake of showing off the incredible level of detail the kit sports, I have added a light wash to the parts:

The ship's cannons and the racks for fighters- the racks will need the ol' hacksaw to seperate from the excess- I'll have to be careful here!
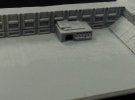
This is the hangar interior- I love this one part where the pilots and crew enter the ship- SO well thought out! I can see the inevitible ground crew guys sitting in there, drinking coffee and complaining about pilots...

The decals for the hangar floor look great- laser printed and super sharp- though I did add some details and make my own version- or expand what's here to go with some additional parts have added.

This is the ventral hangar- I wanted to show off the intricate details added to every part of this model- it's amazing!

My overall impression of the kit: BLOWN AWAY.
Super crisp casting with zero voids or pinholes I can find, amazing mastering of the kit and the design of the details could not be better: a big round of applause to everyone involved with this- Utar, Nick, Jimi and anyone else I'm missing!
I have a second Flurry on-deck with a more colorful paint scheme in mind!
HERE'S WHERE I'M AT AS OF TONIGHT:
http://i.imgur.com/8M95tC3.jpg

So (after many alcoholic spirits were consumed) the spirit of Jimi-Wan appeared and said "Jason- you must complete the Flurry this year! The fate of the galaxy depends on you!"
So I got back into my Flurry build- she's got a gloss coat drying now, but here's the non-weathered paint version.
I'll add the ship's defenses after decaling- she'll be nicely armed!
You can see the new AA cannons on this pic- four on each side, two forward and two aft- plus the cannons that come with the kit- big honkin' turbolasers for the command section!
Colorwise, I wanted very subtle variations of light grey against the white hull- there's going to be some serious decal work next and I did not want the paint to detract from all the crazy I have lined up- lots of spot-color bits to move your eye around and keep you looking at details.
Here's what I have in mind (roughly)- a mock up I made in Photoshop forever ago when I started this build:

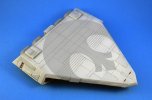
The big Rebel Alliance emblem is printed in black at 20% opacity on clear lazer decal film- which should allow for some of the paint underneath to show through.
I've got a TON of tiny hatches and markings, airlocks, cargo bay doors and windows (for the bridge) waiting application next.
Printed up my expanded decals- made the giant Rebel alliance emblem, some Aurbesh writing for other builds (BWHAHAHA) some hatches and ports and tweaked the hangar floor decal some for kicks and because I cant leave well enough alone.

I have maybe 20 fighters waiting to go in this (Amazing little buggers from Shapeways!) but will probably only put six or seven inside the hangar- as it's very difficult to see inside there once the model is finally assembled.
The rest will be flying escort for their momma- each fighter on a very think black wire.
Photographed against a blak backdrop, I know the fighters will appear to float. I've done that with 1:2500th Trek builds to nice effect.
AS ALWAYS, QUESTIONS AND COMMENTS ARE WELCOMED!
This is what you get by way of parts- there's also an excellent color diagram of how the kit goes together:

Obviously I'll need to carefully remove the pour stubs- I might just sand them down with a nail file. I want it as though they were never there- same goes for the engines- but those are easier than the sharp angled lip of the main hull.
For the sake of showing off the incredible level of detail the kit sports, I have added a light wash to the parts:

The ship's cannons and the racks for fighters- the racks will need the ol' hacksaw to seperate from the excess- I'll have to be careful here!
This is the hangar interior- I love this one part where the pilots and crew enter the ship- SO well thought out! I can see the inevitible ground crew guys sitting in there, drinking coffee and complaining about pilots...

The decals for the hangar floor look great- laser printed and super sharp- though I did add some details and make my own version- or expand what's here to go with some additional parts have added.

This is the ventral hangar- I wanted to show off the intricate details added to every part of this model- it's amazing!

My overall impression of the kit: BLOWN AWAY.
Super crisp casting with zero voids or pinholes I can find, amazing mastering of the kit and the design of the details could not be better: a big round of applause to everyone involved with this- Utar, Nick, Jimi and anyone else I'm missing!
I have a second Flurry on-deck with a more colorful paint scheme in mind!
HERE'S WHERE I'M AT AS OF TONIGHT:
http://i.imgur.com/8M95tC3.jpg

So (after many alcoholic spirits were consumed) the spirit of Jimi-Wan appeared and said "Jason- you must complete the Flurry this year! The fate of the galaxy depends on you!"
So I got back into my Flurry build- she's got a gloss coat drying now, but here's the non-weathered paint version.
I'll add the ship's defenses after decaling- she'll be nicely armed!
You can see the new AA cannons on this pic- four on each side, two forward and two aft- plus the cannons that come with the kit- big honkin' turbolasers for the command section!
Colorwise, I wanted very subtle variations of light grey against the white hull- there's going to be some serious decal work next and I did not want the paint to detract from all the crazy I have lined up- lots of spot-color bits to move your eye around and keep you looking at details.
Here's what I have in mind (roughly)- a mock up I made in Photoshop forever ago when I started this build:

The big Rebel Alliance emblem is printed in black at 20% opacity on clear lazer decal film- which should allow for some of the paint underneath to show through.
I've got a TON of tiny hatches and markings, airlocks, cargo bay doors and windows (for the bridge) waiting application next.
Printed up my expanded decals- made the giant Rebel alliance emblem, some Aurbesh writing for other builds (BWHAHAHA) some hatches and ports and tweaked the hangar floor decal some for kicks and because I cant leave well enough alone.

I have maybe 20 fighters waiting to go in this (Amazing little buggers from Shapeways!) but will probably only put six or seven inside the hangar- as it's very difficult to see inside there once the model is finally assembled.
The rest will be flying escort for their momma- each fighter on a very think black wire.
Photographed against a blak backdrop, I know the fighters will appear to float. I've done that with 1:2500th Trek builds to nice effect.
AS ALWAYS, QUESTIONS AND COMMENTS ARE WELCOMED!


