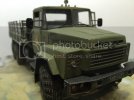
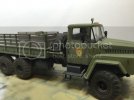
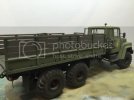
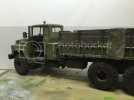
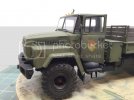
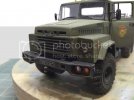
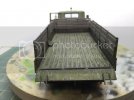
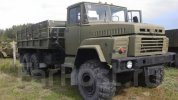
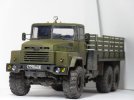
Takom Russian KRAZ-260

jellis11

New Member
Joined
Jul 24, 2012
Messages
112
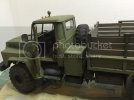
My contribution to the armor forum....Takom's 1:35 Russian KRAZ-260. Mostly OOB except for a few modifications. I posed the passenger side window rolled halfway down and the drivers door open and I added a tarp to the cargo bed. I used almost exclusively paint, washes and pigments from the AMMO of MIG line.

Let me know what you think....all comments and suggestions are very welcome.

Thanks for looking!
IMG_1225_zpsakwrasrf.jpg
IMG_1222_zpsfepawsr6.jpg
IMG_1221_zps3ryxbpqa.jpg
IMG_1220_zpswsvxbuvp.jpg
IMG_1218_zps9xndgccy.jpg
IMG_1217_zpsesqx05sc.jpg
IMG_1216_zpstgjhepvj.jpg
IMG_1219_zpshcusznqt.jpg
 
Looks real enough to me 8)

Nice job on the weathering -- just the right amount .

The only thing that looks odd to me are the headlights ???
 
Urumomo, agreed.....The headlights on the body, right? Not on the bumper? I agree with you now that I see the closeup shots. They do look a bit goofy.....What would you have done differently?
 
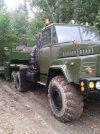
All the Google Images show that style lamp as two -color


975256.jpg

1444633928533_bulletin.jpg


Someone's scale example :

photo_4_1448296770.jpg


.... so , I guess they look like that . You're good 8)

What color (s ) did you use for the exposed steel of the cargo bed ?
 
Aaahh...I see what you're referring to now. Actually, I did paint those lenses in a two tone. The only problem is that you would really only be able to tell from a head on view because the clear parts were molded with indentations on the back side separating the two sections. I thought the smart thing to do was fill those indentations up with the proper colors (amber and silver for the clear).....turns out, I should have made those separations on the "outside" of the lens instead...you would have been able to see the distinction a bit better.
 
For the exposed part of the bed I sponged on "chipping" from MIG on top of a lightened base color.
 
;D " Chipping " , that's the name , huh :D

I ask because some tones I mix for this purpose work better than others depending on the body color(s) so ....

I'm surprised Takom did not produce a two-color lens for the kit , but that's so minor .

Any armor on the bench ?
 
Yup...http://www.ammomigjimenez-usa.com/real-colors/31-chipping.html

There were only clear lenses in the kit....woulda been nice though.

I think I'll probably crack open the MK.1 male tank over the weekend. I've been itching to get it started.
 
Wow, looks really good. Nice chipping, Ill try that 2-color chipping next build (bright edges on the chipped paint).
How about that rear view mirror on first picture? Is it tin foil or how did you do it?
 
Thanks Beeblebrox! I appreciate it. As far as the chipping, like I mentioned earlier, I just lightened the base color with flat white and used a very fine brush to create scratches, scrapes, etc. Then used the MIG color "chipping" (LOL) and went over the top of the mess I made previously. I think it gives some real depth to the effect.

As far as the rear views, that was a true experiment. I tried chrome paint (which looked like "paint"), aluminum foil (couldn't get to lay flat or have a reflective enough surface). Finally, I found some sheets of rigid metallic foil at Hobby Lobby, slowly cut them to fit the recess in the mirror housing, then secured them with white glue.
 
Ok, so its not a chipping medium you are using, its a color and then chipping by painting it over the toned base color.

Thanks for sharing, great inspiring work.
 
You know , Jeff

I think the issue with the headlamps is they are too crystal around the perimeter .

Maybe a quick coat of Flat varnish around just the 'edges' of em ?

Heh heh -- Sorry .


But the thing looks like I could step into it and start it up ;D
the lights in question are the only thing throwing me off :p

Definitely eager to see your take on the MK 1


Ciao
 
;)


I only continued with it since you also said they looked " goofy "

so minor .
Do you agree with ?
I'm thinking 1000 grit around the edges - but the least aggressive approach first .

Ciao


..... Email me the change-order , and we'll cut you a check . ...

. . . or send you a box of sprue ...
 
I do agree. The problem isn't on the outside though. The clear parts are solid except for a slight, shallow indentation on the flat, back side (attach point), which I assume is to fill with the correct color of paint....and is great if you are looking at it from the back side. However, when viewed from the front all you see is the clear majority of the part, with only a hint of the color towards the back. I believe the fix would be to paint the clear amber color on the "outside" of the part.

No biggie though, I am only giving you a hard time. Matter of fact I appreciate the constructive criticism....It helps me to become better and pay more attention to the details that I may have missed when seen through someone else's eyes. I am not above learning!

Thanks!
 

Latest posts

Back
Top