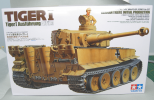
Tiger I Initial (Africa)
- Thread starter sunsanvil
- Start date
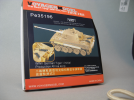
This is my first attempt a serious PE. My experience with it up till now has been the odd mesh grill or what-have you. Going to need help from the peanut gallery.  Do the frets need to be cleaned with any sort of detergent or solvent like we do with resin?
Elm City Hobbies
Active Member
- Joined
- May 7, 2009
- Messages
- 3,241
I have done a bit of PE in the past, but no...haven't had a problem with PE.
If in doubt, just let the frets sit in some vinegar for 10-15mins, should be enough to get any crud off it it that may impeded any CA or paint.
If in doubt, just let the frets sit in some vinegar for 10-15mins, should be enough to get any crud off it it that may impeded any CA or paint.
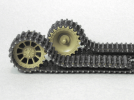
Its one thing to know the Tiger had 48 wheels...its quite another to have to clean up as many.  Still need to distress/chip them. Not sure about the barrel. I didnt want to buy one but while the kit part is....o....k.....I dont know...Still thinking about it.
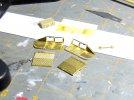
Way too early but I wanted to try some folding....
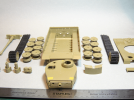
I gave some thought to Voyager's excellent resin attachment bolts for the fenders: Using the plastic kit part I marked the line, but it doesn't quite look right to me...
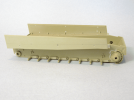
According to Brydon, the two lines should be perfectly parallel with the bottom of the sponson. You can see the forward line isn't, while the back one looks a little high. Humm...

Way too early but I wanted to try some folding....

I gave some thought to Voyager's excellent resin attachment bolts for the fenders: Using the plastic kit part I marked the line, but it doesn't quite look right to me...

According to Brydon, the two lines should be perfectly parallel with the bottom of the sponson. You can see the forward line isn't, while the back one looks a little high. Humm...
Big-John
New Member
- Joined
- Sep 17, 2011
- Messages
- 1,052
Not sure about the barrel. I didnt want to buy one but while the kit part is....o....k.....I dont know...Still thinking about it.
The kit barrel can be cleaned up with a little effort. It just takes a little time and a delicate touch. Once the halves are glued together, I brush on a coat of Mr. Surfacer 500 and wet sand the seam with fine sand paper. Maybe try that first, if you screw it up, then go for the AM barrel.
Build is looking good so far, looking forward to more.
modelerchris521
TO THE WORKBENCH ROBIN
- Joined
- Jun 12, 2012
- Messages
- 76
Great Job so far ;D ;D ;D ;D
Cant wait to see the finished product
Cant wait to see the finished product
Big-John said:The kit barrel can be cleaned up with a little effort. It just takes a little time and a delicate touch. Once the halves are glued together, I brush on a coat of Mr. Surfacer 500 and wet sand the seam with fine sand paper. Maybe try that first, if you screw it up, then go for the AM barrel.
Yea as you can see in the pic above I have put it together and it does clean up nicely, but some of the ring detail is pretty soft and the set screws are missing. I'm going to see how I make out with all the other detailing and if I think I've done a good job I'll get the Voyager barrel.
Elm City Hobbies
Active Member
- Joined
- May 7, 2009
- Messages
- 3,241
Would offer to get you the Lion Roar barrel, but everyone seems to be OOS, including the importer. Lots of Late barrels, but no early ones!
S
ScaleModelMadman
Guest
sunsanvil said:According to Brydon, the two lines should be perfectly parallel with the bottom of the sponson. You can see the forward line isn't, while the back one looks a little high. Humm...
I'm not sure where you read that exact comment but his website mentions something a little different. Like most German armor the Tiger was fraught with constant, minor alterations to the details and the side skirts and their mountings changed several times right from the earliest of tanks.
These are a few snippets from his side skirt section:
"In the original design for the skirts, the mounts were placed equidistant from the bottom edge of the sponson armour, allowing the factory workers to position them easily. But because the sponson edge had a slight bend in it, the line of mounting blocks was also bent."
"In December 1942, the side skirts were altered again. All segments were made the same length, and the welded mounts were put in a straight line."
So basically, the earliest of tanks had side skirts that followed the bend in the lower sponson, like the box art in your initial post. Later these skirts were placed along a straight line, much like the line you have drawn in pencil. It comes down to exactly which Tiger/when/where/who you are portraying, which is a veritable minefield of interpretation, speculation and opinion.
If you are building the earliest of the earlies, you'll have to have the bend upwards in the front few, otherwise your pencil line should be correct.
David Byrdens sideskirt section
Actually if you look closely at my pencil line...it has the bend.  Its perfectly equidistant (aka parallel) from the bottom of the back half, but while it changes angle for the front half, not by enough to track that portion of the sponson bottom (this being traced from the kit part).
I got a hold of David on another forum and he gave me the magic number of 4.6mm from the bottom for the resin mounting bolts so I'm going to see how that looks in terms of where it ends up at the very front (might be too high if Tamiya's proportions arnt perfect).
I got a hold of David on another forum and he gave me the magic number of 4.6mm from the bottom for the resin mounting bolts so I'm going to see how that looks in terms of where it ends up at the very front (might be too high if Tamiya's proportions arnt perfect).
S
ScaleModelMadman
Guest
Sorry, couldn't really tell on my phone it's so small and looked fairly parallel.
...and yeah, I saw the Armorama thread.
...and yeah, I saw the Armorama thread.
cargoman5126
Anything in scale I'm into it...
- Joined
- Nov 7, 2012
- Messages
- 829
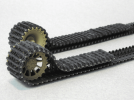
The trax look incredible,,looks like a great start..waitning to see this one come together..great work... 
I need to take some more photos tonight. I'm all over the place with the build right now, wanting to try my hand at some of the advanced PE assemblies to make sure I can do them before cutting off and/or destroying the corresponding kit part.  Front and rear mudguards are scary....

