nicholassagan
sippin on gin + juice
- Joined
- Dec 28, 2011
- Messages
- 2,013
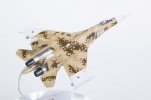
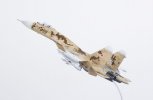
Another non-painting-phase project! I was really excited when I heard Trumpeter was going to be releasing a new tool for a 1/144 Flanker and they did not disappoint (I have 2 more inbound!!).

First off, there are PLENTY of well detailed parts for this kit. It also appears as if they are planning on other variants, the very least of which looks to be the 2-seater UB.


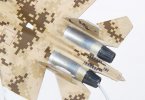
All the details are crisp and feature the finest exhaust nozzles in styrene I’ve ever seen.


You’ll also notice the level of detail on the armament sprues, landing gear, wheel bays, seats and intakes.


armament


The cockpit tub and panel is the only thing that could use a little sprucing up but at this scale it’s hard to see anyway, so not a HUGE mark against… Things that disappoint are my bloody decals and the ejector pin marks on the upper fuselage.


Both are really non issues for this particular build because 1) the pins are easily sanded down and 2) I’ll be using different decals (more below).


There’s also no pilot in the kit, which is odd because you can only mount the canopy in closed position…so I had to borrow a pilot from Pit Road’s 1/144 Sukhoi Pak T-50. Luckily those kits have TWO pilots!! The pit was easy to assembly and drop into the upper fuselage.


Fit-wise this thing is as good as many of the more recent Trumpeter offerings. The intake ducts fit WAY better than the old Airfix or Hasegawa kits in 1/72!! The vertical stabilizers fit flush, the nose seams are solid and the only slight gaps are that little zig-zag area between the wings and elevators. The tail boom also had to be squeezed a little to close the gap. The nozzles are awesome. The intakes are awesome.


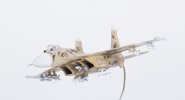
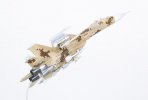
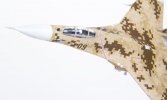
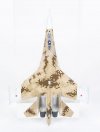
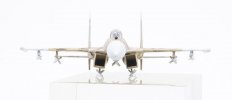
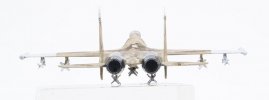
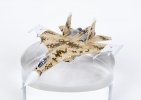
And the rest: digital camo decals from FoxOne, stencils from some Gundam thing, I also decided to go with the ECM pods instead of the Aphid pylons, fat pitot (could have used a needle but then there’d be more putty and sanding), and canopy with the trusty old dorsal seam line.


Oh! And the forward gear door needed some trimming on the hinges and then some gap filling (superglue!). The stand is an old Star Trek resin stand that came with some kit, but turned sideways is looks like the Sukhoi Design Bureau logo!!


First off, there are PLENTY of well detailed parts for this kit. It also appears as if they are planning on other variants, the very least of which looks to be the 2-seater UB.


All the details are crisp and feature the finest exhaust nozzles in styrene I’ve ever seen.


You’ll also notice the level of detail on the armament sprues, landing gear, wheel bays, seats and intakes.


armament


The cockpit tub and panel is the only thing that could use a little sprucing up but at this scale it’s hard to see anyway, so not a HUGE mark against… Things that disappoint are my bloody decals and the ejector pin marks on the upper fuselage.


Both are really non issues for this particular build because 1) the pins are easily sanded down and 2) I’ll be using different decals (more below).


There’s also no pilot in the kit, which is odd because you can only mount the canopy in closed position…so I had to borrow a pilot from Pit Road’s 1/144 Sukhoi Pak T-50. Luckily those kits have TWO pilots!! The pit was easy to assembly and drop into the upper fuselage.


Fit-wise this thing is as good as many of the more recent Trumpeter offerings. The intake ducts fit WAY better than the old Airfix or Hasegawa kits in 1/72!! The vertical stabilizers fit flush, the nose seams are solid and the only slight gaps are that little zig-zag area between the wings and elevators. The tail boom also had to be squeezed a little to close the gap. The nozzles are awesome. The intakes are awesome.


And the rest: digital camo decals from FoxOne, stencils from some Gundam thing, I also decided to go with the ECM pods instead of the Aphid pylons, fat pitot (could have used a needle but then there’d be more putty and sanding), and canopy with the trusty old dorsal seam line.


Oh! And the forward gear door needed some trimming on the hinges and then some gap filling (superglue!). The stand is an old Star Trek resin stand that came with some kit, but turned sideways is looks like the Sukhoi Design Bureau logo!!


