trekriffic
Well-Known Member
- Joined
- Jan 6, 2012
- Messages
- 1,044
Hi everyone.
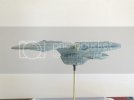
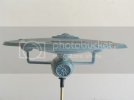
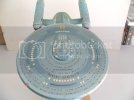
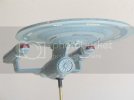
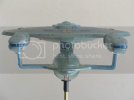
Tobes' Enterprise C thread inspired me to post these images of my own Ambassador class model, the USS Excalibur.
This model was built from the USS Yamaguchi kit which was molded in clear plastic for lighting purposes.
The clear plastic was quite brittle and I was constantly having to repair chips in the saucer rim caused by my banging the edge against my worktable. Details follow concerning this model's construction for those interested...
First I airbrushed transparent blue on the backsides of the clear warp grills and deflector dish except for the center circle on the dish which was painted with Turn Signal Amber.
Transparent red was airbrushed on the insides of the bussard domes.
After that, the ship was completely assembled with GOW light bulbs and all wiring in place, the seams were puttied then sanded smooth, the lit windows and running lights were covered with liquid masking film and the warp grills and deflector dish were masked with tape.
This ship was built as the Yamaguchi variant which has some slight differenences from the C; mainly being the addition of an underslung second shuttle bay under the fantail, a spoked framework for the deflector dish, and cowlings on the bussard domes.
The bussard cowlings were made by cutting and appllying masking tape leaving a slot where the red would show through. Then liquid decal film was carefully brushed on over the transparent red part. After a few minutes the masking tape was removed before the decal film was completely dry so as to leave the mask of decal film behind.
After this dried, ratttle can primer was sprayed on. More seam filling followed with more sanding before a coat of black enamel was sprayed on for light blocking. Afterward, more primer was sparyed on then a basecoat of
Duckegg Blue was airbrushed on followed by light gray and medium gray stripes which were then covered by a light thinned down airbrushing of the basecoat over the top of the stripes making them more muted and subtle.
Most of the Light Blue and Intermediate Blue accent colors on the secondary hull and saucer were handbrushed.
Never having been a big fan of the pastel blues of the studio model (the colors remind me of those seen in a children's nursery room) I decided to try a diffferent approach using Transparent Silver Blue Metallic from a rattle
can. The use of Silver Blue Metallic really worked for me. It served to darken the colors somewhat and imparted a more unified, metallic finish to the model.
Unlit windows were painted black using thinned down enamel and the lit windows were cleared using a microbrush dipped in denatured alcohol which softened the layers of masking film and paint enough for me to clean the windows. The same technique was used to clean the red bussard dome slots. Once uncovered the clear windows were coated with Future for crystal clarity.
The masking tape on the deflector dish and warp engines was then removed.
After decaling the ship was given 2-3 coats of satin semi-gloss lacquer for the final finish.
Sometime later I bought aftermarket decals for the lifeboat hatches and transporter emitters whcih really were a nice touch to finish her off.
Anyway, here are the pics. These were taken years ago using my old camera. One of these days I'll take some better ones:


