VW Rat

ScarredKustoms

Whatcha building!?
Joined
Jan 7, 2011
Messages
630
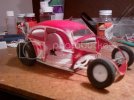
Well said I was going to jump back in with both feet. Bought this model when I was stationed in Italy (93-96) started on it back then but only painted the body.


Photo0188.jpg
Photo0190.jpg


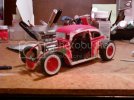
After looking at it decided I wanted to build a VW Ratrod with a blown V8 hemi ;D
Here is what I got done last night.
Photo0200.jpg
 
I little mock up... Having a heck of a time with the chop top keeps breaking at the front windshield pillars almost ready to glue the doors in and give up on making them open.
Photo0211.jpg

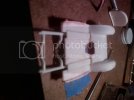
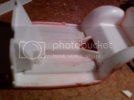
Here is an image of the frame channeled into the body pan ... Original kit was set up as a Gasser if you built it with the V8 I want mine in the weeds.
Photo0207.jpg

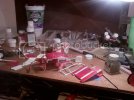
Well desk is a mess now ... don't take long ... Can see the underside of the channel in this shot. Using my camera on my phone and uploading them right to photobucket ... what a nerd I am
Photo0205.jpg
 
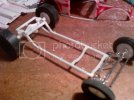
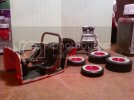
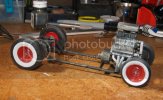
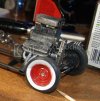
Well chassis is almost done after test fitting I realized I need to make motor mounts the engine was moved up and forward to accommodate the lowered suspension. Wheels are just test fit on just to see how low I got it ... not as low as I wanted it but need room for the exhaust

Photo0212.jpg

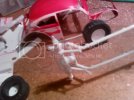
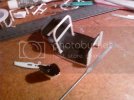
Custom made the rear suspension... sorry for the blurry picture ... camera phone doesn't take great macro

Photo0213.jpg

Test fit ... adjust ... test fit ... adjust ... repeat

Photo0211.jpg

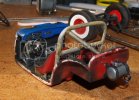
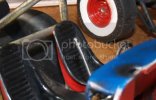
shot of the interior ... working on the drive-shaft tunnel pulled off drag chassis that came with model ... wanted to use stock interior ... rear wheel wells fit the body a lot better

Photo0214.jpg
 
Interior is painted and scratch built a roll bar from sprues and stole seats from a older VW model that was a converitable and came with optional seats (love kits like that) Can't decide what to do about the dash becuase of the engine bay comes so far into the interior ... I know I wll have to put the seats all the way back so the driver would have leg room. Any thoughts?

Photo0222.jpg
 
Thanks Anedg003

Well some how I managed to loose a rim ... think the cat stole it :mad:

Went through all my kits in the house and didn't find anything suitable so once the sun is up today I'm off to brave the cold and get the rest of my kits and parts from the garage. Once everything is in I'm going to update my stash pictures and I'm pretty sure I have some completed models out there. :p
 
Looks good. I think it's pretty cool when some body takes model "A" and transforms it into some think else.
 
Thanks JMac ... I don't think there are many models I build that are straight outta the box ... lol

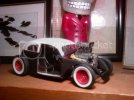
Well I gave up on finding the rim ... went a different route and it turned out really well. Got a little more done.
Photo0226.jpg

Another test fit/mock up ... I think it's coming along ... Want to wire the motor and run brake lines and such like I usually do but can't find my micro drill bits.

Photo0225.jpg

Going to get a little more done and break out my good camera for some high res images ... Really happy with the "glass" shift knob I made.
 
Here's an update for those of you who are following this build. Been busy shouldn't even be posting right now ;D need to finish editing a commercial. But anyway ::)

Here is chassis done minus drive-shaft that I still have to make.

chassis.jpg

Shot of the motor still want to wire this and detail it a little more ... looks used and abused

motor.jpg

Rear shot of body pan little bit of age showing.

interior2.jpg

Here is a shot of the clear shift knob I made ... piece of bent wire repeatedly dipped in clear enamel ;D

glassknob.jpg

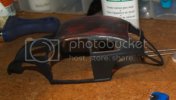
Still doing body work and fitting doors

body.jpg

Thanks for looking any feedback is great!

Oh and I rearranged my photobucket so if you see one of my post that the picture link is broken please message me ... THANK YOU!!
 
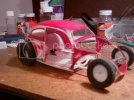
Thank you for the comments. Just got back from local hobby shop The Prop Shop and harbor freight and picked up a few supplies. Mixed bag of styrene and flat white paint so I can finish the body ... was going to buy pin vise and drill bits at hobby shop but would have cost me $50 picked up the same thing at harbor freight for $10 and got double the amount of drill bits. Now I will have to wire the engine, brake lines ... etc

Want to get this bug done so I can start on a new project !! ;D
 
Thank you all for the comments ;D

Small update picture. Haven't got much done on it, was side tracked by another model that was calling me in my stash. lol

Photo0235.jpg

I'm having issues with the doors, keep breaking at the joint where I chopped the top. Glue I'm using is either old or just plan sucks. What glue do you guys use?

I'm about to drill holes where I chopped the top and put a wire(s) in the joint. Like a dowel rod when joining wood.
 
I use Tamiya Thin, Thin CA, Thick CA and Tenax, depending on what need sticking.
 
I use the Tamiya thin also, and two viscosities of CA (thin and what I would call a medium), as well I sometimes use Future to join some clear parts.
 
Having a real hard time finishing this model. Seems like every time I work on it something else breaks. Think I am going to set it aside and find something else to work on. :-[
 
I've had days like that, SK.
Step back from it. Work on something easy, then come back. Should help a lot
 

Latest posts

Back
Top