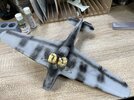
Hawker Hurricane IIB, Revell 1/32

BarryW

Member
Joined
Apr 17, 2025
Messages
23
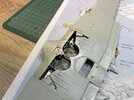
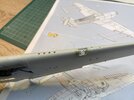
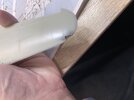
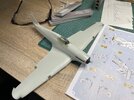
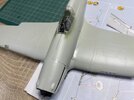
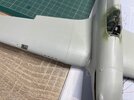
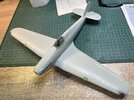
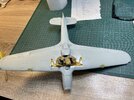
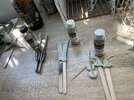
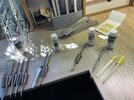
Here are a couple of in progress shots of this, my latest build.

I am not the biggest Revell fan but I would say that this is one of the better Revell 1/32 aircraft I have built and while not as refined as many other brands it does have good fit and reasonable engineering with fairly shape moulding and very little flash or burring.

Until now 1/32 scale has been poorly served with Hurricanes and this, to some extent rights the wrong but the definitive 1/32 Hurricane is yet to be produce (come forward Kotare with their Mk1 set to drop lat this year or early next).

Revell will be releasing a 1/32 Sea Hurricane soon and I may well get that as well. I just love the FAA camo scheme.

So, this is where I am at, fuselage joined, seams sorted with wings next to do:

Airbrush paints being used: MRP lacquers
Handbrushed detail: Vallejo Model Colour
Aftermarket: Quinta 3d cockpit set and ASK canopy masks

I found that the Quinta seatbelts deteriorated and fell apart just while soaking, so I used Eduard Steel lap seatbelts as the Quinta were no usable. The rest of the cockpit details worked fine, were on a seperate sheet and are amazing.

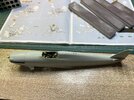
IMG_8322.jpeg


IMG_8320.jpeg

I will pose some more progress pics of this as I go. This is the second of my simple, largely, out of the box builds. I will be following up when this is done with a more complex build.
 
HI Barry nice to see you back building a kit on here an a 1/32 as well so loads of detail should be a good intestestin build an i will be following your build an i hope its a better kit than my 1/32 phantom as ive just now starting on the main parts of the build an found the plastic is quite weak an not many locator pins so its a job to get the parts to meet up when gluein as they slip easy in my hands an i thought tamyia was a rolls rocyce kit maker oh dear
ATB
Chrisb
Hi Chris.
Great to see you here
Yes, this Tamiya kit is an old tooling and far from today's quality offering a lot of challenges but I am sure that you will overcome them and produce a great result.
 
Hi Chris.
Great to see you here
Yes, this Tamiya kit is an old tooling and far from today's quality offering a lot of challenges but I am sure that you will overcome them and produce a great result.
HI AGAiIN Barry yes i thought the kit is old AS Steve gave it to me SO tamyia is a lot better now glad to hear that as its put me right off TAMYIA but im gettin on now so i have bought enough kits now to see me out an i bought that tornado that you built an yes looks a very nice kit an the workin wings parts an a big 1/200 SCALE KIT OF the USS HORNET as i want to build it for the dolittle raid an an a big 1/48th MONEAGRAM B /58 HUSTLER but this is an old kit AN LASHED OUT on a 1/350 tamyia USS ENTERPRISE an would you beleive it had no hawkeyes on it so sent off for 2 kits tiny they may be but im hopein to light up all these kits one way or another an the last big kit ive bought may not be up anybodys street on here but i have bought a fully workin 1/17 scale CLAAS COMBINE as ive always wanted a workin one since i was a kid as i used to ride around on them in the 1960 's an i was fasinated by all the workin parts an it has 4 an a half thousands parts an 3HUNDRED AN 27 PAGES OF INSTRUCTIONS AN ITS IS GOIN TO BE A VERY HARD BUILD THATS IF I CAN BUILD IT THAT IS AN are yo still on the old forum as im now been put off as i could not understant how to pay my subs so he put me off anyway lookin forward to your hurri build
ATB
chrisb
 
Hi Chris.

Yes I am still on the old forum and I will be doing some posting there. I don't do so as much as I used to as the new platform is just not as user friendly.
 
Hi Chris.

Yes I am still on the old forum and I will be doing some posting there. I don't do so as much as I used to as the new platform is just not as user friendly.
YES Barry thats what i find on the old site an im waiting till i get my windows 11 laptop an then i may try an rejion as i herd somwhere that john has got all the build pics back up full size is this true ? as i cant look on there but if i do jion again i will still stay on this site as well as there are some very good moddelers on here
chrisb
 
Some more progress shots
The wing sub assembly is done. The wheel wells were weathered with AKI Dark Brown Wash while also was treated with Ammo Dark Earth pigment to give it a nice grubby look. The lens chrome was from an AK chrome paint pen.

When joined to the fuselage the fit was not to bad, I have seen a lot worse. It will need a little filler

IMG_8323.jpeg
IMG_8324.jpeg
IMG_8325.jpeg


IMG_8326.jpeg


IMG_8327.jpeg
IMG_8328.jpeg
IMG_8329.jpeg
 
oh some nice pics Barry of this hurri an its lookin good pity there was no lights in them landing lights but i know you dont like to fit them but each to his own but it looks a crackin build more please an i hope the plastic is a lot stronger than on my phantom
chrisb
 
...methodical and reasoned approach.
I like it.
Sometimes, in my worklife, more footloose 'creatives' would smirk at my principle and process oriented design methods, but when things went sideways, I had a very good idea why, and how to avoid it in the future, as well as how to repeat a success.
There will always be accidents, happy and sad. Why bet the farm on a whim?
 
HI Barry that hurri is goin to be a nice build what your out of 10 score for it ? as i alsways think that when i do my builds of models an jen an i hope you are getting on fine in your wheelchair sir ?
chris an jen
 
HI Barry that hurri is goin to be a nice build what your out of 10 score for it ? as i alsways think that when i do my builds of models an jen an i hope you are getting on fine in your wheelchair sir ?
chris an jen
Hi Chris and Jen. I am doing fine thank you the cancer is well under control and my 'legs' are getting me around and enabling me to be almost fully independent.

I would give this Hurri about 8/10. It's the best Revell build I have done. It is lacking in the refinement of Zoukei Mura, Tamiya and Kotare as you would expect but, overall a pleasing build
 
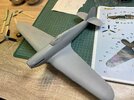
I have moved on to prime the mainframe. I am a great believer in surface preparation as being the key to a good finish.

First of all I decided to prime with the MRP Grey Primer instead of my usual black to do a painting experiment.

First step though was to thoroughly clean the model with 99% ipa. I wiped it down, using cotton buds to get into detail.

Then I applied the primer which dries very fast so I can check the joins and seams in the same session. I then used Mr Dissolved Putty to treat any joins that need attention. This I leave overnight to fully cure hard.

For sanding I use the full range of Infiny sanding products and their sanding sponge sticks are idea for this. I work through various grades, 600, 800, 1000, 1500 to ensure no scratches are left.

Next I go around and rescribe any lost detail, I also check for glue imperfections and correct them.

I then use a 25000 sanding sponge all over the model to remove and rough areas to ensure a smooth overall surface.

Another grey primer coat and, when dry another going over with the 2500 grit sanding sponge.

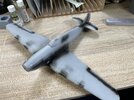
This is how she now looks.

IMG_8336.jpeg

Next job is to use the MRP black primer but not in the way I have used it before or have seen others use it. I will be specifically targeting areas that will be in shadow or where engrained dirt/oil will be. An odd time for the latter, but please bear with me. More later.
 
Here are pics of the black preshading

A few notes on this that might help the less experienced modellers.
1/ I see a lot of pictures, mostly on Facebook rather than forums such as this, where someone has shown excellent airbrush control carefully spraying neatly along the panel lines often because they mix up the idea of panel line accentuation and preshading. These are very much two different things. These models just look wrong to the eye with this regular grid pattern showing through the paint. By the nature of what you want the result to be preshading must not be neat and even, dirt and grime does not work that way.
2/ Remember that this is just the first stage of a process which will include panel line line washes, post shading, pigment work and so on.
3/ This is also an experiment for me. I am trying out some ideas I have had. My normal process is called black basing and that's for another model.

The pictures

IMG_8338.jpeg
IMG_8339.jpeg


Write your reply...

Latest posts

Back
Top