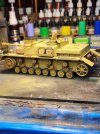
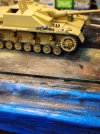
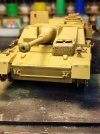
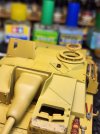
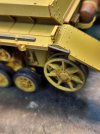
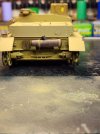
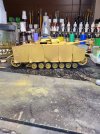
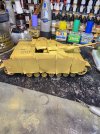
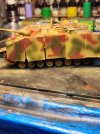
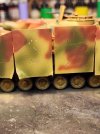
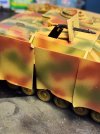
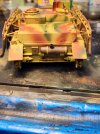
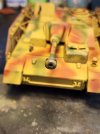
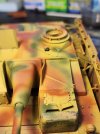
German Sturmgeschutz IV

I cannot believe I've been up all night working on this. It's now 6:30 in the morning! o_O
Man time flies by!
Anyway, I'm getting closer to weathering.
 

Attachments

  • 20230319_062918.jpg
    20230319_062918.jpg
    364.4 KB · Views: 10
  • 20230319_063041.jpg
    20230319_063041.jpg
    345.2 KB · Views: 9
  • 20230319_062937.jpg
    20230319_062937.jpg
    318.2 KB · Views: 8
  • 20230319_063129.jpg
    20230319_063129.jpg
    207.9 KB · Views: 10
  • 20230319_063149.jpg
    20230319_063149.jpg
    197.3 KB · Views: 10
  • 20230319_063411.jpg
    20230319_063411.jpg
    254.8 KB · Views: 10
  • 20230319_063056.jpg
    20230319_063056.jpg
    184.4 KB · Views: 10
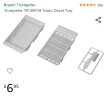
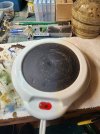
Trying out my new decal tray.
I think I paid around $11.00 for it from Amazon.
Then it never came and I contacted the seller twice and never heard from them. So, I ordered another one from ebay. And as soon as the ebay shipped the Amazon order came in.
So now I have 2.
Forgive me but I've never heard of a decal tray. The name says what it is but what is the purpose of it when it comes to doing decals? My interest is tweaked.
 
Forgive me but I've never heard of a decal tray. The name says what it is but what is the purpose of it when it comes to doing decals? My interest is tweaked.
Mine too. Just had a look on YouTube and decided to order one.
Pantherman
 

Attachments

  • Screenshot_20230319_131632_Amazon Shopping.jpg
    Screenshot_20230319_131632_Amazon Shopping.jpg
    54 KB · Views: 6
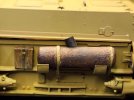
Just out of curiosity, where did you see that the fire extinguisher should be painted red? I have seen this done on more than one German AFV model, but when I did my research on it apparently this is not correct as most extinguishers were painted the same colour as the vehicle.
Not trying to pin prick, just curious. Personally, I actually prefer them the colour you have painted.

Phil
 
Forgive me but I've never heard of a decal tray. The name says what it is but what is the purpose of it when it comes to doing decals? My interest is tweaked.
It works great (thumbs up). Even on very small decals.
I did a test on a small decal, it did slip through the slats but still easy to retrieve.
I recommend it.
 
Just out of curiosity, where did you see that the fire extinguisher should be painted red? I have seen this done on more than one German AFV model, but when I did my research on it apparently this is not correct as most extinguishers were painted the same colour as the vehicle.
Not trying to pin prick, just curious. Personally, I actually prefer them the colour you have painted.

Phil
I see that. Thanks brother. It's easy enough to pop off and give it a covering of Dunkel gelb.
 
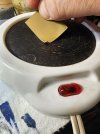
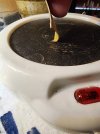
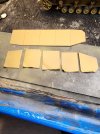
I figured to try a different way to achieve warped, damaged, and bent steel. Instead of a lighter (which can cause owies) I decided that my coffee warmer dock (which I use to warm water for decals) could work. For this experiment I used the steel shields from my current build. I placed the edge I wanted to bend on the plate and began rocking the edge/corner back and forth. Then I took tweezers to further bend it into the desired shape. And BINGO!
 

Attachments

  • 20230320_161229.jpg
    20230320_161229.jpg
    346 KB · Views: 14
  • 20230320_161733.jpg
    20230320_161733.jpg
    276.4 KB · Views: 11
  • 20230320_161759.jpg
    20230320_161759.jpg
    237 KB · Views: 14
  • 20230320_160518.jpg
    20230320_160518.jpg
    392.9 KB · Views: 14
I figured to try a different way to achieve warped, damaged, and bent steel. Instead of a lighter (which can cause owies) I decided that my coffee warmer dock (which I use to warm water for decals) could work. For this experiment I used the steel shields from my current build. I placed the edge I wanted to bend on the plate and began rocking the edge/corner back and forth. Then I took tweezers to further bend it into the desired shape. And BINGO!
I like it, ingenious.
Pantherman
 
After you get them where you want them I recommend sanding the visible edges down to be more in scale .
Schurzen was 5 mm if I remember correctly so .14 mm in 1/35 .
Feathered into the stock thickness makes the illusion work even on the inside .
 
After you get them where you want them I recommend sanding the visible edges down to be more in scale .
Schurzen was 5 mm if I remember correctly so .14 mm in 1/35 .
Feathered into the stock thickness makes the illusion work even on the inside .
5mm‽ that is so thin. Isn't that about ³/¹⁶" ?
 
So far so good.
One minor hiccup; the armor plate racks were on opposite sides, easy peezy lemon squeezey.
Gun is taped and hatch is closed for winter camo paint.
 

Attachments

  • 20230321_014630.jpg
    20230321_014630.jpg
    414.7 KB · Views: 12
  • 20230321_014635.jpg
    20230321_014635.jpg
    526.3 KB · Views: 12
If you can't get a spare part from Tamiya, you can make a copy of one of the existing wheels using Oyumaru mold material that you stick in boiling water along with some miliput or green stuff

Since you really just need to open face side it is very easy. Boil some water, drop the Oyumaru in it for 30 seconds or so, squish it around an existing part and let it cool

mix i[ some milliput or green stuff and press it into the mold. Let it dry and viola, you've got a copy of your part

There are lots of videos on using Oyumaru

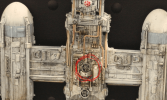
I did it for this tiger sprocket part on my 1/72 Y-Wing for example

1679409792801.png


I have even done two part molds with the Oyumaru stuff to make copies of pilots or more complex parts, but those are a bit harder to do
 
If you can't get a spare part from Tamiya, you can make a copy of one of the existing wheels using Oyumaru mold material that you stick in boiling water along with some miliput or green stuff

Since you really just need to open face side it is very easy. Boil some water, drop the Oyumaru in it for 30 seconds or so, squish it around an existing part and let it cool

mix i[ some milliput or green stuff and press it into the mold. Let it dry and viola, you've got a copy of your part

There are lots of videos on using Oyumaru

I did it for this tiger sprocket part on my 1/72 Y-Wing for example

View attachment 98623


I have even done two part molds with the Oyumaru stuff to make copies of pilots or more complex parts, but those are a bit harder to do
I dont think I'm at such an advanced level Blake, but that is awesome work!

I got an email yesterday.Tamiya is sending the wheel. :)

Curious to see how Oyumaru works. I'll be watching YouTube later today.

Thank you.
 
Weren't there any spare road wheels in the kit? Not trying to be a smart-aleck-I'm thinking of the pair of spares that were carried in a rack on the hull.
 
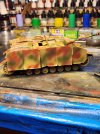
Primary camo is on. Next hairspray and winter camo.
 

Attachments

  • 20230321_132924.jpg
    20230321_132924.jpg
    397.2 KB · Views: 8
  • 20230321_132951.jpg
    20230321_132951.jpg
    320.7 KB · Views: 8
  • 20230321_133001.jpg
    20230321_133001.jpg
    358.6 KB · Views: 6
  • 20230321_133105.jpg
    20230321_133105.jpg
    287.3 KB · Views: 5
  • 20230321_132939.jpg
    20230321_132939.jpg
    405 KB · Views: 6
  • 20230321_133011.jpg
    20230321_133011.jpg
    152.6 KB · Views: 5
  • 20230321_133049.jpg
    20230321_133049.jpg
    230.2 KB · Views: 7

Latest posts

Back
Top