You are using an out of date browser. It may not display this or other websites correctly.
You should upgrade or use an alternative browser.
You should upgrade or use an alternative browser.
Galileo Shuttle 2022 1:32 Scale with Interior
- Thread starter trekriffic
- Start date
trekriffic
Well-Known Member
- Joined
- Jan 6, 2012
- Messages
- 984
Thanks ohbejuan! Glad you are enjoying the build.
Today's update...
Sides of door ramp puttied and smoothed with AVES Apoxy Sculpt leaving
the paperclip barely exposed for contacting the rare earth magnet in the doorframe:
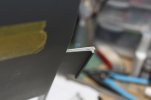
The Galileo 7 - WIP 058 by Steve J, on Flickr
Rear wall tanks glued together, puttied, and placed temporarily on my new Tamiya rotating paint stand to dry:
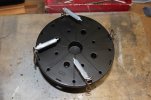
The Galileo 7 - WIP 059 by Steve J, on Flickr
Other stand included in my new Tamiya airbrushing stand set. This one is spring loaded and best suited for holding model car bodies:
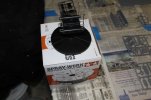
The Galileo 7 - WIP 060 by Steve J, on Flickr
Tools for scribing lines into the exterior surface of the roof. The kit instructions included a paper template for use in creating these panels atop the shuttle. Here I have taped it to the plastic roof piece.
I will use two pieces of Dymo label tape laid down close together on each side of each line, after I pencil it on, so the scribing tool stays in the gap and doesn't wander off the straight and narrow while I press down:
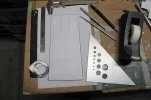
The Galileo 7 - WIP 061 by Steve J, on Flickr
Roof panel line scribing almost done. I left about a miillimeter at the ends of each panel line unscribed as the panels have rounded corners. Just need to decide how I want to approach scribing them. Freehand could get messy if I slip. Think I need to make up a template to guide the tool:
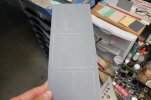
The Galileo 7 - WIP 062 by Steve J, on Flickr
I finally hit on the best solution to scribing the curved corners and having them be uniform. I punched a hole in some black dymo label tape and used the disc cut from the tape and the hole left in the tape to make scribing guides for each corner:
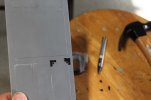
The Galileo 7 - WIP 063 by Steve J, on Flickr
Galileo roof is now scribed. Probably took me about 4 hours to do. The dymo label tape sure does the trick for scribing straight lines. And my trick with the hole punch makes rounded corners a snap too. Still, you can see spots where I did stray outside the tape and had to fill in some minor scratches with white PPP putty. After another coat of primer and final coats the panels should look just fine:
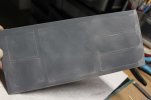
The Galileo 7 - WIP 064 by Steve J, on Flickr
Think I'll start gluing the lower hull and wing struts together next now that the lower door/ramp is sorted out.
Today's update...
Sides of door ramp puttied and smoothed with AVES Apoxy Sculpt leaving
the paperclip barely exposed for contacting the rare earth magnet in the doorframe:

The Galileo 7 - WIP 058 by Steve J, on Flickr
Rear wall tanks glued together, puttied, and placed temporarily on my new Tamiya rotating paint stand to dry:

The Galileo 7 - WIP 059 by Steve J, on Flickr
Other stand included in my new Tamiya airbrushing stand set. This one is spring loaded and best suited for holding model car bodies:

The Galileo 7 - WIP 060 by Steve J, on Flickr
Tools for scribing lines into the exterior surface of the roof. The kit instructions included a paper template for use in creating these panels atop the shuttle. Here I have taped it to the plastic roof piece.
I will use two pieces of Dymo label tape laid down close together on each side of each line, after I pencil it on, so the scribing tool stays in the gap and doesn't wander off the straight and narrow while I press down:

The Galileo 7 - WIP 061 by Steve J, on Flickr
Roof panel line scribing almost done. I left about a miillimeter at the ends of each panel line unscribed as the panels have rounded corners. Just need to decide how I want to approach scribing them. Freehand could get messy if I slip. Think I need to make up a template to guide the tool:

The Galileo 7 - WIP 062 by Steve J, on Flickr
I finally hit on the best solution to scribing the curved corners and having them be uniform. I punched a hole in some black dymo label tape and used the disc cut from the tape and the hole left in the tape to make scribing guides for each corner:

The Galileo 7 - WIP 063 by Steve J, on Flickr
Galileo roof is now scribed. Probably took me about 4 hours to do. The dymo label tape sure does the trick for scribing straight lines. And my trick with the hole punch makes rounded corners a snap too. Still, you can see spots where I did stray outside the tape and had to fill in some minor scratches with white PPP putty. After another coat of primer and final coats the panels should look just fine:

The Galileo 7 - WIP 064 by Steve J, on Flickr
Think I'll start gluing the lower hull and wing struts together next now that the lower door/ramp is sorted out.
trekriffic
Well-Known Member
- Joined
- Jan 6, 2012
- Messages
- 984
Still touching up the crew but, when not obsessed with Mears' hair or Guetano's ears,
I managed to airbrush the light, slightly reddish, beigy interior wall color...
Testors flat white, beige, and rust enamel were mixed to make the interior upper and lower wall color to match the paint chip.
Later on I added a few drops of flat brown to darken it just a shade:
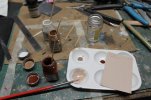
The Galileo 7 - WIP 065 by Steve J, on Flickr
The upper/inner surface of the door ramp was painted to match the lower wall color:
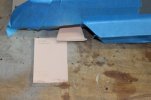
The Galileo 7 - WIP 066 by Steve J, on Flickr
Inner upper and lower wall surfaces were masked off and airbrushed with my light, slightly reddish, beige enamel:
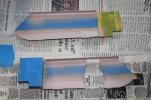
The Galileo 7 - WIP 067 by Steve J, on Flickr
No pic but I also re-primed the upper roof piece I had previously scribed.
Three treatments with Mister Surface with wet sanding in between did the trick.
I managed to airbrush the light, slightly reddish, beigy interior wall color...
Testors flat white, beige, and rust enamel were mixed to make the interior upper and lower wall color to match the paint chip.
Later on I added a few drops of flat brown to darken it just a shade:

The Galileo 7 - WIP 065 by Steve J, on Flickr
The upper/inner surface of the door ramp was painted to match the lower wall color:

The Galileo 7 - WIP 066 by Steve J, on Flickr
Inner upper and lower wall surfaces were masked off and airbrushed with my light, slightly reddish, beige enamel:

The Galileo 7 - WIP 067 by Steve J, on Flickr
No pic but I also re-primed the upper roof piece I had previously scribed.
Three treatments with Mister Surface with wet sanding in between did the trick.
trekriffic
Well-Known Member
- Joined
- Jan 6, 2012
- Messages
- 984
Main console parts ready to glue together and decal:
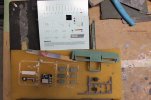
The Galileo 7 - WIP 079 by Steve J, on Flickr
Seat floor brackets installed:
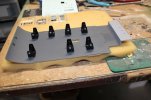
The Galileo 7 - WIP 080 by Steve J, on Flickr
Metal tacks hold the chairs in place allowing them to turn:
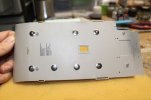
The Galileo 7 - WIP 081 by Steve J, on Flickr
Brackets turn freely:
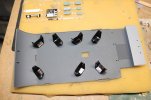
The Galileo 7 - WIP 082 by Steve J, on Flickr
Roof panel painted and unmasked:
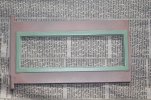
The Galileo 7 - WIP 083 by Steve J, on Flickr
Floor access maintenance bay with pipes and gauges. Scottie used this hatch to
access and replenish some of the shuttle's fuel supply using hand phaser energy:
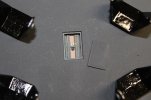
The Galileo 7 - WIP 084 by Steve J, on Flickr
More to come.

The Galileo 7 - WIP 079 by Steve J, on Flickr
Seat floor brackets installed:

The Galileo 7 - WIP 080 by Steve J, on Flickr
Metal tacks hold the chairs in place allowing them to turn:

The Galileo 7 - WIP 081 by Steve J, on Flickr
Brackets turn freely:

The Galileo 7 - WIP 082 by Steve J, on Flickr
Roof panel painted and unmasked:

The Galileo 7 - WIP 083 by Steve J, on Flickr
Floor access maintenance bay with pipes and gauges. Scottie used this hatch to
access and replenish some of the shuttle's fuel supply using hand phaser energy:

The Galileo 7 - WIP 084 by Steve J, on Flickr
More to come.
trekriffic
Well-Known Member
- Joined
- Jan 6, 2012
- Messages
- 984
Time for an update...
I painted a thin piece of precisely trimmed styrene sheet to match the interior wall color then glued it in behind the windows to complete the framing of the three panes and form the forward wall of the crew compartment:
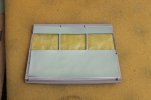
The Galileo 7 - WIP 086 by Steve J, on Flickr
I brush painted the silver metal floor plate located in the aft compartment:
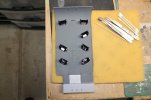
The Galileo 7 - WIP 085 by Steve J, on Flickr
Interior of stern "maintenance" compartment accessed thru an exterior door in the stern:
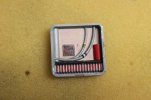
The Galileo 7 - WIP 087 by Steve J, on Flickr
Wall computers glued in with Gorilla CA gel glue. Two boxes were glued to the wall in the aft engine compartment.
Decals are all awash in Solvaset:
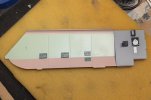
The Galileo 7 - WIP 088 by Steve J, on Flickr
After removing all masking tape I glued in the wall computers using CA gel glue. The decals are soaking in Solvaset in this shot:
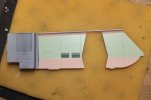
The Galileo 7 - WIP 089 by Steve J, on Flickr
All those parts I started with and look what I have left. The fun stuff is coming up next:
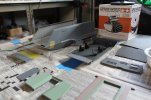
The Galileo 7 - WIP 095 by Steve J, on Flickr
I painted a thin piece of precisely trimmed styrene sheet to match the interior wall color then glued it in behind the windows to complete the framing of the three panes and form the forward wall of the crew compartment:

The Galileo 7 - WIP 086 by Steve J, on Flickr
I brush painted the silver metal floor plate located in the aft compartment:

The Galileo 7 - WIP 085 by Steve J, on Flickr
Interior of stern "maintenance" compartment accessed thru an exterior door in the stern:

The Galileo 7 - WIP 087 by Steve J, on Flickr
Wall computers glued in with Gorilla CA gel glue. Two boxes were glued to the wall in the aft engine compartment.
Decals are all awash in Solvaset:

The Galileo 7 - WIP 088 by Steve J, on Flickr
After removing all masking tape I glued in the wall computers using CA gel glue. The decals are soaking in Solvaset in this shot:

The Galileo 7 - WIP 089 by Steve J, on Flickr
All those parts I started with and look what I have left. The fun stuff is coming up next:

The Galileo 7 - WIP 095 by Steve J, on Flickr
trekriffic
Well-Known Member
- Joined
- Jan 6, 2012
- Messages
- 984
Upper and lower door panels mate together well, especially when I get the interior glued in place and can glue the front of each side of the hull to the bottom. that will tighten up some minor gaps:
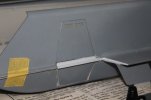
The Galileo 7 - WIP 094 by Steve J, on Flickr
The main control console awash in Solvaset. This took about 4 treatments with gentle tamping after a few hours using a cotton swab and microbrushes then repeating until I finally got the decals to lay down. This last soaking should do it though... I think:
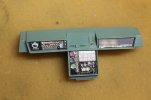
The Galileo 7 - WIP 90 by Steve J, on Flickr
Port and starboard Winglets swapped and re-glued to hull sides with Testors red tube glue and gap filling CA. Nacelles no longer toe inward but face straight forward:
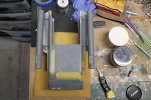
The Galileo 7 - WIP 097 by Steve J, on Flickr
After swapping and re-attaching the winglets I used Vallejo acrylic putty for smaller gaps and AVES Apoxy Sculpt to fill larger ones:
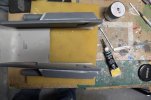
The Galileo 7 - WIP 100 by Steve J, on Flickr
Special attention is paid to the juncture of the winglet trailing edges and the stern of the fuselage. Lots of filing and sanding makes for a smooth transition:
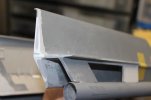
The Galileo 7 - WIP 099 by Steve J, on Flickr
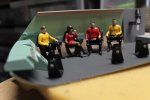
Starboard cabin wall was glued to floor. Decided to take some pics of the crew in their seats while the epoxy cured and the port wall was not in the way of my camera lens. The figures are not glued into the seats at this stage as I still need to give their uniforms a matte coat. They also still need their badge and sleeve braid decals:
The Galileo 7 - WIP 101 by Steve J, on Flickr
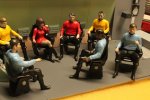
Seats were glued in with 5 minute epoxy. Figures were temporarily positioned in the seats while the glue dried so I could be sure their feet would touch the floor. The seats all rotate so I can pose the crew members in various directions. Funny, in this one, four of the crew members appear to be looking in Mister Boma's general direction probably having an argument. Yeoman Mears appears to be interested more in what McCoy is up to as she is looking almost directly at him. McCoy is looking sidelong to his right roughly in Mears's direction as if to say "Can you believe this..."
The Galileo 7 - WIP 102 by Steve J, on Flickr
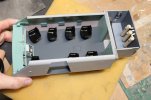
Cabin assembled. I'll need to finish the crew and place them in their seats before attaching the roof:
The Galileo 7 - WIP 104 by Steve J, on Flickr
Next up... installation of the cabin into the hull...

The Galileo 7 - WIP 094 by Steve J, on Flickr
The main control console awash in Solvaset. This took about 4 treatments with gentle tamping after a few hours using a cotton swab and microbrushes then repeating until I finally got the decals to lay down. This last soaking should do it though... I think:

The Galileo 7 - WIP 90 by Steve J, on Flickr
Port and starboard Winglets swapped and re-glued to hull sides with Testors red tube glue and gap filling CA. Nacelles no longer toe inward but face straight forward:

The Galileo 7 - WIP 097 by Steve J, on Flickr
After swapping and re-attaching the winglets I used Vallejo acrylic putty for smaller gaps and AVES Apoxy Sculpt to fill larger ones:

The Galileo 7 - WIP 100 by Steve J, on Flickr
Special attention is paid to the juncture of the winglet trailing edges and the stern of the fuselage. Lots of filing and sanding makes for a smooth transition:

The Galileo 7 - WIP 099 by Steve J, on Flickr
Starboard cabin wall was glued to floor. Decided to take some pics of the crew in their seats while the epoxy cured and the port wall was not in the way of my camera lens. The figures are not glued into the seats at this stage as I still need to give their uniforms a matte coat. They also still need their badge and sleeve braid decals:

The Galileo 7 - WIP 101 by Steve J, on Flickr
Seats were glued in with 5 minute epoxy. Figures were temporarily positioned in the seats while the glue dried so I could be sure their feet would touch the floor. The seats all rotate so I can pose the crew members in various directions. Funny, in this one, four of the crew members appear to be looking in Mister Boma's general direction probably having an argument. Yeoman Mears appears to be interested more in what McCoy is up to as she is looking almost directly at him. McCoy is looking sidelong to his right roughly in Mears's direction as if to say "Can you believe this..."

The Galileo 7 - WIP 102 by Steve J, on Flickr
Cabin assembled. I'll need to finish the crew and place them in their seats before attaching the roof:

The Galileo 7 - WIP 104 by Steve J, on Flickr
Next up... installation of the cabin into the hull...
trekriffic
Well-Known Member
- Joined
- Jan 6, 2012
- Messages
- 984
Here's a video where I discuss how I overcame a rather egregious mistake I made installing the winglets, among other things…
 The Galileo 7 - Video WIP 109 by Steve J, on Flickr
 The Galileo 7 - Video WIP 109 by Steve J, on Flickr
trekriffic
Well-Known Member
- Joined
- Jan 6, 2012
- Messages
- 984
Cabin ready for insertion inside hull. A test fit will be needed after my thickening of the forward wall:
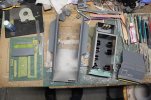
The Galileo 7 - WIP 105 by Steve J, on Flickr
Stern impulse engine unit is made up of three sections. I test fit within the stern of the shuttle so I knew they would fit together when in place. The sections were then glued together and allowed to dry before removing them.
The impulse engine ports and cowling were painted with Krlyon satin black acrylic lacquer and were masked beforehand.
I will install this subassembly into the fuselage after the cabin is installed:
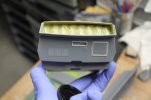
The Galileo 7 - WIP 108 by Steve J, on Flickr
Clear astrogator disc got its decal and the flight console is glued in place in the front of the cabin:
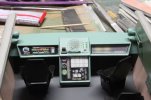
The Galileo 7 - WIP 110 by Steve J, on Flickr
After some tricky maneuvering, I finished installing the passenger cabin into the outer fuselage using Testors tube/brush glue and slow cure CA:
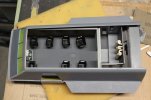
The Galileo 7 - WIP 111 by Steve J, on Flickr
Aft compartment rear wall tanks are snapped into place - no need for glue:
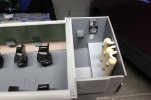
The Galileo 7 - WIP 112 by Steve J, on Flickr
Forward wall is glued to the bow of the upper hull. Some mods were needed to give enough clearance for the cabin to fit inside the outer hull:
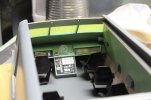
The Galileo 7 - WIP 113 by Steve J, on Flickr
Some minor filing and sanding got the doors to fit snuggly into the hull opening.
Later I filled in some small gaps using the Vaseline and AVES method. I am hoping this is then end of the tweaking process but who knows:
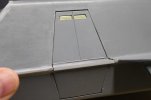
The Galileo 7 - WIP 114 by Steve J, on Flickr
The Galileo after the final priming coat:
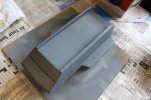
The Galileo 7 - WIP 115 by Steve J, on Flickr
Next up... masking and airbrushing of final coats followed by gloss coats before decaling.

The Galileo 7 - WIP 105 by Steve J, on Flickr
Stern impulse engine unit is made up of three sections. I test fit within the stern of the shuttle so I knew they would fit together when in place. The sections were then glued together and allowed to dry before removing them.
The impulse engine ports and cowling were painted with Krlyon satin black acrylic lacquer and were masked beforehand.
I will install this subassembly into the fuselage after the cabin is installed:

The Galileo 7 - WIP 108 by Steve J, on Flickr
Clear astrogator disc got its decal and the flight console is glued in place in the front of the cabin:

The Galileo 7 - WIP 110 by Steve J, on Flickr
After some tricky maneuvering, I finished installing the passenger cabin into the outer fuselage using Testors tube/brush glue and slow cure CA:

The Galileo 7 - WIP 111 by Steve J, on Flickr
Aft compartment rear wall tanks are snapped into place - no need for glue:

The Galileo 7 - WIP 112 by Steve J, on Flickr
Forward wall is glued to the bow of the upper hull. Some mods were needed to give enough clearance for the cabin to fit inside the outer hull:

The Galileo 7 - WIP 113 by Steve J, on Flickr
Some minor filing and sanding got the doors to fit snuggly into the hull opening.
Later I filled in some small gaps using the Vaseline and AVES method. I am hoping this is then end of the tweaking process but who knows:

The Galileo 7 - WIP 114 by Steve J, on Flickr
The Galileo after the final priming coat:

The Galileo 7 - WIP 115 by Steve J, on Flickr
Next up... masking and airbrushing of final coats followed by gloss coats before decaling.
trekriffic
Well-Known Member
- Joined
- Jan 6, 2012
- Messages
- 984
Time to get caught up ...
Nacelles attached with Testors red tube glue and slow cure CA. Windows still masked:
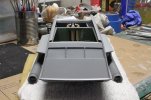
The Galileo 7 - WIP 126 by Steve J, on Flickr
Woodland Scenics sticky tack glue was carefully brushed onto the upper inside lip of the door frame so as not to make a mess on the outer hull. This is enough to hold the upper door piece in place once the lower door piece is up:
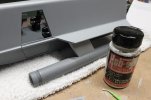
The Galileo 7 - WIP 127 by Steve J, on Flickr
Door top piece held in with sticky tac glue. Bottom panel overlaps to hold bottom of upper "split" panel:
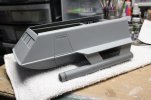
The Galileo 7 - WIP 128 by Steve J, on Flickr
Vanity shot:
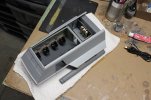
The Galileo 7 - WIP 129 by Steve J, on Flickr
Impulse engine exhaust manifold unmasked:
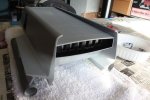
The Galileo 7 - WIP 130 by Steve J, on Flickr
Rear Landing Strut was brush painted with Humbrol brass enamel, which is a challenging paint to work with using a brush. I finally gave up trying to get a brushless coat on the bottom of the pad without using a ton of goopy brass enamel so I decided to airbrush the final coat. First though I brushed a fresh coat of insignia red on the bottom of the pad and let it dry overnight:
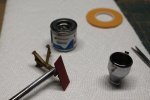
The Galileo 7 - WIP 131 by Steve J, on Flickr
Nacelles attached with Testors red tube glue and slow cure CA. Windows still masked:

The Galileo 7 - WIP 126 by Steve J, on Flickr
Woodland Scenics sticky tack glue was carefully brushed onto the upper inside lip of the door frame so as not to make a mess on the outer hull. This is enough to hold the upper door piece in place once the lower door piece is up:

The Galileo 7 - WIP 127 by Steve J, on Flickr
Door top piece held in with sticky tac glue. Bottom panel overlaps to hold bottom of upper "split" panel:

The Galileo 7 - WIP 128 by Steve J, on Flickr
Vanity shot:

The Galileo 7 - WIP 129 by Steve J, on Flickr
Impulse engine exhaust manifold unmasked:

The Galileo 7 - WIP 130 by Steve J, on Flickr
Rear Landing Strut was brush painted with Humbrol brass enamel, which is a challenging paint to work with using a brush. I finally gave up trying to get a brushless coat on the bottom of the pad without using a ton of goopy brass enamel so I decided to airbrush the final coat. First though I brushed a fresh coat of insignia red on the bottom of the pad and let it dry overnight:

The Galileo 7 - WIP 131 by Steve J, on Flickr
trekriffic
Well-Known Member
- Joined
- Jan 6, 2012
- Messages
- 984
Thanks! Considering what I've put this model thru it's a miracle she looks this good.Looks alright don't it!
Starting the decal process...
Strips of Tamiya tape will aid in the positioning of each decal to match the pictures on the sides of the kit box:
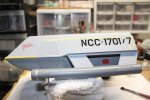
The Galileo 7 - WIP 133 by Steve J, on Flickr
I like a lot of water on these larger decals. I trapped little or no bubbles under the decals so no major worries about silvering:
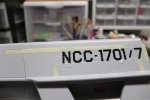
The Galileo 7 - WIP 132 by Steve J, on Flickr
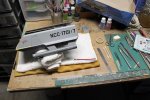
Now that the big shuttle registry decal is on, tamped down and partly dry, I can use it to help me position the red stripe:
The Galileo 7 - WIP 134 by Steve J, on Flickr
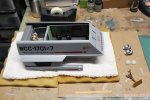
All decals are on. I'll wait a day to spray with a clear gloss sealing coat:
The Galileo 7 - WIP 135 by Steve J, on Flickr
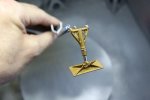
I finished foiling the rear landing strut using a new sheet of this chrome "mirror" foil.
It's got adhesive backing but I still laid it on over a layer of metal foil adhesive so it stays put.
I then gave the strut a shot of Dullcote:
The Galileo 7 - WIP 136 by Steve J, on Flickr
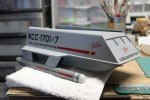
Bussards and endcaps were glued to the nacelles:
The Galileo 7 - WIP 137 by Steve J, on Flickr
Decals were added to the stern.
I like how my flash makes the impulse engine vents light up:
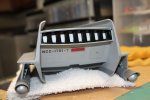
The Galileo 7 - WIP 138 by Steve J, on Flickr
I found a way to slide the roof on without scratching the sides at the rear.
You use your left hand to spread the sides of the aft end of the hull just a little wider, I used my thumb and forefinger.
You only need maybe a half millimeter or less to get enough clearance to slide the roof on with your right hand without scratching the paint:
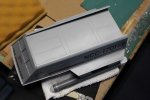
The Galileo 7 - WIP 139 by Steve J, on Flickr
Still need to re-attach the front landing pads to the nacelles and attach the rear strut.
First, I'm going to see if i can substitute metal tubing for the easily bent plastic shafts the front pads attach to.
Eagle-1
Well-Known Member
- Joined
- Jan 16, 2014
- Messages
- 880
Thanks! Considering what I've put this model thru it's a miracle she looks this good.
Understood. Fully! I put 'em through that same wringer myself and just cross my fingers.
trekriffic
Well-Known Member
- Joined
- Jan 6, 2012
- Messages
- 984
So I gave in and decided the spindly landing pad support pegs needed strengthening when they bent at odd angles while I was applying decals.
They didn't break off thankfully but I thought this was not the place to have a weak point.
To that end, I trimmed most of the plastic shaft down to about 3 mm and sheathed the stub in aluminum tubing.
A short length of brass tubing is glued inside the aluminum tube to slide into the mounting hole in the nacelle.
I always wondered at Federation engineers placing a shaft for the landing pad right aft of the bussard but ... I guess it works for Star Trek.
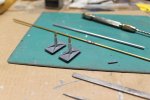
The Galileo 7 - WIP 140 by Steve J, on Flickr
Landing pads and rear landing strut installed.
I used 25 second CA on the forward pads into the nacelle and they cured like iron.
You can literally support the weight of the model just holding onto one pad.
Much improved over the plastic kit shaft alone:
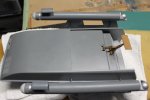
The Galileo 7 - WIP 141 by Steve J, on Flickr
Teaser showing rear landing strut...
I was delighted to see there was enough clearance for the nacelles not to touch the surface.
When I watched the show as a kid, I just assumed the shuttle sat on its balls.
Never knew it had a landing pad at the stern till later:
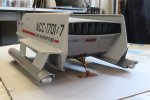
The Galileo 7 - WIP 142 by Steve J, on Flickr
Good look at the forward landing pads whose support shafts run up thru the middle of the warp nacelle.
Really strange engineering to have that built into the nacelle.
Must be a way for starfleet engineering to make it work though:
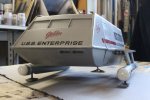
The Galileo 7 - WIP 143 by Steve J, on Flickr
I like the way the engines light up using my flash:
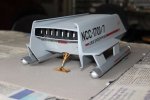
The Galileo 7 - WIP 144 by Steve J, on Flickr
I went ahead and unmasked the forward windows so I could clean out any stubborn bits of dried liquid mask before the next clearcoat to seal the decals.
Glad I did! That stuff is tough. I had to resort to isopropyl alcohol on a microbrush to get some of it out of the frames.
That and my dental picks and an old scrubby brush, though, did the job:
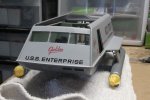
The Galileo 7 - WIP 145 by Steve J, on Flickr
The crew were installed using Museum Wax. So if I ever want to remove a crewman I can do so easily.
The wax comes off with warm water or mineral spirits.
I also masked off the bussards to keep the next clearcoats off them:
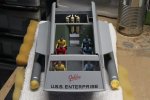
The Galileo 7 - WIP 147 by Steve J, on Flickr
Teaser of the crew in their seats:
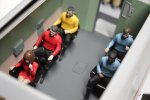
The Galileo 7 - WIP 148 by Steve J, on Flickr
Underside detailed and wiped clean with water before spraying with Testors Glosscote.
Went on smooth as silk with no wind today so little to no risk of my wet gloss catching threads in the air:
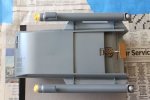
The Galileo 7 - WIP 149 by Steve J, on Flickr
Still wet from her final gloss coat.
Her final coat will be one spray with Testors Dullcote to give the Galileo a satin finish:
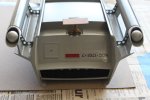
The Galileo 7 - WIP 150 by Steve J, on Flickr
They didn't break off thankfully but I thought this was not the place to have a weak point.
To that end, I trimmed most of the plastic shaft down to about 3 mm and sheathed the stub in aluminum tubing.
A short length of brass tubing is glued inside the aluminum tube to slide into the mounting hole in the nacelle.
I always wondered at Federation engineers placing a shaft for the landing pad right aft of the bussard but ... I guess it works for Star Trek.

The Galileo 7 - WIP 140 by Steve J, on Flickr
Landing pads and rear landing strut installed.
I used 25 second CA on the forward pads into the nacelle and they cured like iron.
You can literally support the weight of the model just holding onto one pad.
Much improved over the plastic kit shaft alone:

The Galileo 7 - WIP 141 by Steve J, on Flickr
Teaser showing rear landing strut...
I was delighted to see there was enough clearance for the nacelles not to touch the surface.
When I watched the show as a kid, I just assumed the shuttle sat on its balls.
Never knew it had a landing pad at the stern till later:

The Galileo 7 - WIP 142 by Steve J, on Flickr
Good look at the forward landing pads whose support shafts run up thru the middle of the warp nacelle.
Really strange engineering to have that built into the nacelle.
Must be a way for starfleet engineering to make it work though:

The Galileo 7 - WIP 143 by Steve J, on Flickr
I like the way the engines light up using my flash:

The Galileo 7 - WIP 144 by Steve J, on Flickr
I went ahead and unmasked the forward windows so I could clean out any stubborn bits of dried liquid mask before the next clearcoat to seal the decals.
Glad I did! That stuff is tough. I had to resort to isopropyl alcohol on a microbrush to get some of it out of the frames.
That and my dental picks and an old scrubby brush, though, did the job:

The Galileo 7 - WIP 145 by Steve J, on Flickr
The crew were installed using Museum Wax. So if I ever want to remove a crewman I can do so easily.
The wax comes off with warm water or mineral spirits.
I also masked off the bussards to keep the next clearcoats off them:

The Galileo 7 - WIP 147 by Steve J, on Flickr
Teaser of the crew in their seats:

The Galileo 7 - WIP 148 by Steve J, on Flickr
Underside detailed and wiped clean with water before spraying with Testors Glosscote.
Went on smooth as silk with no wind today so little to no risk of my wet gloss catching threads in the air:

The Galileo 7 - WIP 149 by Steve J, on Flickr
Still wet from her final gloss coat.
Her final coat will be one spray with Testors Dullcote to give the Galileo a satin finish:

The Galileo 7 - WIP 150 by Steve J, on Flickr
Last edited:
trekriffic
Well-Known Member
- Joined
- Jan 6, 2012
- Messages
- 984
Here are some more teasers of the crew with the roof off leading up to taking the final shots.
The model is finished except for some small touches on Mears that these images revealed need to be done.
She's a little shiny on her face and uniform and my Liquitex matte varnish went bad on me so need to get me some.
I used a cheap Harbour Freight flashlight to take these pics...
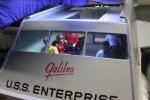
The Galileo 7 - WIP 151 by Steve J, on Flickr
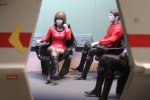
The Galileo 7 - WIP 153 by Steve J, on Flickr
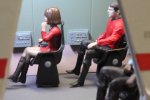
The Galileo 7 - WIP 154 by Steve J, on Flickr
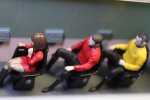
The Galileo 7 - WIP 155 by Steve J, on Flickr
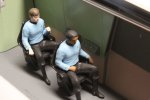
The Galileo 7 - WIP 156 by Steve J, on Flickr
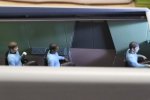
The Galileo 7 - WIP 157 by Steve J, on Flickr
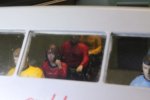
The Galileo 7 - WIP 159 by Steve J, on Flickr
I'll have better ones once I get my photo booth set up with better lighting.
The model is finished except for some small touches on Mears that these images revealed need to be done.
She's a little shiny on her face and uniform and my Liquitex matte varnish went bad on me so need to get me some.
I used a cheap Harbour Freight flashlight to take these pics...

The Galileo 7 - WIP 151 by Steve J, on Flickr

The Galileo 7 - WIP 153 by Steve J, on Flickr

The Galileo 7 - WIP 154 by Steve J, on Flickr

The Galileo 7 - WIP 155 by Steve J, on Flickr

The Galileo 7 - WIP 156 by Steve J, on Flickr

The Galileo 7 - WIP 157 by Steve J, on Flickr

The Galileo 7 - WIP 159 by Steve J, on Flickr
I'll have better ones once I get my photo booth set up with better lighting.
Eagle-1
Well-Known Member
- Joined
- Jan 16, 2014
- Messages
- 880
...I'll have better ones once I get my photo booth set up with better lighting.
Them don't look bad right there.
Rob.
Similar threads
- Replies
- 6
- Views
- 418
- Replies
- 2
- Views
- 92

