BSG Original Series Viper
- Thread starter ohbejuan
- Start date
Pantherman
Well-Known Member
- Joined
- Feb 10, 2022
- Messages
- 4,034
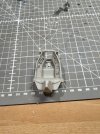
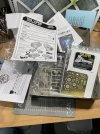
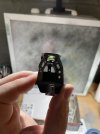
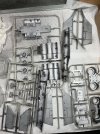
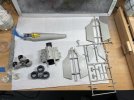
You are a devil for punishment !!Since I was already working on 5 kits, I figured why not start another one?
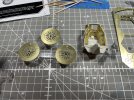
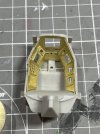
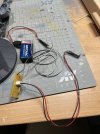
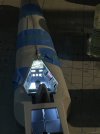
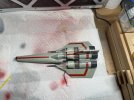
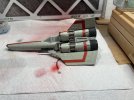
Moebius version of the original BSG Viper. With Photo Etch and lighting. I love photo etch. Super glue is super easy to work with. I did not cut myself once. We have always been at war with Eurasia.
View attachment 101215
View attachment 101216
View attachment 101217
View attachment 101218
Pantherman
Hard agreeCan't go wrong with the original Battlestar Galactica!
Rob.
stevethefish
My name's actually not Steve
- Joined
- Jun 12, 2015
- Messages
- 403
Oh gosh, I think I must have at least 20+ unfinished model projects at this point...
Eagle-1
Well-Known Member
- Joined
- Jan 16, 2014
- Messages
- 1,036
Ok... WAIT???Oh gosh, I think I must have at least 20+ unfinished model projects at this point...
We're suppose to finish 'em?
Wash your mouth out with soap. First I'm hearin' about anything like that.
Rob.
Eagle-1
Well-Known Member
- Joined
- Jan 16, 2014
- Messages
- 1,036
stevethefish
My name's actually not Steve
- Joined
- Jun 12, 2015
- Messages
- 403
Is the aperature of the camera making it seem brighter than it actually does (which so often happens), or do you need to use a resistor?
Great question! Yes the camera makes it seem super bright.Is the aperature of the camera making it seem brighter than it actually does (which so often happens), or do you need to use a resistor?
stevethefish
My name's actually not Steve
- Joined
- Jun 12, 2015
- Messages
- 403
Yeah, I mention that because I had a couple of conversations with Jerry from HDA Modelworx and he said that too often, modelers overlook that detail and the cockpit ends up too bright and not properly to-scale. I made that mistake myself by using a weakened battery to test out a starfighter, before I bought a power supply. Oops!Great question! Yes the camera makes it seem super bright.
I appreciate the advice! This is my first time lighting a model so it helps. I did do a bunch of test fits to get the led placed just right. I was surprised by how much difference the interior paint made. There spots I painted black to reduce reflectivity and parts I painted gloss white to improve it. This would have all been easier if there were not holes for the pilot's feet at the bottom of the cockpit. Next up? Lighting the engines.Yeah, I mention that because I had a couple of conversations with Jerry from HDA Modelworx and he said that too often, modelers overlook that detail and the cockpit ends up too bright and not properly to-scale. I made that mistake myself by using a weakened battery to test out a starfighter, before I bought a power supply. Oops!
Pantherman
Well-Known Member
- Joined
- Feb 10, 2022
- Messages
- 4,034
Looking good. PanthermanOk I painted the stripes. Used Aztec Dummy paint masks. A few things to touch up and then I can seal it. I am not planning on doing too much weathering to keep in the spirit of the original models.
View attachment 102867
View attachment 102868
stevethefish
My name's actually not Steve
- Joined
- Jun 12, 2015
- Messages
- 403
It's been a few years ago, but we had a great conversation on the Starship Modeler forum exploring the pros and cons between the Moebius and Revell's anniversary Viper kits. (Unfortunately, that conversation disappeared along with every other great conversation on that forum. Kilobytes don't grow on trees, you know?) As great as the Moebius kit is, it overlooks some details. One of which is the leg computer on the pilot. I have both kits and while I haven't really touched either one, I plan to recreate the leg computer with using clear plastic putty (Oyumaru) and UV resin. I'll lightblock it, then scrape away the buttons I wish to have lit up. I've channeled out the Revell pilot's right leg with a hole popping up where the leg computer will go. From there I shall insert an SMD and have it attached to the underside of the leg computer, then secure it into place.
Crap... maybe I should just start on my project this summer?
Crap... maybe I should just start on my project this summer?
Last edited:
Similar threads
- Replies
- 8
- Views
- 872

