You are using an out of date browser. It may not display this or other websites correctly.
You should upgrade or use an alternative browser.
You should upgrade or use an alternative browser.
Airfix 1/24 typhoon rebuild for a friend
- Thread starter Pantherman
- Start date
Pantherman
Well-Known Member
- Joined
- Feb 10, 2022
- Messages
- 3,312
Sounds like a plan, thanks.You'll need to go find one at a museum or something and map out the canopy , sculpt out a casting buck of it and vacuum form a new one .

Pantherman
Pantherman
Well-Known Member
- Joined
- Feb 10, 2022
- Messages
- 3,312
Yeah, stupid mistake to make and now I'm paying for it. Although the challenge has made the restoration more interesting for me. PanthermanHow did you lose it ?
You had it soaking in that dragon's saliva too ?
Pantherman
Well-Known Member
- Joined
- Feb 10, 2022
- Messages
- 3,312
Yet another great suggestion, thanks. PanthermanIf you can borrow one you could fill it with plaster and then use that to vacuum form a replacement .
Pantherman
Well-Known Member
- Joined
- Feb 10, 2022
- Messages
- 3,312
At this rate I will have it finished before I start !!!! PanthermanYet another great suggestion, thanks. Pantherman
GaryG64
Well-Known Member
- Joined
- Sep 8, 2022
- Messages
- 2,285
Ohhh! That's NICE!The part's have arrived so finally got the flaps sorted out.
I think the guns next possibly.
Pantherman
View attachment 109206
Pantherman
Well-Known Member
- Joined
- Feb 10, 2022
- Messages
- 3,312
So all the flaps sorted. Guns next. I removed the two gun supports and have made up 4 new longer one's with a metal gun barrel to be fitted. Think it will look better when sprayed up.The part's have arrived so finally got the flaps sorted out.
I think the guns next possibly.
Pantherman
View attachment 109206
Have decided to leave the engine as it was pretty much ok. I will clean it a bit, prime it and eventually hand paint the engine and pipes. Pantherman
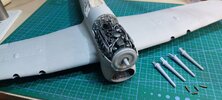
Pantherman
Well-Known Member
- Joined
- Feb 10, 2022
- Messages
- 3,312
Guns done. Trying to tidy up the exhaust, think im going to remove the existing as some of them fell out during the cleaning and I put them in the melting pot so gone forever !!So all the flaps sorted. Guns next. I removed the two gun supports and have made up 4 new longer one's with a metal gun barrel to be fitted. Think it will look better when sprayed up.
Have decided to leave the engine as it was pretty much ok. I will clean it a bit, prime it and eventually hand paint the engine and pipes. Pantherman
View attachment 109247
Think I will glue the exhaust covers and leave the top engine cover loose so I can play with the engine a little. Pantherman
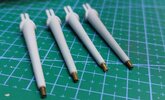
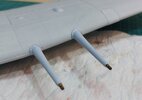
Pantherman
Well-Known Member
- Joined
- Feb 10, 2022
- Messages
- 3,312
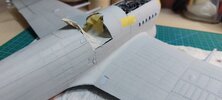
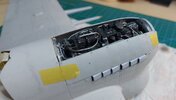
Got the engine done. I used blutac to temporarily stick the engine cowling down ready for some top coat.Guns done. Trying to tidy up the exhaust, think im going to remove the existing as some of them fell out during the cleaning and I put them in the melting pot so gone forever !!
Think I will glue the exhaust covers and leave the top engine cover loose so I can play with the engine a little. Pantherman
View attachment 109261View attachment 109262View attachment 109263View attachment 109264
Had a go at improving the landing gear wells while I was at it.
Ready for the start of the top coats now I think. I'm leaving the undercarriage until later on so nothing gets broken.
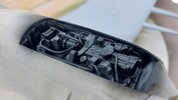
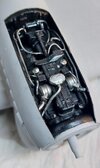
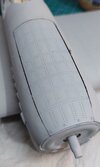
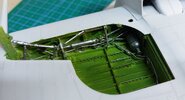
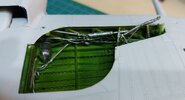
Pantherman
Well-Known Member
- Joined
- Feb 10, 2022
- Messages
- 3,312
Thanks. There was just way too much paint on it previously which obscured the great details.That is looking much better than it did.
I'm doing the underside top coat and stripes today. Pantherman
Pantherman
Well-Known Member
- Joined
- Feb 10, 2022
- Messages
- 3,312
So the underside is painted and the stripes are done. Have to say I'm really pleased with how it turned out.Thanks. There was just way too much paint on it previously which obscured the great details.
I'm doing the underside top coat and stripes today. Pantherman
Forgive the Ps, couldn't help myself.
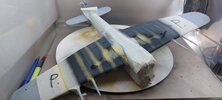
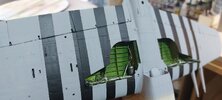
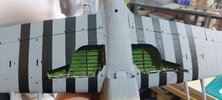
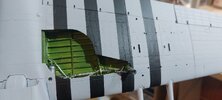
Need a little help now from you all. I want to really show the rivet details but not too sure how to go about it. Thought I would gloss coat the paintwork then try a watery black wash over the lot, then rub off the access with a foam cloth. What do you think??
Pantherman
Pantherman
Well-Known Member
- Joined
- Feb 10, 2022
- Messages
- 3,312
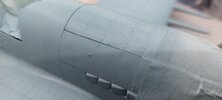
Managed to get the beast masked up again and sprayed the top coats on the upper wing's and fuselage. Bonus. PanthermanSo the underside is painted and the stripes are done. Have to say I'm really pleased with how it turned out.
Forgive the Ps, couldn't help myself. View attachment 109434View attachment 109435View attachment 109436View attachment 109437
Need a little help now from you all. I want to really show the rivet details but not too sure how to go about it. Thought I would gloss coat the paintwork then try a watery black wash over the lot, then rub off the access with a foam cloth. What do you think??
Pantherman
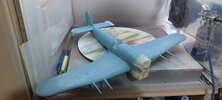
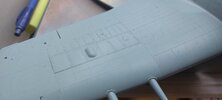
Pantherman
Well-Known Member
- Joined
- Feb 10, 2022
- Messages
- 3,312
Base coat of gray/green done so just the top coat of thinned olive green to finish it off. PanthermanManaged to get the beast masked up again and sprayed the top coats on the upper wing's and fuselage. Bonus. Pantherman View attachment 109442View attachment 109443View attachment 109444
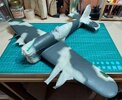
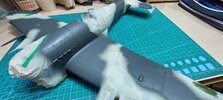
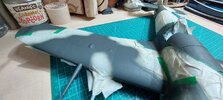
Pantherman
Well-Known Member
- Joined
- Feb 10, 2022
- Messages
- 3,312
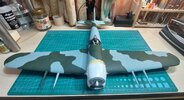
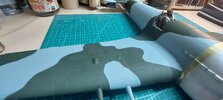
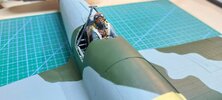
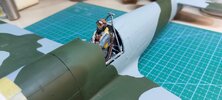
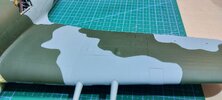
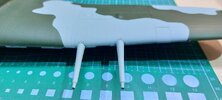
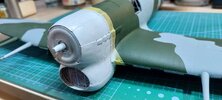
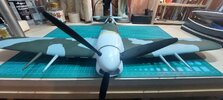
Little bit more done. Camo finished apart from a few minor touch in's. Front of the engine done although I hate doing white. Prop almost done, just got the tips to paint. Pilot is getting acquainted with his upgrade !!!!Base coat of gray/green done so just the top coat of thinned olive green to finish it off. Pantherman View attachment 109707View attachment 109708View attachment 109709
Think I just need to touch in some of the cockpit as I haven't done anything in there yet. Pantherman
Similar threads
- Replies
- 23
- Views
- 600
