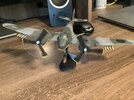
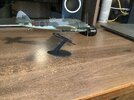
WWII Pacific Navy aircraft in 1/72

blakeh1

Well-Known Member
Joined
Oct 26, 2011
Messages
925
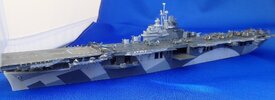
Having nearly completed the Trumpeter 1/700 USS Yorktown it kind of stoked my desire for kits of the aircraft
(I still have more aircraft and some touch up paint for some of the added guns/antenna and flight deck)

PB291814-2.JPGPB291802.JPG
PB291817-2.JPG

At any rate, I searched for proper kits of the various aircraft used, and so I have these so far in 1/72

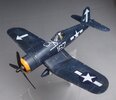
Tamiya F4U-Corsair
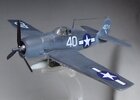
Academy F6-3/5
Academy TBF-1
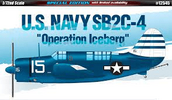
two Academy SB2C-4
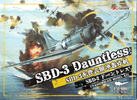
Flyhawk 1/72 SBD-3 Dauntless

on a side note, I find it disappointing that none of these kits except the TBF one came with a pilot, and even then the TBF only had the pilot, no turret gunner or even a third man

I prefer doing the aircraft in flight instead of landed. I figured I would save the landed/parked ones for larger scales like 1/48 or even 1/32 as details are better and you get options for folded wings etc...

I did find an stl of a pilot and have printed out a bunch

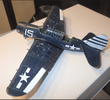
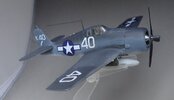
Up first, I built the Academy F6 as the 3 version using the USS Yorktown markings (you have a choice of building as a 3 or 5, but since the Yorktown scheme was for the 3 I went with it)

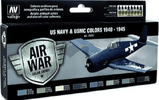
I used Vallejo WWII Navy paint set for the various colors
PB221774-1.JPGPB221777-2.JPG

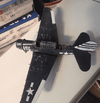
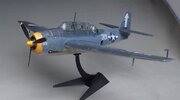
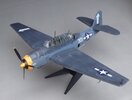
following that is the TBF-1. There were some fit issues, especially with the canopy and fuselage, and the details aren't great, but it is what it is
On the plus side, it was the only kit with a stand and pilot and option to build in flight

I used the USS Bunker Hill scheme as I liked the distinctive yellow cowling that they had, plus that was the only option for the kits decals
I still need to add the antenna wires though
PB221785-2.JPG
PB221786-2.JPG
 
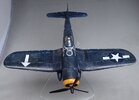
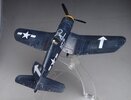
Next is the Tamiya F4U Corsair. I did this as the USS Bunker Hill markings (the other option was for a Marines one)
since I had the TBF in those markings I figured he needed some fighter cover

The Tamiya kit is far superior to the old Academy ones in both detail and engineering, but still lacked and easy way to build in flight without modifying the landing bay doors. Also the decals in the Academy kit were actually better. The Tamiya ones are a bit thick and also the national insignias were out of register and you can see some white around the edges

I still have to add the rocket pods though and try to fade/weather the decals a bit better

I also want to add "blur" props for all the kits, but have to figure out a good source for those or way of making my own

PB221780-1.JPG
PB221781-1.JPG
PB221784.JPG
 
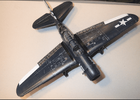
On the bench still are the Academy Helldivers and the Flyhawk Dauntless

1701291415524.png

1701291365799.png

both those kits are incredible detail wise, even better than the Tamiya Corsair

both kits also have photo-etch for the dive brakes as well as the ability to pose the canopies in their open states and the Flyhawk one even has masks for the canopies!

Wish more companies would include paint masks, even if it is a few extra dollars tacked on
 
Nice little builds! They'll make a cool display with the Fighting Lady.

By the way, the Hellcat is the F6F. In the Navy's old system, that was F for fighter, 6 for the sixth fighter from the manufacturer, F for Grumman. A dash and number after that meant the mark or model number of that design, eg, "-3" would be the 3rd mark of a particular aircraft.
Why they did it that way, only those long-deceased BuAer officers know.

ah, your right, I forgot the "F", thanks!
 
I'm curious to see the Flyhawk Dauntless when you've finished it. I've never seen that particular kit before.
 
Next is the Tamiya F4U Corsair. I did this as the USS Bunker Hill markings (the other option was for a Marines one)
since I had the TBF in those markings I figured he needed some fighter cover

The Tamiya kit is far superior to the old Academy ones in both detail and engineering, but still lacked and easy way to build in flight without modifying the landing bay doors. Also the decals in the Academy kit were actually better. The Tamiya ones are a bit thick and also the national insignias were out of register and you can see some white around the edges

I still have to add the rocket pods though and try to fade/weather the decals a bit better

I also want to add "blur" props for all the kits, but have to figure out a good source for those or way of making my own

View attachment 109596
View attachment 109597
View attachment 109599
What color did you use for the main body? the kit says AS-8. but I have been trying to find a good acrylic alternative.
 
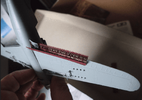
Back at it with the Academy Helldiver. Unlike the previous posts, I will try to show more of the build process in case anyone is interested in picking up these kits

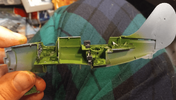
The interior is nicely detailed for a 1/72 kit, on the level of some of the better Tamiya stuff

1712354747451.png

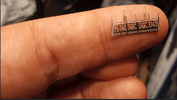
The photoetch is including in the kit (at least the Operation Iceberg special edition)

Although the dive brakes were quite complicated to assemble considering the size of some of the parts. I had to wind up scraping a few details, but hopefully not too noticeable

1712354277356.png

this piece in particular which you have to glue on to the edge was very frustrating to work with, but this wasn't even the smallest or fragile bit

I learned I need a better set of snips for small stuff like this as trying to cut out with a #11 blade just does not cut it, literally

1712354432854.png


in the end I am glad I made the attempt. Not perfect, but looks pretty cool nonetheless

1712355166170.png

loosely dry fitted so ignore the gap, that will be gone once I do a bit of fine sanding to fit better and then glue in place

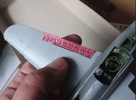
You have to cut off the plastic molded dive brakes from the upper and lower wings halves if you go the with the photo-etch

1712354917762.png

1712353837653.png
 
Finally back at it

A lot more work done on the first Helldiver, but still a fair bit to do as well, namely the engines, but getting there
This one is decaled with the USS Randolph markings, and a rarity for me, gears down

1719346057611.png
1719346181062.png
1719346253697.png

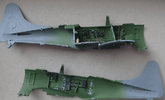
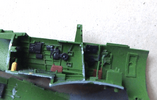
Also started on the Dauntless. This is a really detailed kit for 1/72. Interior wise on is on par with kits like the 1/72 Tamiya Zero

I'm not spending to much time stressing about painting though as most of it won't be seen since I am planning on adding a pilot and gunner but will do a little touch up before gluing the halves together

1719346397297.png
1719346593260.png

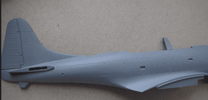
and the fine panel details on the fuselage
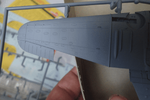
and wings. Like the Helldiver, it also comes with Photo-etch for the dive brakes, but as a bonus, it includes canopy masks. Something more companies should consider. I'd gladly pay a bit extra for kits that include things like that

1719346697554.png

1719346765750.png
 
Finally back at it

A lot more work done on the first Helldiver, but still a fair bit to do as well, namely the engines, but getting there
This one is decaled with the USS Randolph markings, and a rarity for me, gears down

View attachment 118937
View attachment 118938
View attachment 118939

Also started on the Dauntless. This is a really detailed kit for 1/72. Interior wise on is on par with kits like the 1/72 Tamiya Zero

I'm not spending to much time stressing about painting though as most of it won't be seen since I am planning on adding a pilot and gunner but will do a little touch up before gluing the halves together

View attachment 118940
View attachment 118941

and the fine panel details on the fuselage
and wings. Like the Helldiver, it also comes with Photo-etch for the dive brakes, but as a bonus, it includes canopy masks. Something more companies should consider. I'd gladly pay a bit extra for kits that include things like that

View attachment 118942

View attachment 118943
Nice work. Pantherman
 
Great builds. I made my own prop blurs using clear plastic sheets they use for overhead projectors (remember those in high school? LOL!)
Easy to make. Get a bladed compass, measure center to tip of blade then cut. Once that's done, mark with a marker where each blade is for 3 or 4 bladed propeller.

I used simple flat black paint using a artist fan shape brush by lightly brush your own prop blurs. Practice on a scrap clear sheet to get you desired effect. You can do it for yellow tips too. I'll post mine later.
Thanks for the tip!
 

Latest posts

Back
Top