You are using an out of date browser. It may not display this or other websites correctly.
You should upgrade or use an alternative browser.
You should upgrade or use an alternative browser.
F-35B
- Thread starter GCB
- Start date
I just finished a 1/72 Tamiya F35A Lightning II. It is a new release. The tooling on that kit is really amazing. It went together really easily. I will agree that 1/72 is a tough scale sometimes. Way too easy to lose parts via the tweezers catapult. But I like the finished size. Mostly because I do not a lot of room for displaying. The bay doors are molded in the fuselage closed. There were some really small parts. The landing gear was a breeze. The worse part of this build are the decals. Of course they are small also. The biggest problem was the ghosted grey ones, which you couldn't really see on the paper. Once you got the decal on the plane, then you could see what it actually was. But all in all, a great looking model that fit together amazingly.
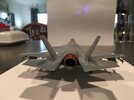
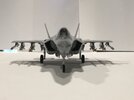
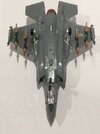
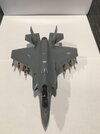


Thank you! I lost one of the pitot tubes on the nose of the F35. I was getting ready to put it in place and then heard the dreaded "ping" and never found it. Had to make one out of scrap sprue.Nice job!
Did not try yet 1/72 scale, but I imagine how tricky it is for the small parts.. and I like your "tweezers catapult"! So true...
That's actually pretty ironic. It seems like every time something like that happens, I find another way to do the same without losing the piece. I plan to build Academy's 1/72 F15E Eagle Strike Eagle as soon as I finish my current build(1/12 Tamiya Yamaha YZF R1). For any really small parts on the F15, I plan to use an old pencil or something similar with reverse wrapped painter's tape. I will stick the part to that until it is in place or damn close to it. I use old plastic straws wrapped with reverse wrapped tape to hold small parts for painting. Works great. Build and learn. It is fun to learn something everyday at my age. That would be 70. Damn I'm old. LOLI did the exact same to the pitot tube of a 1/72 P40 a while back. Same outcome, stretched sprue made a new one...lol
Pantherman
Well-Known Member
- Joined
- Feb 10, 2022
- Messages
- 3,312
Never too old to create great model builds. PanthermanThat's actually pretty ironic. It seems like every time something like that happens, I find another way to do the same without losing the piece. I plan to build Academy's 1/72 F15E Eagle Strike Eagle as soon as I finish my current build(1/12 Tamiya Yamaha YZF R1). For any really small parts on the F15, I plan to use an old pencil or something similar with reverse wrapped painter's tape. I will stick the part to that until it is in place or damn close to it. I use old plastic straws wrapped with reverse wrapped tape to hold small parts for painting. Works great. Build and learn. It is fun to learn something everyday at my age. That would be 70. Damn I'm old. LOL
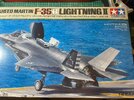
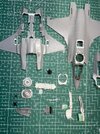
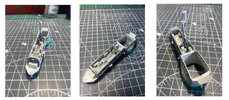
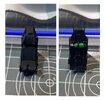
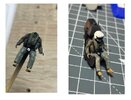
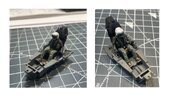
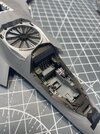
And working on cockpit and pilot. I usually do not put pilots into planes, however, planning to display the F-35 during a vertical landing, therefore needed the pilot.. Not easy to paint in so small scale. And wanted to check that the joysticks were at the right position. The decals in the cockpit are those provided with the kit; not as detailed as the 3D aftermarket ones, but good enough when canopy will be in place


Excellent job! This is a kit I'm interested in...just gotta get through a couple models first.I just finished a 1/72 Tamiya F35A Lightning II. It is a new release. The tooling on that kit is really amazing. It went together really easily. I will agree that 1/72 is a tough scale sometimes. Way too easy to lose parts via the tweezers catapult. But I like the finished size. Mostly because I do not a lot of room for displaying. The bay doors are molded in the fuselage closed. There were some really small parts. The landing gear was a breeze. The worse part of this build are the decals. Of course they are small also. The biggest problem was the ghosted grey ones, which you couldn't really see on the paper. Once you got the decal on the plane, then you could see what it actually was. But all in all, a great looking model that fit together amazingly.
View attachment 113462
View attachment 113463
View attachment 113464
View attachment 113465
The F-35 coms with plenty options such as hatches/doors closed or not, etc.. and for the painting I was planning to glue these pieces temporarily and then remove and install the opened ones . Any recommendation on what type of "temporary" glue to use? One of those for clear parts?? Liquid mask???
Pantherman
Well-Known Member
- Joined
- Feb 10, 2022
- Messages
- 3,312
Couple of dabs of PVA (kids glue) usually works for me. PanthermanThe F-35 coms with plenty options such as hatches/doors closed or not, etc.. and for the painting I was planning to glue these pieces temporarily and then remove and install the opened ones . Any recommendation on what type of "temporary" glue to use? One of those for clear parts?? Liquid mask???
urumomo
Well-Known Member
- Joined
- Mar 18, 2013
- Messages
- 6,820
Maybe of interest ,
https://www.scalemodeladdict.com/threads/canopy-glue.14390/
https://www.scalemodeladdict.com/threads/canopy-glue.14390/

