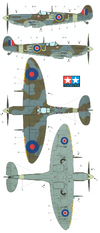
1/48 Spitfire Vb

Edbert

Well-Known Member
Joined
May 16, 2024
Messages
502
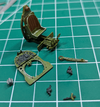
Next kit in line, as I take a time-out on the Corsair. Less than 25% as many parts to make the cockpit, my custom mixed interior green is too much USAAF, but I'm not part of that crew that cares.
1718151409363.png

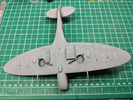
I was a bit amazed at how few parts were in this kit, after just working on a WWII plane with 330+ parts jaded me. But these components fit together without putty, like a dream.
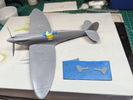
1718151381856.png

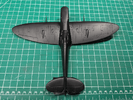
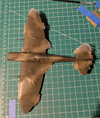
Here it is with a layer of 1500 surfacer. Those two ridges, just inboards of the Hispanos, they are staying.
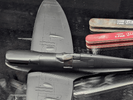
1718151447805.png

I found several places that needed attention. You can see the two shiny blobs by the cannons. I trimmed the lower wings after cutting them from the sprue, did not realize the blobs I trimmed off were the underside of the sponsons, or whatever they are called. So I had to fill those gaps and I'm hating putty, either CA or sprue-glue.
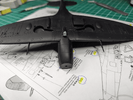
1718151489848.png

Was able to get the two dimples out with CA as a filler.
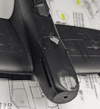
1718151530268.png

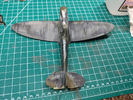
Pre-shading, either my Testors Model Master enamel was tooo thick or I had too much pressure. But since this is undercoating, I didn't worry.
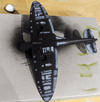
1718151570643.png

I'm not happy withy the feul cap sitting wonky, but too late, and I did get the dimples out.
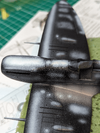
1718151599180.png
 
I am struggling a bit with the new paints, not just the new glues. "New" is a relative term, and the last ~30 years counts for my old ass! I grew up on Testors with the square bottle for $0.15 each. Advanced in the 1990s to "Model Masters" enamels in the 1990s. But now that I feel the muse and want to build again I find out Testors no longer exists and almost everyone uses Acrylics now.

In fact, I literally learned today (via a podcast) that I should not use distilled water to dilute Tamiya acrylic paint. WTAF!?

Anyway. I kinda got the hang of using a 1500 primer with enamel silver for chipping and enamel white highlights since the Acrylic topcoat will not molest either. I need a LOT more experience of course, but I think I understand the basics. I found out I need some XF-81 for "RAF Green", I checked online and my only local hobby shop (a national chain) had it in-stock, so I decided to drive into Austin and buy that paint. I knew I would look at kits, but did not intend to buy a kit, just look.

Anyway, the shop did not in fact have any XF-81 in stock. The owner (?) guided me to "Mr Hobby" brand, and I asked is their acrylic compatible with the Tamiya acrylic and they said "of course it is", so I paid 100% over average price and bought it.
 
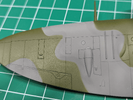
So to add to the pics above, this is the underside sprayed with a thin coat (to allow pre-shading through), I custom mixed the color using my Mk.II eyeball. It looked good being sprayed.

1718155483061.png

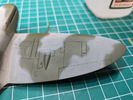
So I then did the gray on the upper surfaces, remembering to put dark colors on top of light ones instead of the other way around. When it came time for the darker green I put some sticky-tack on the edges, hard to have the soft/hard edge used by the RAF with other means, right?


More than one bad thing happened.
1.) Worst (by far) is that I mixed the Mr Color acrylic with some distilled water and struggled immediately getting my airbrush to spray. It took me a while to figure out that the owner of the local hobby shop was a fugging idiot and Mr. Color is not acrylic! I was able to correct in-progress, and continue (without pictures as I was stressing) to get the green down. It turned out okay, considering.
2.) When I removed the mask with sticky-tack, I found it was too adhesive or sticky. Lines where it was used are CLEASRLY visible!

1718155878408.png

So I was considering the need to re-apply the gray now. Until I saw that the difference between to top gray and the underside gray was different but BARELY. Starting to be mad at Tamiya for not having the correct color in the jars, but my underside was only slightly lighter than the upper.

I put the kit aside for a bit to think about solutions.
 
Mr Color IS acrylic

it's a solvent based acrylic .
I'm sooo confused.

I can say for certain though, do not add distilled water to Mr. Color as a thinner. It will fook your airbrush for at least an hour.
 
So I've been staring at this for a few weeks now, the top gray and the underside grays were WAY too close to each other. I decided to try and save it but redoing the upper gray in a different color right from the bottle. It came out much lighter than the cap and lable indicated, "XF-54 Dark Sea Gray" should have been the correct color, but it was even lighter than what I showed above. So now I had the contrasting grays right, but juxtaposed with the light on top and dark underneath.

That dog won't hunt!

1718225180367.png

Only option at this point was to nuke it.

1718225265237.png

I thought that cotton swaps with isopropyl would pull the Tamiya gray right off. IT DID! The Mr. Color green was 2 to 4 times more resistant to the solvent but it was affected enough that I had to take it off too. Due to the vigor needed to remove that acrylic that is not water soluble also impacted my enamel highlights and primer/finisher.

The worst part was that my attempt to protect the underside were in vain considering the carnage I was causing up top.
1718225528833.png

That is probably for the best since the underside gray is too dark. So I stipped it too! I was concerned there'd be marks left on the surface when I was at this stage.

1718225621539.png

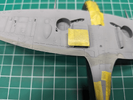
But two think coats of surfacer seem to have laid smooth after all. So now I get to start over. I do not think I'll use sticky-tack again. Considering a frisket mask, maybe even paper. Not sure how to get slightly blurred edges in 1/48 scale.

1718225743000.png

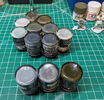
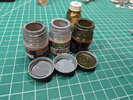
I am seriously considering using my enamels too, I can control the color shifts better, and my selection of colors is far greater. Thinking of these three...
1718225991333.png

Bad glare on the glass there, try this...
1718226042151.png
1718232223565.png
I'm gonna hold of until tomorrow and think about it more, making decisions in haste has bitten me enough.
 
Last edited:
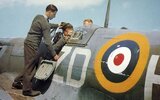
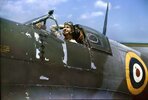
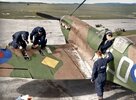
Hey I hope these pics help put you at ease, because as you can see the RAF, in various schemes, utilized very hard and semi-hard demarcation lines. So if you can't nail the blurred lines, hard edge is perfectly fine and probable for your Spit.

904a6782df529e1f71a381b7ccd293ec.jpg

e28f11db6cf6c273a24cbbeba3118822.jpg

ab310fbbea3fe83322126ce77244e245.jpg

41e326b00c4817c9d25c567e8e9e8ce9.jpg

81ebd135f4f339f7161535d669033893.jpg
 
I am struggling a bit with the new paints, not just the new glues. "New" is a relative term, and the last ~30 years counts for my old ass! I grew up on Testors with the square bottle for $0.15 each. Advanced in the 1990s to "Model Masters" enamels in the 1990s. But now that I feel the muse and want to build again I find out Testors no longer exists and almost everyone uses Acrylics now.

In fact, I literally learned today (via a podcast) that I should not use distilled water to dilute Tamiya acrylic paint. WTAF!?

Anyway. I kinda got the hang of using a 1500 primer with enamel silver for chipping and enamel white highlights since the Acrylic topcoat will not molest either. I need a LOT more experience of course, but I think I understand the basics. I found out I need some XF-81 for "RAF Green", I checked online and my only local hobby shop (a national chain) had it in-stock, so I decided to drive into Austin and buy that paint. I knew I would look at kits, but did not intend to buy a kit, just look.

Anyway, the shop did not in fact have any XF-81 in stock. The owner (?) guided me to "Mr Hobby" brand, and I asked is their acrylic compatible with the Tamiya acrylic and they said "of course it is", so I paid 100% over average price and bought it.
If you need test subjects, try a Hobby Lobby they have 40% off every other day , I get some an try out some new things, if it works good , if not no big lose. I'm 74yrs ,cheap, an just getting back into, if you can find a model club check it out good poeple, have fun.
 
You can get those Tamiya RAF colors at Hobbylinc.com I just got some delivered a couple weeks ago. They are only in the smaller bottles though.
 
If you want a soft edge camo pattern, you can lightly draw the camo pattern on the primered model with a pencil then spray the pattern without masking. You just have to thin the tamiya paints 60 percent thinner to 40 percent paint and spray at 10 to 12 psi. Then you don't have to paint the entire top with the light color first. Then spray the light color camo areas and fill in the blanks with the dark color. I've done this on two builds so far and have been happy with the outcome. You may stray and not quite get the pattern perfect but it works.
 
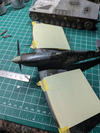
Here's what I settled for to try and rescue this build...

Using the three Testors MM paints which were not exact but close enough, used some frisket paper.
1719096160752.png

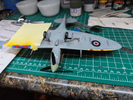
I can live with the results, I kinda want to finish this up and call it done. So I move on to decals before a clear coat and washing. I know Tamiya gets a lot of hate about their decals, too think they say. This kit came with white circles to go UNDER the colored RAF roundels. Why did thay do that, is one layer too easy to hide?

1719096374381.png

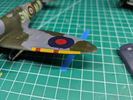
Le sigh, I don't mind the aggravation of fiddly bits nearly as much as my mistakes, very much doubt I can match the blue/red to cover that.
 
Here's what I settled for to try and rescue this build...

Using the three Testors MM paints which were not exact but close enough, used some frisket paper.
View attachment 118888

I can live with the results, I kinda want to finish this up and call it done. So I move on to decals before a clear coat and washing. I know Tamiya gets a lot of hate about their decals, too think they say. This kit came with white circles to go UNDER the colored RAF roundels. Why did thay do that, is one layer too easy to hide?

View attachment 118890

Le sigh, I don't mind the aggravation of fiddly bits nearly as much as my mistakes, very much doubt I can match the blue/red to cover that.
I pretty sure that the white is very slightly bigger than the blue ones which gives it a nice white edge. Pantherman
 
Opinions on the yellow/red leading edge markings by the MGs?

Tamiya provided decals, I can assume they are a PITA, do ya'll just paint those on? If 1/32 I'd already be going that direction, but at 1/48 I'm skeered.

What do you do?
 
Opinions on the yellow/red leading edge markings by the MGs?

Tamiya provided decals, I can assume they are a PITA, do ya'll just paint those on? If 1/32 I'd already be going that direction, but at 1/48 I'm skeered.

What do you do?
I do paint them, it will work out if you just mask carefully and mix that paint to a match to your eye, then call it a day.
 
Well, I decided that having nine kits "active" at one time was too much. I've put aside a few of them that were under construction, including some that were 60-80% done in order to try and finish the four that were 90+% done. That would be this Spitfire, but also the Mig-21, F-16 and F4U-1A.

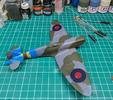
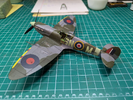
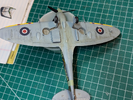
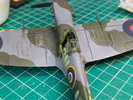
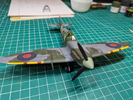
So here she is, lower quality outcome than I had hoped for, but considering the frustrations she put me through, I'm happy to call this one done.

1726173776473.png

1726173763381.png

1726173791655.png

1726173815039.png

Some corners were cut and there are many flaws, the biggest issue is the decals (ripping and silvering) and I think this kit might be many years old from some warehouse without temp controls.

I should not blame the kit though, it is almost always the modeler's fault, I'll take it and move on.
 
Last edited:
WOW! that put up a fight didn't it - good end result though - that looks great!
 

Latest posts

Back
Top