MystRacing
Active Member
- Joined
- Nov 7, 2023
- Messages
- 56
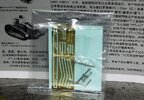
I'm continuing my WW1 Armor kick I've been on and decided to post this next build. I kind of speed built the other 2 french tanks I did. The St. Chamond and Schnieder. When I signed up for this site I mentioned wanting to get better with PE and this is one of the kits I bought with that in mind. I have the Meng FT-17 Cast Turret full interior kit. I also bought an Eduard PE set with a lot of little details and the rear skid assembly, a Voyager Model set of PE Tracks, and I had an Aber barrel. I ordered some figures of French soldiers doing maintenance and some other resin items to make a small diorama of the tank being maintained. Here are all the parts.
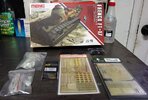
I don't normally buy kits with full interiors because of the obvious issue of not being able to see much of the interior without building it so you can take it apart. However, one really cool thing about this tank is it's so small about 80% of the interior can be seen when the hatches are open without disassembling the tank.
The basic kit is pretty typical of a modern plastic kit so I'm not going to go into a ton of detail here. It comes with 4 different paint schemes, the one not shown is a german grey captured version. The FT-17 was the first tank in a typical modern configuration and used during and shortly after WW1 but 27 different countries. Versions of it were even built in different countries like the US and Russia. About any color scheme you could think up is out there.
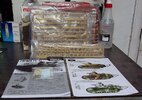
It also comes with a little bit of its own PE and some metal springs and rods for the working suspension. I've alway thought something like this was a little toyish and king of silly on a static model, but each to there own I guess.
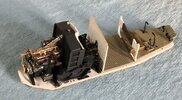
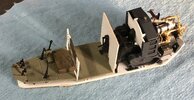
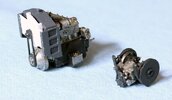
The first three steps of the instructions have you build the transmission and engine. The two items are made up of 45 different parts, but I have to say I was really impressed with how well it all goes together. Given the number of little parts I have to give meng an A++ for the layout of locating pins etc, it was remarkably easy to assemble. I painted it in assemblies as I went along like is typical for a kit with an interior. Here's the work after the first day. I spent about 6 hours getting to this point. After some more studying of the instructions, the transmission and the fuel tank will be completely hidden. The rest of the interior stuff should be visible.
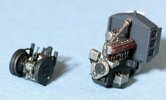
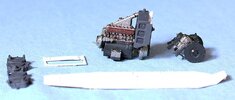
Then last night I spent about an hour and a half and added the final linkages and lines to the engine. I took some liberties with the colors to make it look the way I wanted it too. I made some wires fron the magneto to the spark plugs from magnet wire. It's amazing the magnet wires look oversized, but I'm happy with it.
As all of you know who post on here, it looks better i person. There's nothing better than a good macro photo to show every flaw.
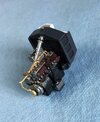
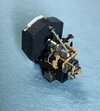
And finally, here is the view of the motor that I expect will be visible when it's in the tank.
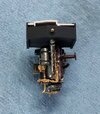

I don't normally buy kits with full interiors because of the obvious issue of not being able to see much of the interior without building it so you can take it apart. However, one really cool thing about this tank is it's so small about 80% of the interior can be seen when the hatches are open without disassembling the tank.
The basic kit is pretty typical of a modern plastic kit so I'm not going to go into a ton of detail here. It comes with 4 different paint schemes, the one not shown is a german grey captured version. The FT-17 was the first tank in a typical modern configuration and used during and shortly after WW1 but 27 different countries. Versions of it were even built in different countries like the US and Russia. About any color scheme you could think up is out there.

It also comes with a little bit of its own PE and some metal springs and rods for the working suspension. I've alway thought something like this was a little toyish and king of silly on a static model, but each to there own I guess.

The first three steps of the instructions have you build the transmission and engine. The two items are made up of 45 different parts, but I have to say I was really impressed with how well it all goes together. Given the number of little parts I have to give meng an A++ for the layout of locating pins etc, it was remarkably easy to assemble. I painted it in assemblies as I went along like is typical for a kit with an interior. Here's the work after the first day. I spent about 6 hours getting to this point. After some more studying of the instructions, the transmission and the fuel tank will be completely hidden. The rest of the interior stuff should be visible.


Then last night I spent about an hour and a half and added the final linkages and lines to the engine. I took some liberties with the colors to make it look the way I wanted it too. I made some wires fron the magneto to the spark plugs from magnet wire. It's amazing the magnet wires look oversized, but I'm happy with it.
As all of you know who post on here, it looks better i person. There's nothing better than a good macro photo to show every flaw.


And finally, here is the view of the motor that I expect will be visible when it's in the tank.


